Creative chaos doesn’t have to mean messy mayhem. A well-organized craft room transforms frustration into flow, letting you focus on making instead of hunting for supplies. Whether you’re working with a spare bedroom, basement corner, or shared dining table, smart storage solutions help you maximize every inch. The best part? You don’t need a fortune to create a functional workspace. Simple shelving, repurposed containers, and clever vertical storage can turn any area into a creative haven. Ready to reclaim your creative space and say goodbye to clutter? These 30 organization systems prove that tidy crafting is totally achievable.
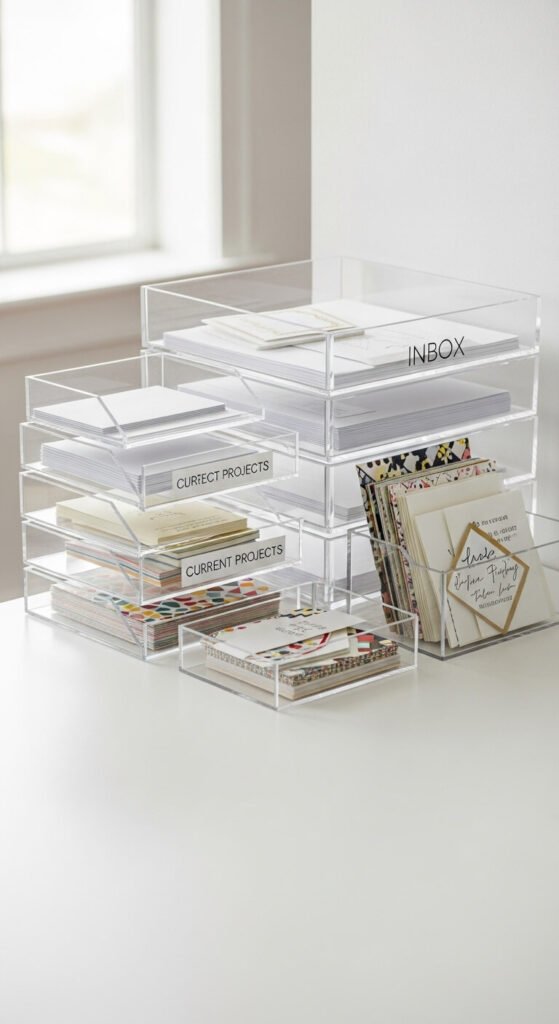
Clear Stackable Drawers for Small Supplies

Clear plastic drawers let you see everything at a glance. No more digging through mystery boxes wondering where you stashed those tiny beads.
Stack them by category—one for buttons, another for thread, one for stickers. Dollar stores sell these for just a few bucks each. Label the front if you want extra organization.
Pull out only what you need for each project. This keeps your work surface clean and prevents the dreaded supply avalanche.
When you finish, everything goes back in seconds. This system works beautifully on shelves, under tables, or inside cabinets.
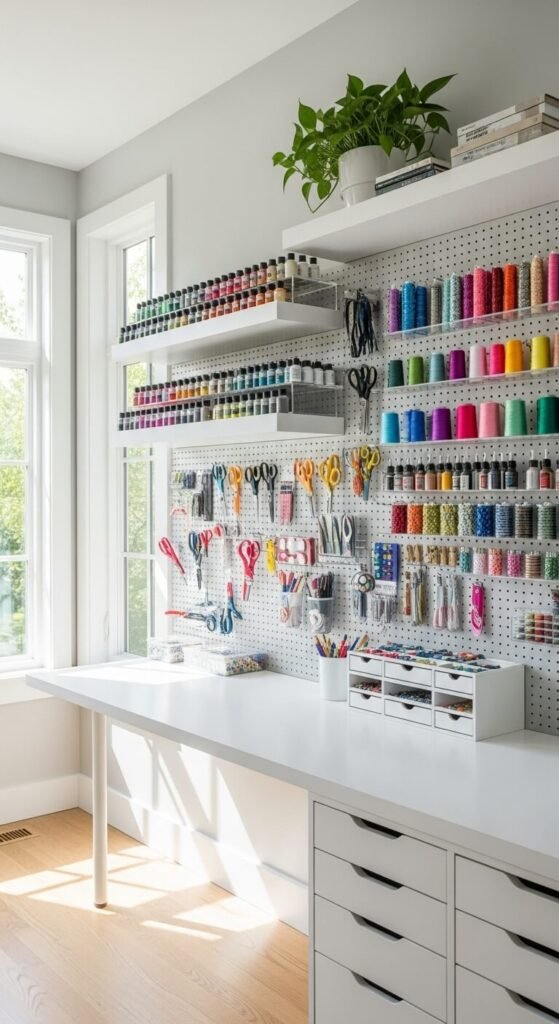
Pegboard Wall Command Center
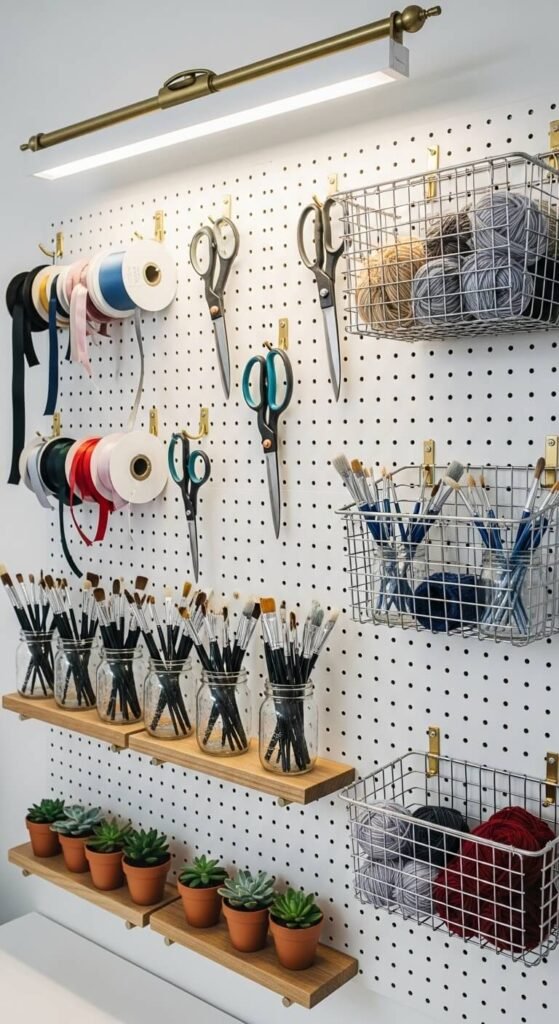
Pegboard transforms blank walls into hardworking storage. You can customize it endlessly as your collection grows.
Install it above your desk or along an empty wall. Hardware stores cut it to size for free. Paint it any color to match your room.
Add hooks for scissors, baskets for ribbon, and small shelves for jars. Everything hangs within arm’s reach. Rearrange hooks whenever your storage requirements change.
This setup costs under $30 for a 4×4 foot board plus accessories. Mount it securely with anchors since craft supplies add weight quickly.
Rolling Cart With Multiple Tiers
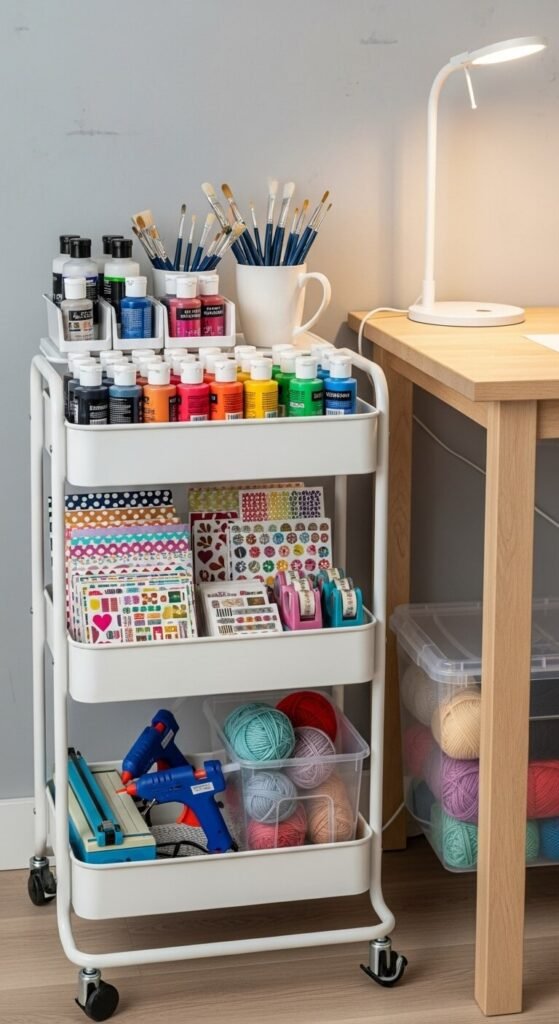
Rolling carts bring supplies wherever you work. Tuck them under tables when not in use.
Three-tier models hold tons while staying compact. Use the top shelf for current projects, middle for frequently-used tools, and bottom for bulkier items.
Move it from desk to couch to kitchen table. IKEA and Target sell these for $20-40. Some come with removable bins for extra flexibility.
Label each tier if multiple people share the cart. Clean-up becomes a breeze when everything has a designated spot.
Mason Jar Storage Display
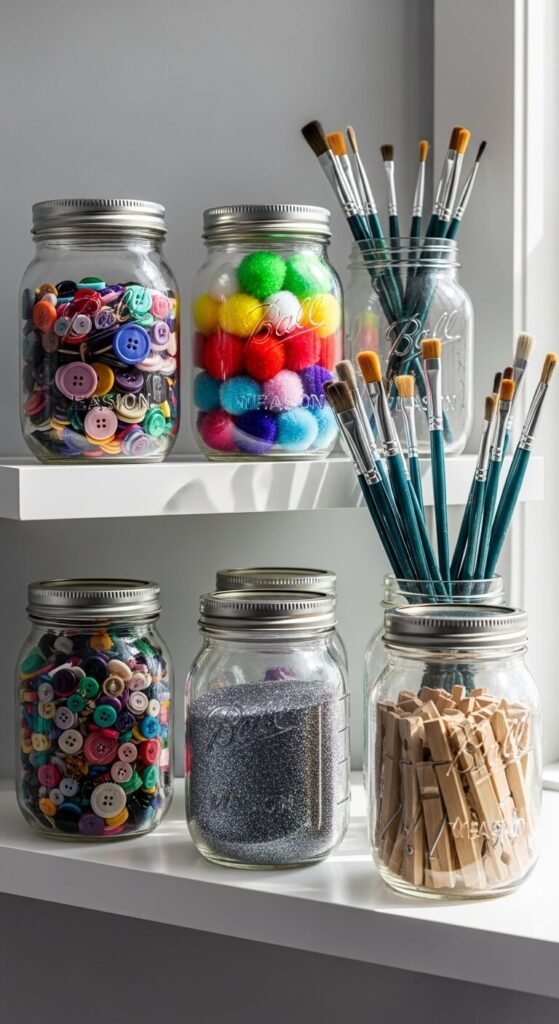
Mason jars turn storage into decoration. They’re cheap, cheerful, and see-through.
Fill them with buttons, pom poms, clothespins, or brush collections. Line them up on open shelving for easy access. Dollar stores sell jars for $1 each.
Group similar items together—all red supplies in one jar, all blue in another. Or organize by material type.
Screw lids on tight to prevent spills. Stack smaller jars inside bigger ones to save space. This works beautifully for both modern and farmhouse aesthetics.
Over-the-Door Shoe Organizer
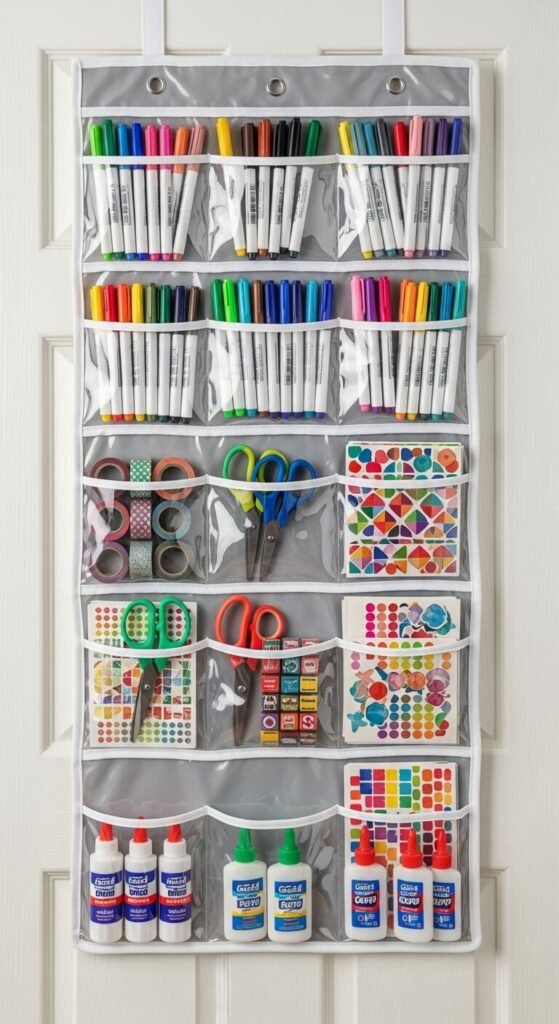
Repurpose a shoe organizer for instant vertical storage. Each pocket becomes a mini supply station.
Hang it on your closet door or room entrance. Clear vinyl versions let you spot supplies immediately. These cost $10-15 and hold hundreds of small items.
Sort by color, material, or project type. Markers in one row, tapes in another, embellishments below.
Kids can reach lower pockets while you keep sharp tools up high. When you move houses, just unhook and rehang. Zero installation hassle.
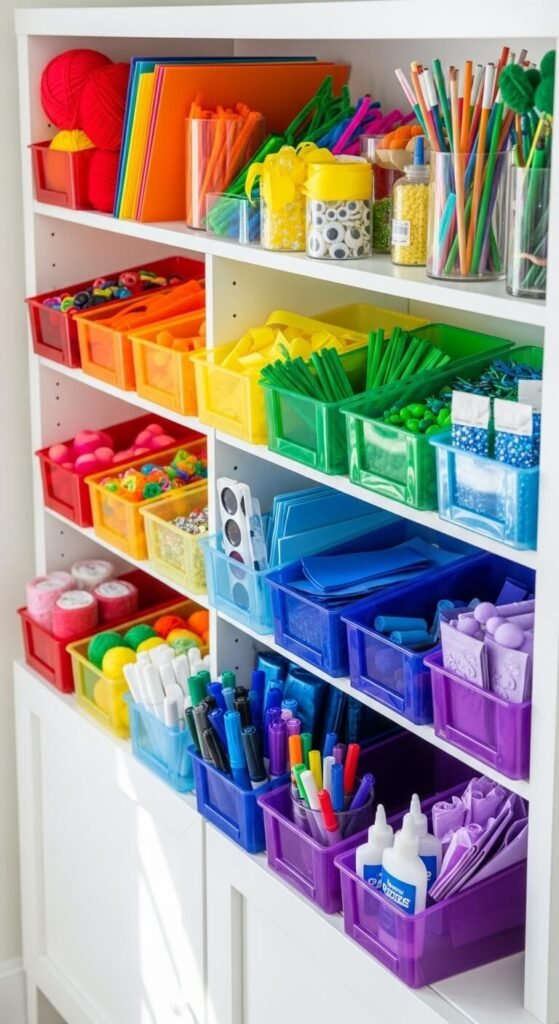
Labeled Plastic Bins on Shelving Units
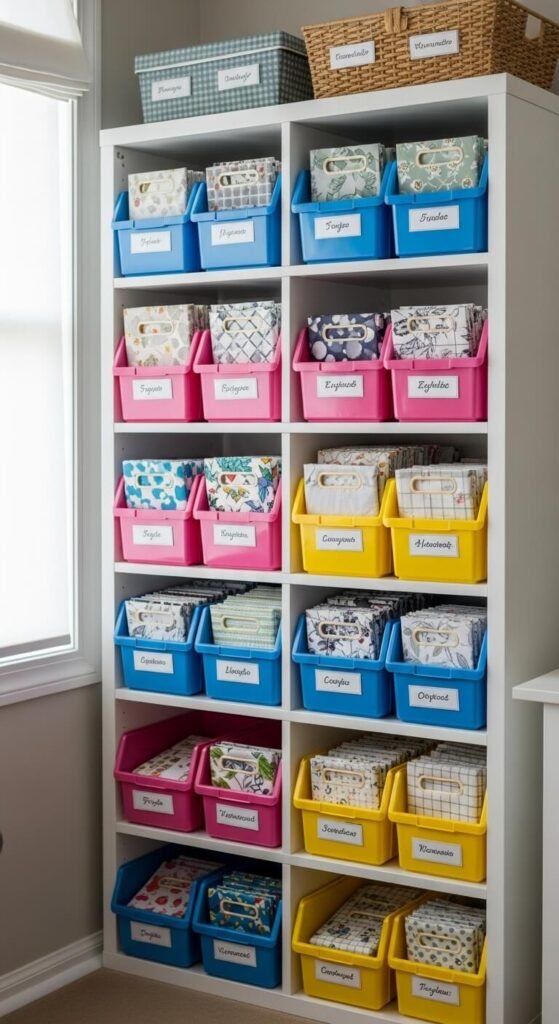
Bins hide clutter while keeping everything sorted. Labels prevent the guessing game.
Choose matching bins for a cohesive look. Stack them on basic shelving from big-box stores. Write contents on masking tape—easy to change when categories shift.
Pull bins down when working, then slide them back. This prevents surface clutter from spreading.
Color-code by project type—blue for sewing, pink for scrapbooking, yellow for painting. Bins with handles make grabbing supplies easier.
Budget around $3-5 per bin during back-to-school sales.
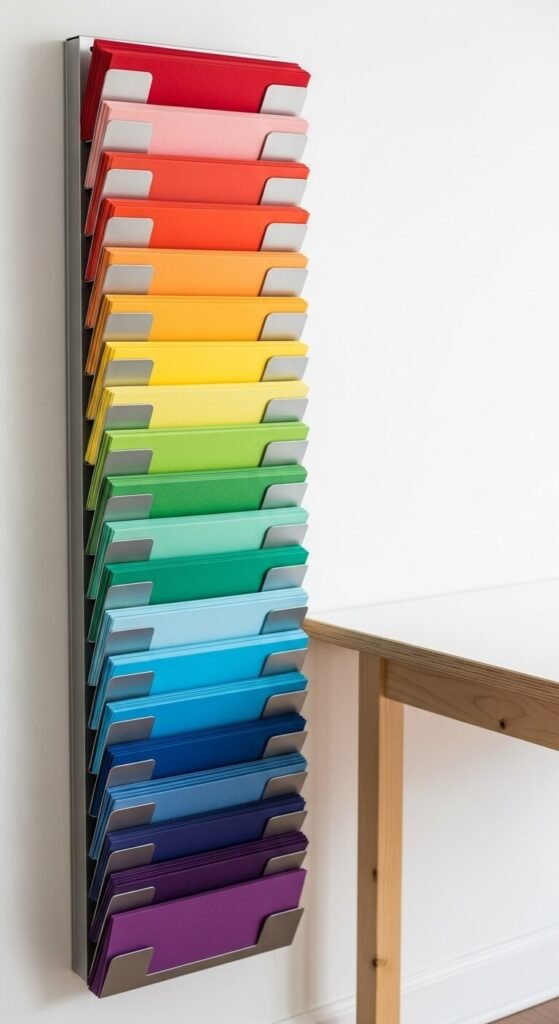
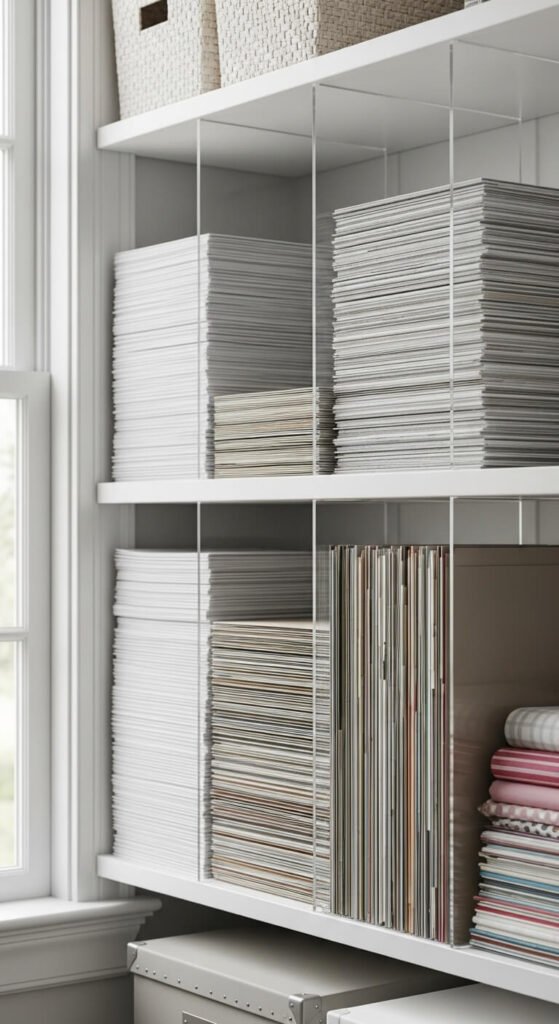
Vertical Paper Storage Rack
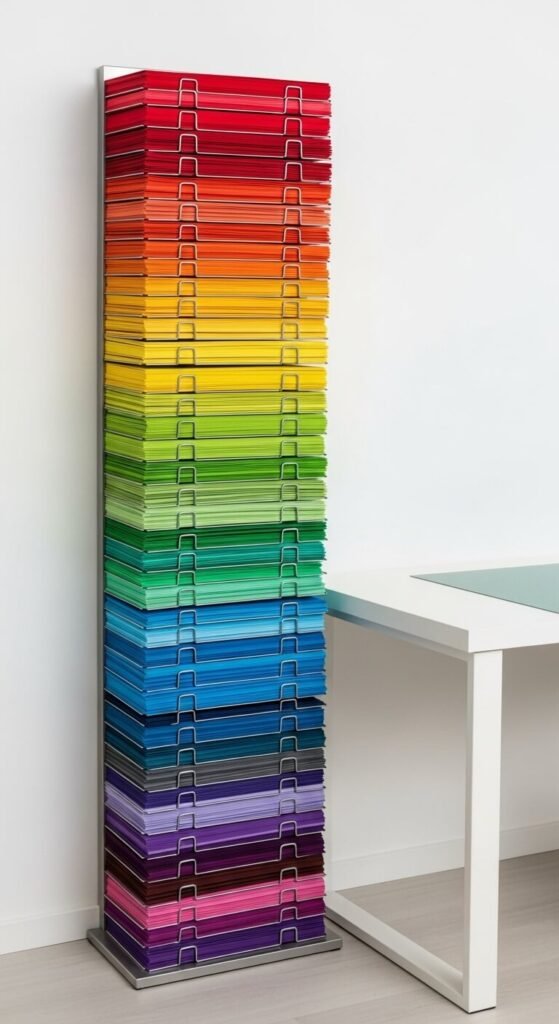
Cardstock and scrapbook paper stays flat and findable in vertical racks. No more bent corners or forgotten sheets.
Desktop versions hold 12×12 inch paper upright. Sort by color for visual appeal. Office supply stores carry these for $15-25.
Wall-mounted options save desk space. Some models expand as your collection grows.
File folders work too—just stand them in a magazine holder. This prevents paper from yellowing in stacks. Grab exactly what you want without disturbing the rest.
Magnetic Strip for Metal Tools
Magnetic strips keep sharp tools visible and safe. Mount them near your work zone.
Kitchen knife strips work perfectly for scissors, tweezers, and cutters. Hardware stores sell 12-inch strips for under $10.
Install at eye level where you can grab tools quickly. This frees up drawer space for other supplies.
Kids stay safer when sharp items hang out of reach. The strip also works for metal rulers and bobby pins. Just wipe clean when it gets dusty.
Fold-Down Wall-Mounted Table

Wall-mounted tables disappear when not in use. Perfect for tiny apartments or multipurpose rooms.
Fold them down for work sessions, then tuck away for floor space. DIY versions cost $30-50 in lumber and brackets.
Mount at a comfortable height for standing or sitting. Some include shelves underneath for supplies.
Paint it to match your walls or choose bold colors. This works brilliantly in guest rooms that double as craft spaces. Check weight limits before loading heavy equipment.
Lazy Susan Organizers
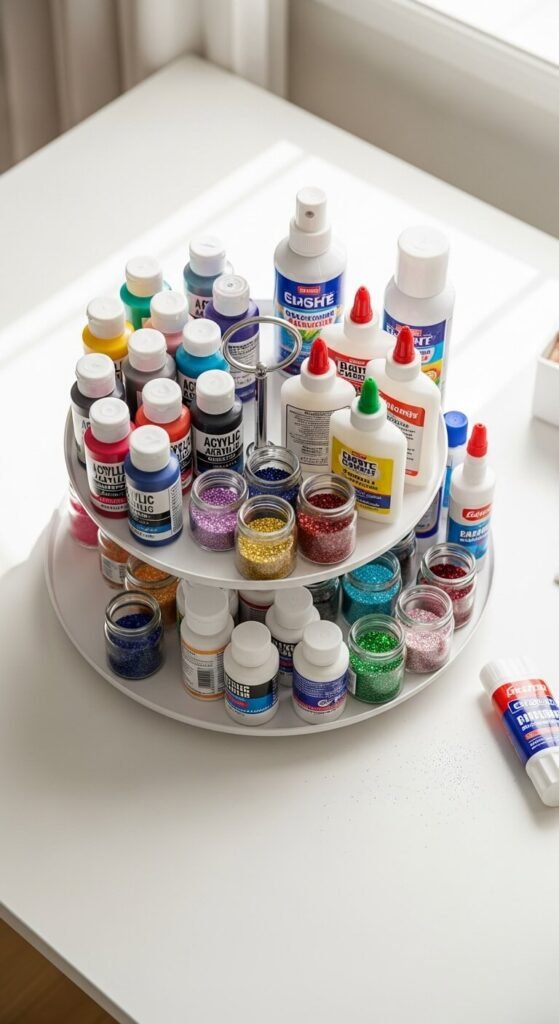
Lazy Susans bring back-row supplies to the front with a spin. No more knocking things over reaching for items.
Place one on your desk for paints, glues, and frequently-used tools. Dollar stores sell these for $3-5.
Two-tier versions double storage without taking more surface area. Group similar items on each level.
Clean spills easily by removing the whole organizer. These also work inside deep cabinets for hard-to-reach supplies. Spin to find exactly what you want in seconds.
Hanging Wire Baskets

Hanging baskets use ceiling or wall space you’re probably ignoring. They add character while solving storage problems.
Mount three-tier versions near your workspace. Fill with yarn, fabric, or works-in-progress. Find these at home decor stores for $15-30.
Choose wire over solid baskets so you can see contents. Spray paint them fun colors if the metal finish feels too industrial.
Hanging storage keeps supplies off floors and surfaces. This works great in basements with low ceilings where shelves might feel cramped.
Clipboard Project Station
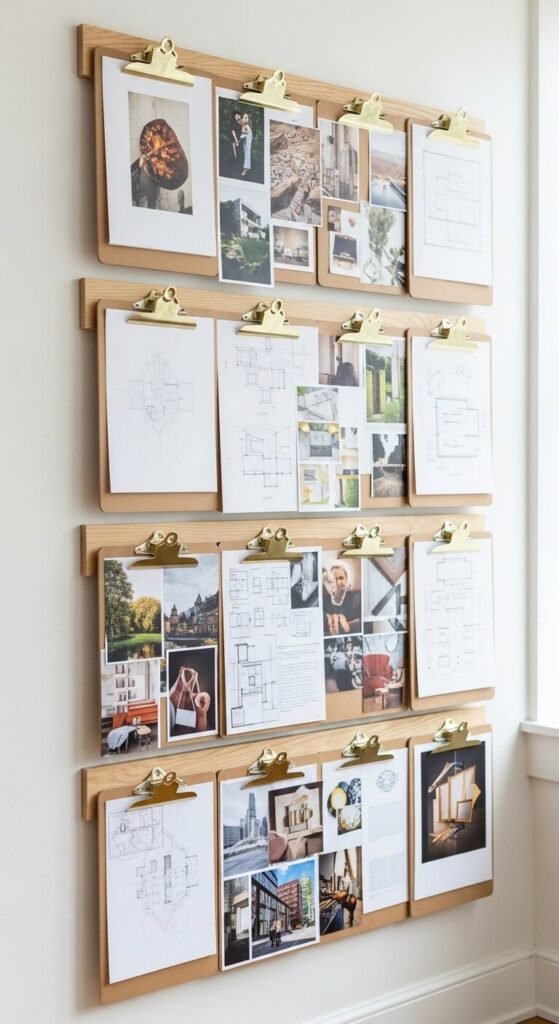
Clipboards keep active projects visible and organized. Each one holds a different work-in-progress.
Hang multiple clipboards on the wall using command hooks. Clip patterns, photos, or instruction sheets to each one. Clipboards cost $1-2 at office stores.
This prevents losing paper scraps in piles. Reference your work without digging through folders.
Rotate clipboards as you finish projects. Add fabric backing or decorative tape to make them prettier. Gallery-style arrangements look intentional and inspiring.
Color-Coded Supply Bins
Sorting by color creates visual order and speeds up supply hunting. Rainbow arrangements feel cheerful too.
Assign one bin per color family. Red supplies in the red bin, blue in blue. This costs nothing if you already own containers.
Mixing colors becomes faster when you grab exactly what you want. Kids love this system and put things back correctly.
Clear bins with colored lids work well. Or use colored tape to mark plain containers. Paint swatches, paper, and ribbon organize beautifully this way.
Under-Desk Rolling Storage
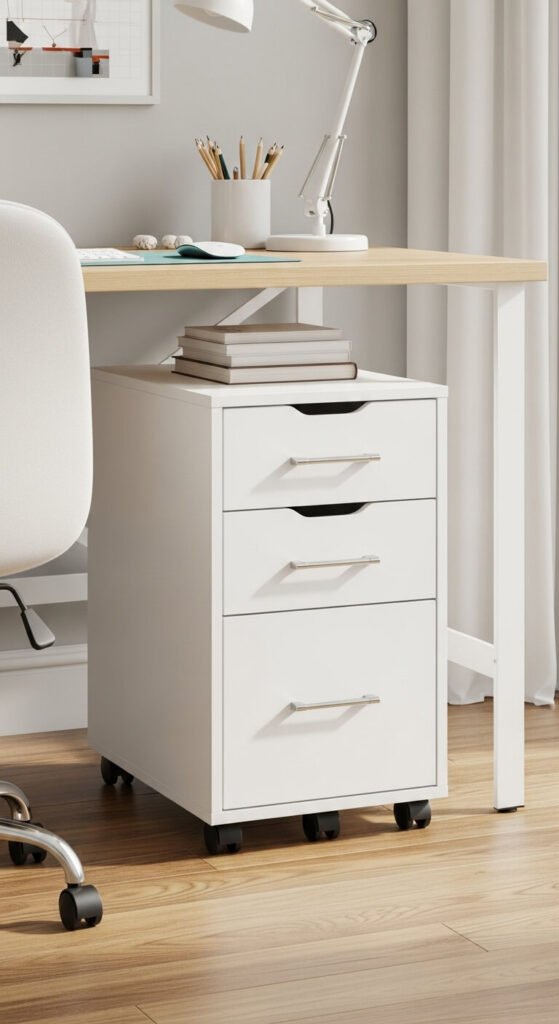
Rolling drawers slide under desks to maximize floor space. Pull them out when working, tuck away when done.
Three-drawer units fit standard desk heights. Office furniture stores offer these starting at $40.
Store current projects in the top drawer for quick access. Keep backup supplies below.
Wheels let you rearrange your room easily. These work great in multi-use spaces where furniture moves frequently. Lock the wheels when you want them stationary.
Tension Rod Ribbon Storage
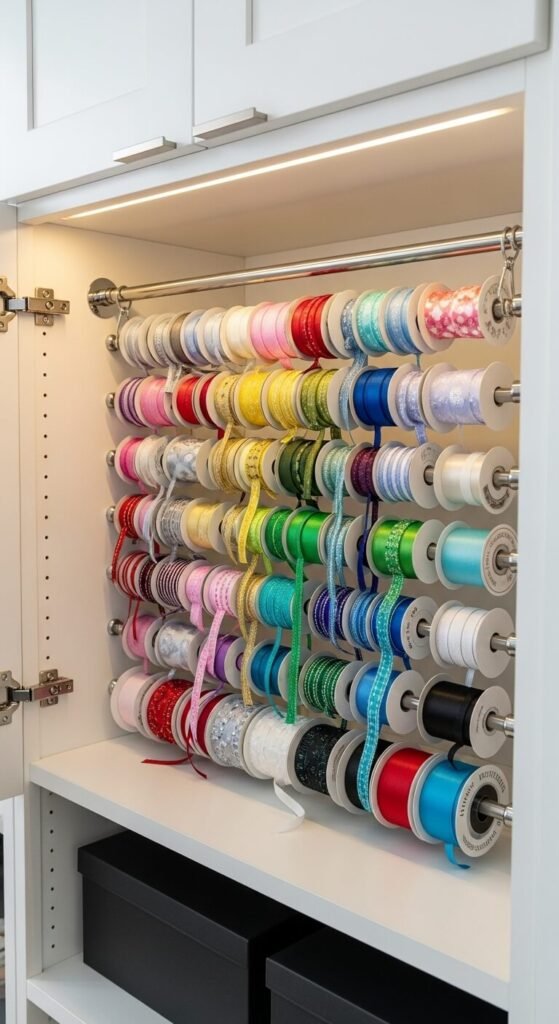
Tension rods turn cabinet space into ribbon dispensers. Thread spools onto the rod for tangle-free storage.
Install rods inside cabinets, closets, or between shelf uprights. These cost $5-10 and require no drilling.
Pull ribbon through the cabinet opening as you need it. Each spool stays separate and accessible.
Adjust rod placement when your collection grows. This works for wrapping paper ribbon, fabric ribbon, and lace trim. Remove the rod completely if you change storage systems.
Corkboard Inspiration and Tool Wall
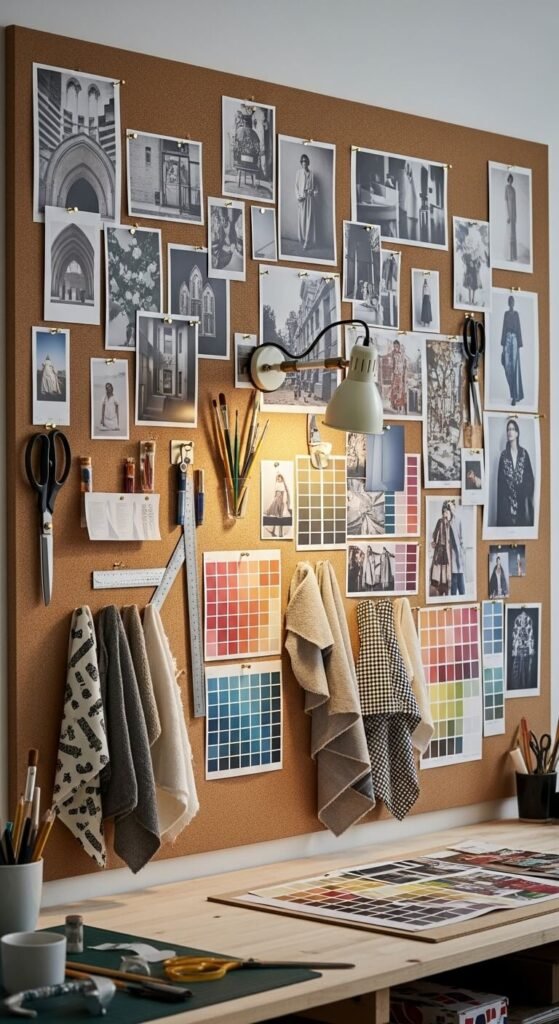
Corkboard pulls double duty—storing tools and displaying inspiration. Everything stays in sight.
Cover an entire wall or just a section above your desk. Buy tiles at home improvement stores for $1 per square foot.
Pin scissors, measuring tools, and templates directly to the board. Tack up photos, color swatches, and project ideas.
Rearrange constantly as your work evolves. Paint the cork edges or frame it for a finished look. This beats thumbtack holes in regular walls.
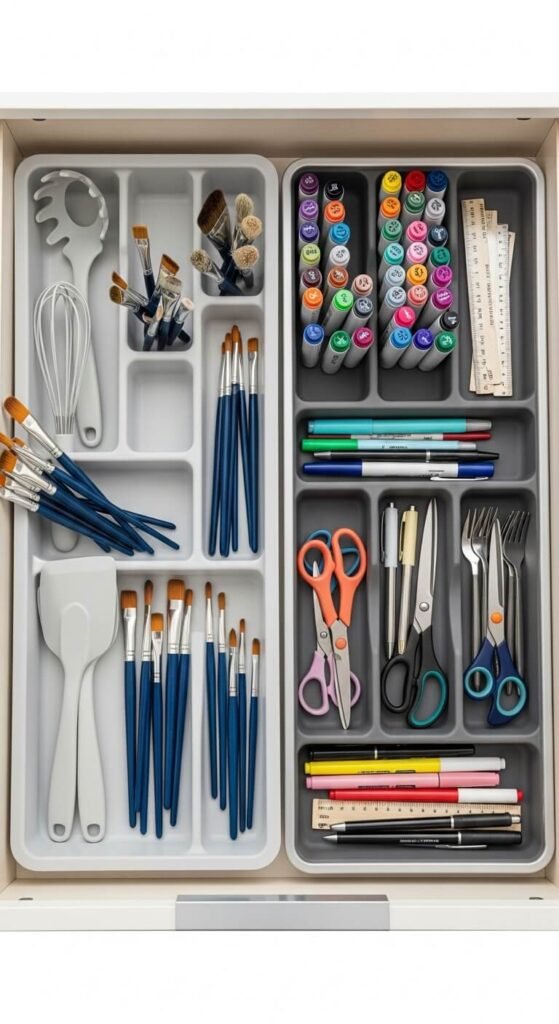
Craft Caddy for Portability
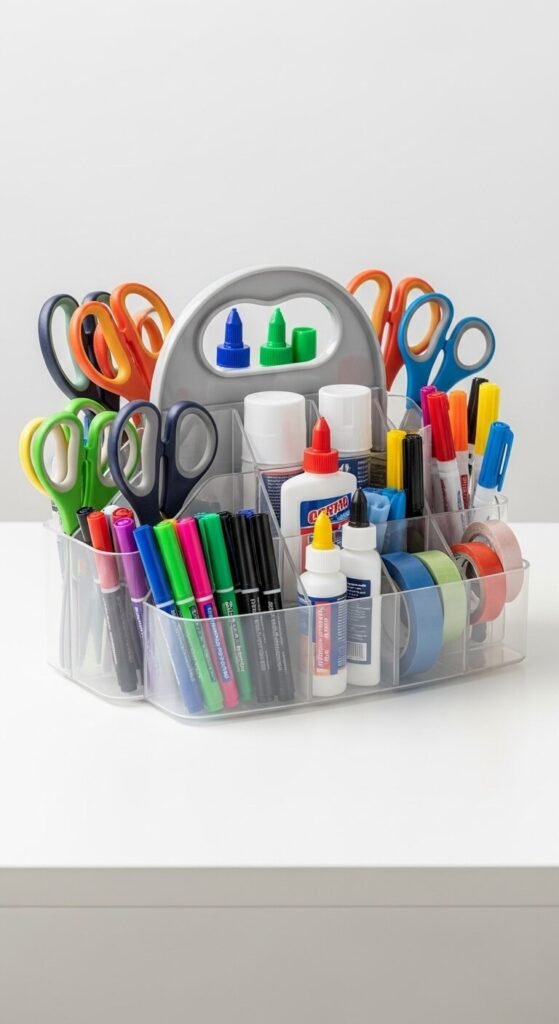
Caddies gather basic supplies in one portable container. Carry your tools to any work surface.
Choose divided versions with handles. Fill compartments with scissors, glue, tape, and other essentials. Shower caddies work great and cost $5-8.
Leave specialized tools in main storage, but keep everyday items ready to grab.
This prevents supply hoarding at your desk. Clean-up means returning one caddy instead of 20 items. Perfect for crafters who work in different rooms.
Spice Rack for Small Bottles
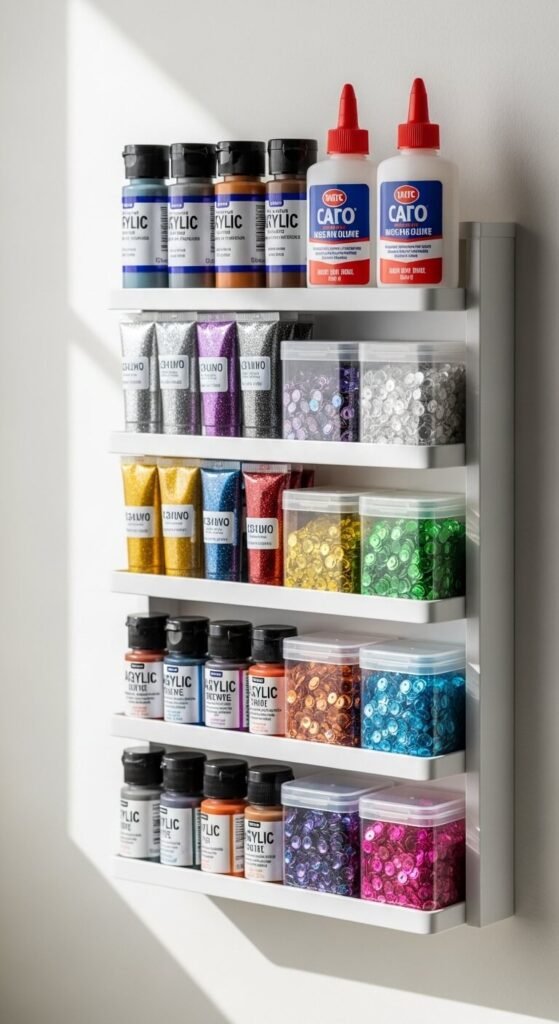
Spice racks repurpose beautifully for craft supplies. Small bottles and tubes fit perfectly.
Mount them on walls or inside cabinet doors. Dollar stores sell these for $3-6.
Organize paints, glitters, glues, and tiny embellishments. Labels face forward so you spot what you want immediately.
This saves drawer space for bigger items. Magnetic spice racks stick to metal surfaces without tools. Tiered versions let you stack multiple rows.
Labeled File Folders for Patterns
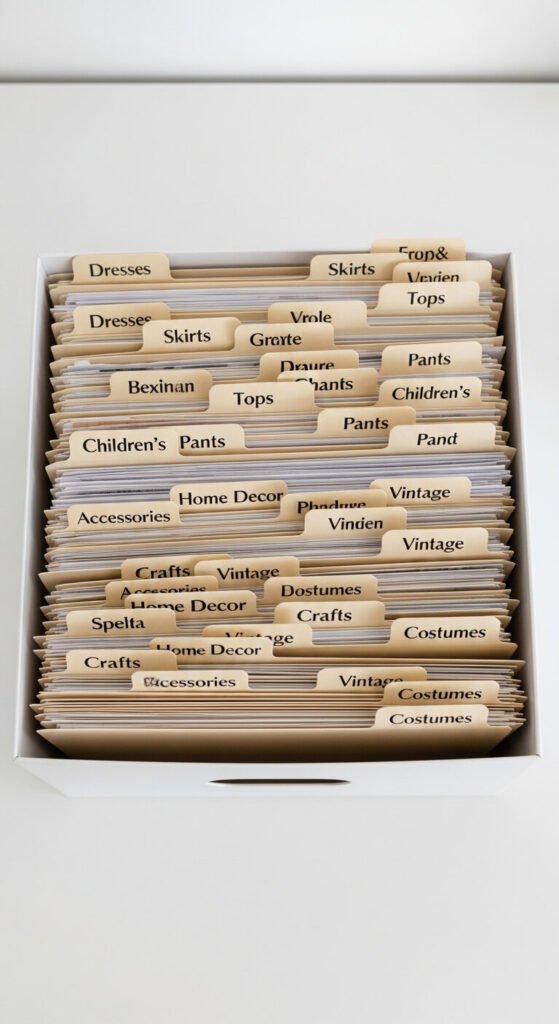
File folders keep patterns flat and sorted. No more crumpled instructions or missing pieces.
Use a desktop file box or drawer system. Label folders by pattern type or project. Office supplies cost under $10 total.
Store commercial patterns in original envelopes, but file your own templates separately.
This beats throwing patterns in bags where they wrinkle. Reference them easily without unfolding everything. Add new folders as your collection expands.
Acrylic Shelf Dividers
Acrylic dividers stop stacks from toppling. They create compartments on open shelving.
Slide them between paper stacks, fabric piles, or boxed supplies. Container stores sell sets for $10-15.
Clear versions disappear visually while doing heavy organizational lifting. Adjust spacing based on what you’re storing.
This prevents the domino effect when you pull items from the middle. Works on closet shelves, craft shelves, or bookcases. Easy to clean when dusty.
Repurposed Kitchen Organizers
Kitchen organizers translate perfectly to craft rooms. Utensil holders, drawer inserts, and lazy Susans all work.
Silverware dividers sort pens, brushes, and tools. Thrift stores sell these for $1-3.
Dish racks hold paper vertically. Muffin tins organize buttons by color.
This saves money since you’re repurposing items you might already own. Look at kitchen storage with fresh eyes. Cake stands display small supplies beautifully on shelves.
Closet Door Pocket Organizer
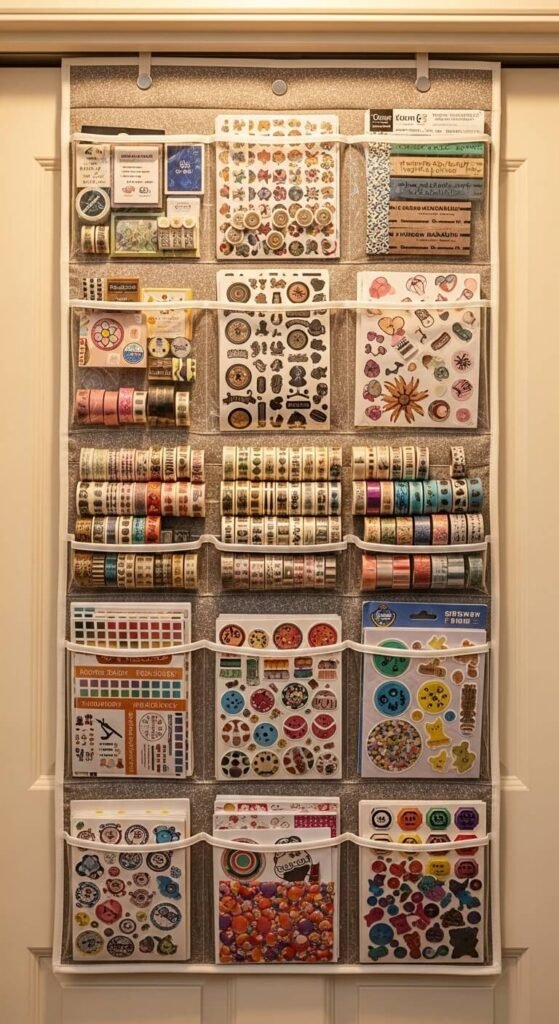
Closet doors hide acres of unused space. Hanging organizers fix that instantly.
Choose fabric versions with clear pockets for visibility. These run $10-20 and hold hundreds of items.
Fill with washi tape, stamps, stencils, and stickers. Everything stays hidden behind closed doors but accessible in seconds.
This works in small apartments where wall space is precious. Label pockets if multiple crafters share the space. Machine wash organizers when they get dusty.
Tiered Desktop Organizer
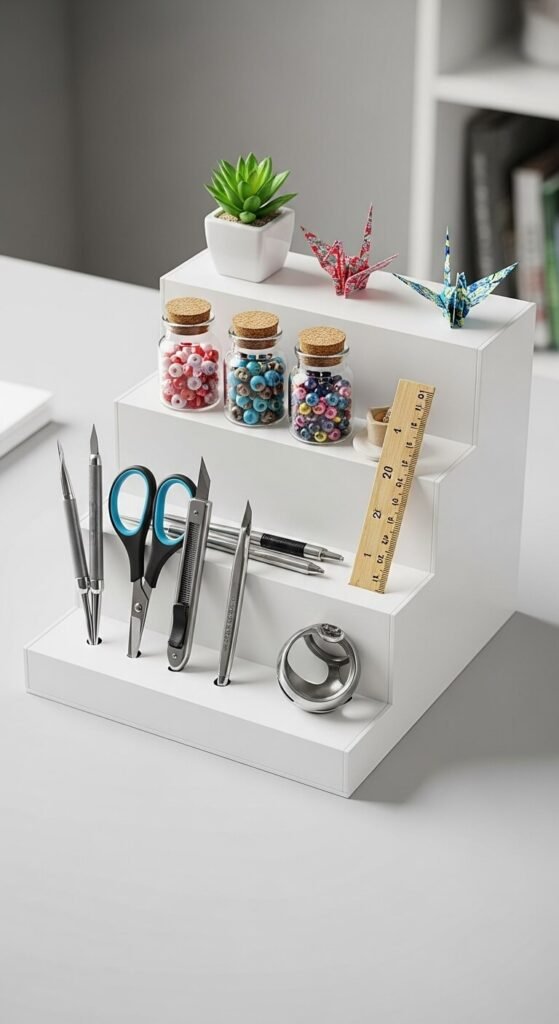
Tiered organizers create vertical storage on flat surfaces. They maximize desk real estate.
Place frequently-used tools on the bottom tier. Less-used items go higher. Office stores sell these for $8-15.
Letter trays, makeup organizers, and food risers all work. This keeps supplies visible without spreading across your entire desk.
Stack supplies by project phase—planning tools at bottom, finishing touches on top. Wipe clean easily when they get messy.
Bulletin Board Supply Planning
Bulletin boards help plan projects and track supplies. Visual organization prevents overbuying.
Section the board by project or supply category. Pin swatches, shopping lists, and reference photos. Cork boards start at $10 for smaller sizes.
Update it as you finish projects or add new materials. This beats keeping notes in random places.
Color-code pins by project status—red for active, blue for planned, yellow for completed. Frame the board or paint the cork for a polished look.
Wire Shelving With Baskets
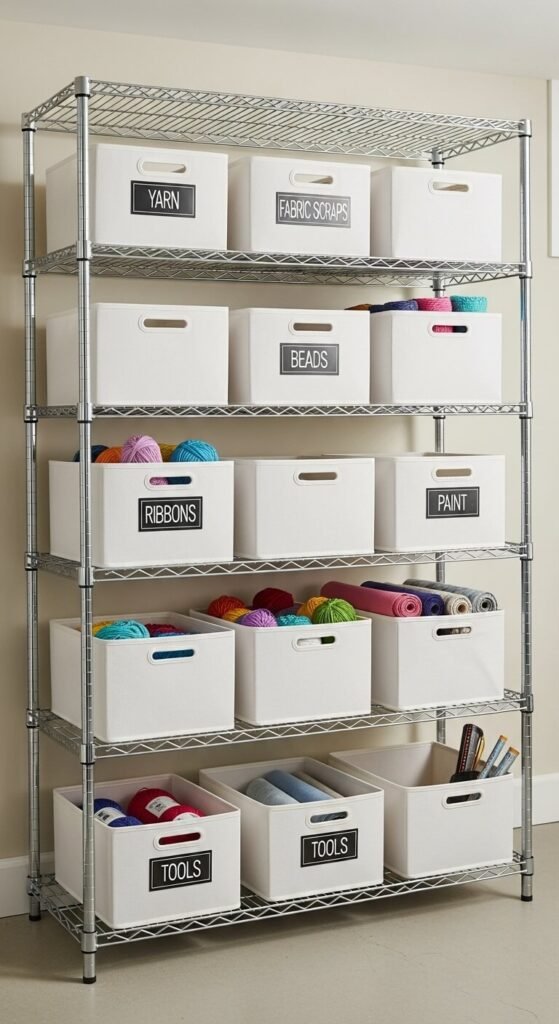
Wire shelving breathes while keeping supplies organized. Add baskets for a finished appearance.
Assemble units from hardware stores in minutes. Basic models cost $30-50 and hold serious weight.
Drop fabric baskets into shelves to corral loose items. Labels on basket fronts identify contents quickly.
This works great in basements or garages where moisture might warp wood. Adjust shelf heights as your collection changes. Wheels make units portable if you rearrange frequently.
Washi Tape Display Dowel
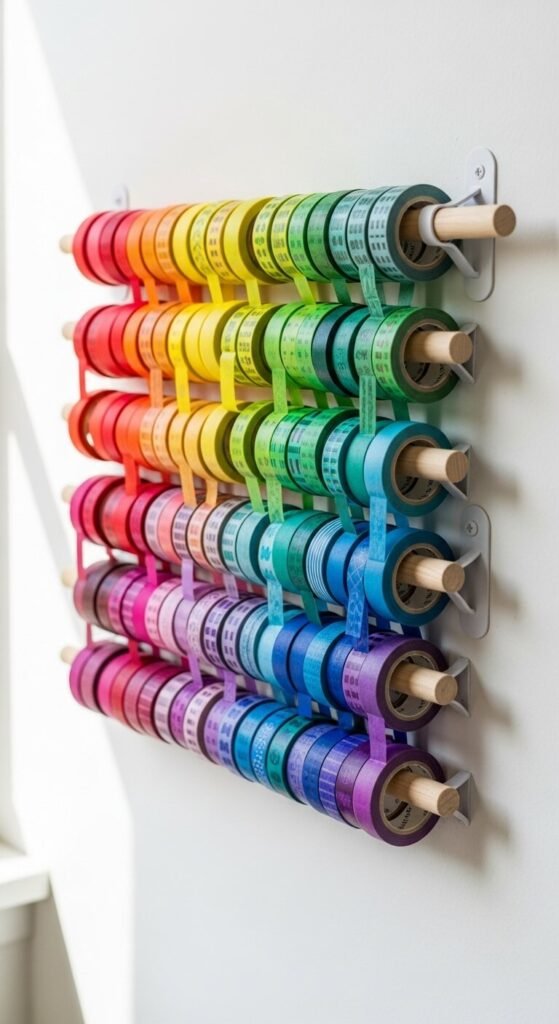
Dowel rods display washi tape beautifully while keeping it accessible. Slide rolls on and off easily.
Mount a 1-inch dowel between two brackets. This costs under $5 at hardware stores.
Arrange tape by color for visual appeal. Pull off exactly what you want without disturbing others.
Multiple rods let you sort by width or pattern type. Paint dowels to match your room. This beats keeping tape in drawers where you forget what you own.
Stackable Letter Trays
Letter trays sort paper supplies and active projects. Stack them high to save surface space.
Use one tray for current projects, another for paper stock, another for completed works. Office stores sell these for $3-8 each.
Clear versions show contents at a glance. This prevents the pile problem on flat surfaces.
Pull out just the tray you want without disturbing the stack. Label the front edge of each tray. Add or remove trays as your workflow changes.
Conclusion
Your craft room should spark joy, not stress. These 30 organization systems prove you don’t need expensive solutions to create a functional workspace. Start with one or two ideas that solve your biggest pain points—maybe that’s corralling ribbon or finally organizing paper.
Mix and match systems based on your space and budget. Repurpose kitchen items, shop dollar stores, and DIY when possible. The goal isn’t perfection—it’s creating a space where you actually want to create. Small changes add up to big improvements. Pick your favorite system from this list and implement it this weekend. Your future self will thank you when inspiration strikes and everything you need is exactly where it should be.