You know that gorgeous, minimalist look of floating shelves that seems to cost a fortune at high-end furniture stores? The ones that make your walls look like they belong in a design magazine? Here’s the secret: you can create that exact same look for a fraction of the price with a quick trip to the hardware store and a free afternoon. No advanced carpentry skills required—just a little patience and the right technique.
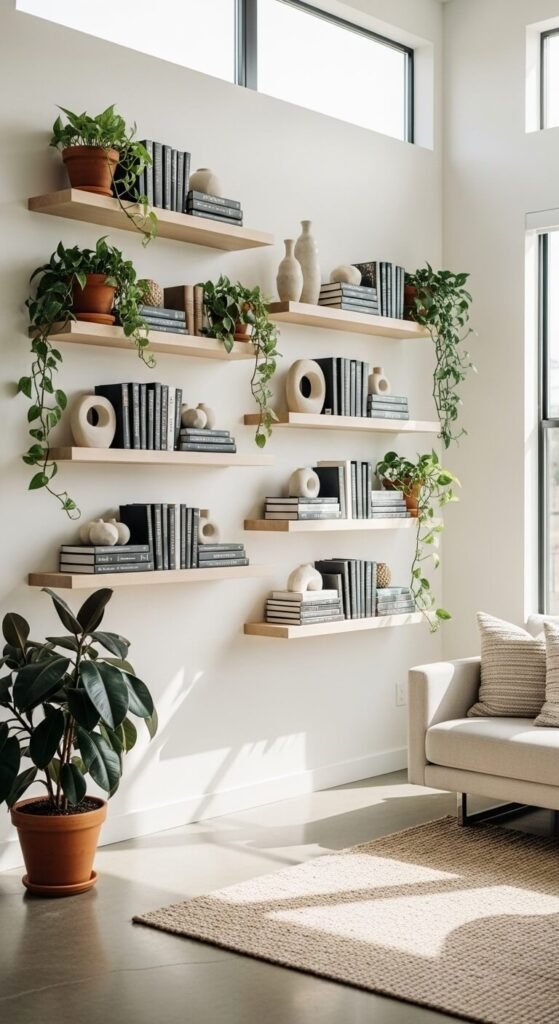
The trick isn’t in buying expensive materials—it’s in knowing how to hide the hardware and finish the wood properly. Let’s dive into exactly how you can create custom floating shelves that’ll have your guests asking where you bought them.
What You’ll Need (And Why It’s So Affordable)
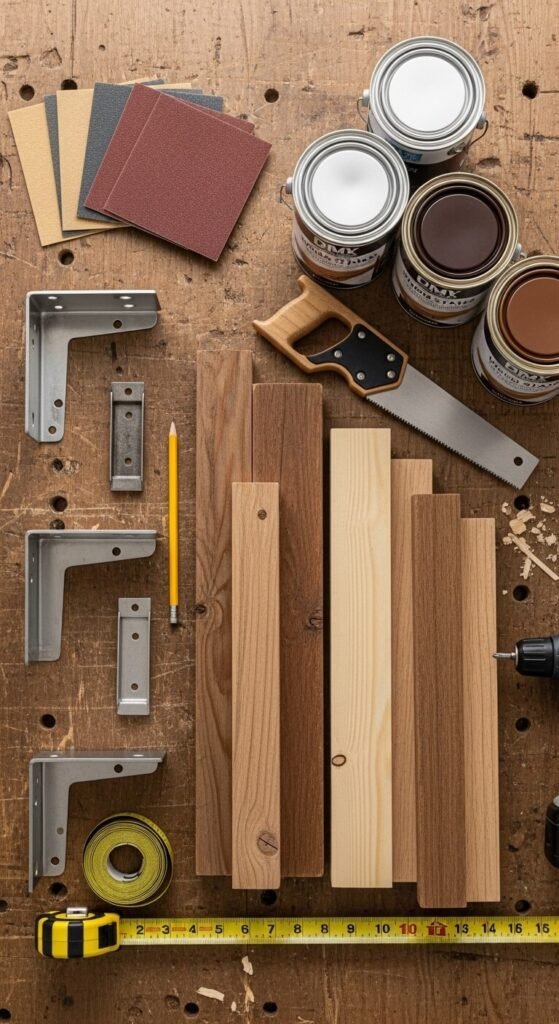
The beauty of this project is that you’re working with basic materials that cost significantly less than pre-made floating shelves. Here’s your shopping list:
- Solid wood boards (pine, poplar, or oak—your choice based on budget)
- Floating shelf brackets (the heavy-duty hidden kind)
- Wood stain or paint
- Polyurethane or wood sealer
- Sandpaper (120 and 220 grit)
- Level, drill, and basic tools you probably already own
Most people spend $30-60 per shelf compared to $150-300 for store-bought versions. The quality? Often better because you’re using solid wood instead of particle board.
Step 1: Choose Your Wood Wisely
This is where you can save serious money without sacrificing the high-end look. Head to your local lumber yard instead of a big box store—you’ll often find better quality wood at lower prices. Look for boards that are already planed smooth on all sides, which saves you prep work.
For that expensive look, choose wood with interesting grain patterns. Even affordable pine can look stunning when properly finished. The standard depth for floating shelves is 10-12 inches, but go deeper (14-16 inches) if you want that really substantial, custom look.
Pro tip: Inspect each board carefully for knots and warping. A straight, clear board will look far more expensive once installed.
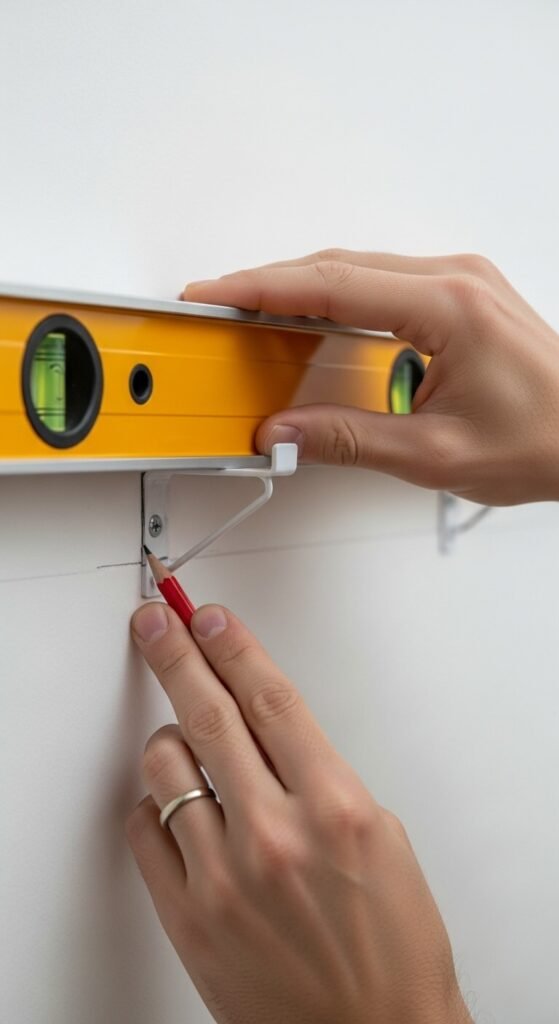
Step 2: The Secret to Invisible Support
Here’s what separates DIY floating shelves from the cheap-looking kind: proper bracket installation. Heavy-duty floating shelf brackets are your best friend. These mount directly into wall studs and slide into a routed channel in the back of your shelf.
Mark your studs carefully using a stud finder. Your shelves will only look expensive if they’re perfectly level and securely mounted. Measure twice, drill once. Use a level to mark where your brackets will go, then secure them with lag bolts directly into the studs—not just drywall anchors.
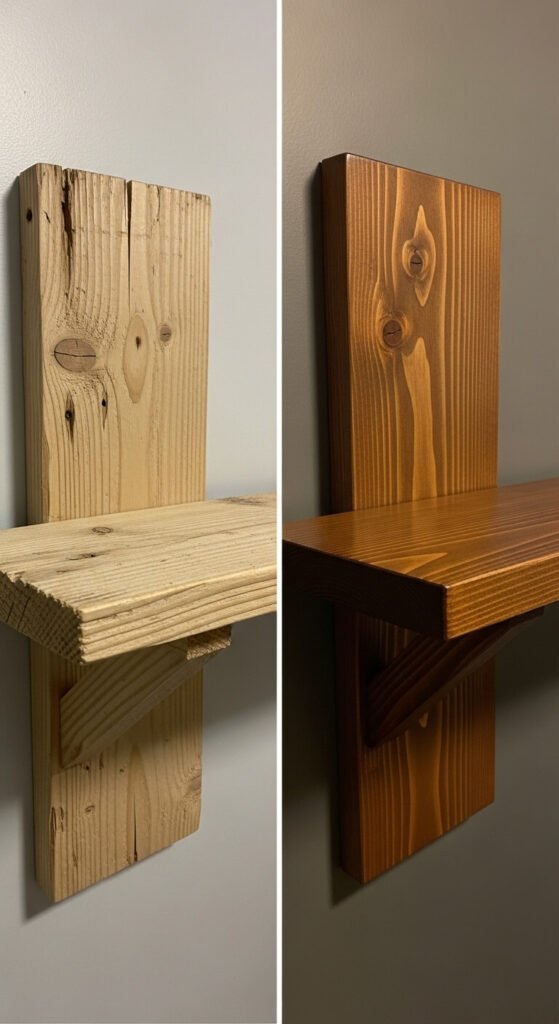
Step 3: The Finishing Touch That Makes All the Difference
This is where your shelves transform from “DIY project” to “expensive custom carpentry.” The finishing process is crucial:
- Sand thoroughly – Start with 120-grit sandpaper and finish with 220-grit. The smoother the surface, the more professional the final result.
- Stain or paint strategically – For a high-end look, consider these options:
- Dark walnut stain for a rich, sophisticated vibe
- White or light gray paint for modern minimalism
- Natural finish with clear polyurethane to show off beautiful wood grain
- Apply multiple thin coats – Whether staining or painting, three thin coats always look better than one thick coat. Sand lightly between coats with 220-grit sandpaper.
- Don’t skip the sealer – A quality polyurethane top coat protects your shelves and gives them that smooth, touchable finish that screams quality.
Installation Day: Making It Look Professional
When you’re ready to install, work with a helper if possible. Slide your finished shelf onto the mounted brackets carefully. The shelf should fit snugly without visible gaps. If you’ve measured and cut correctly, the brackets will be completely hidden inside.
Use wood filler to cover any small imperfections where the shelf meets the wall, then touch up with stain or paint. This tiny detail makes your shelves look built-in rather than installed.
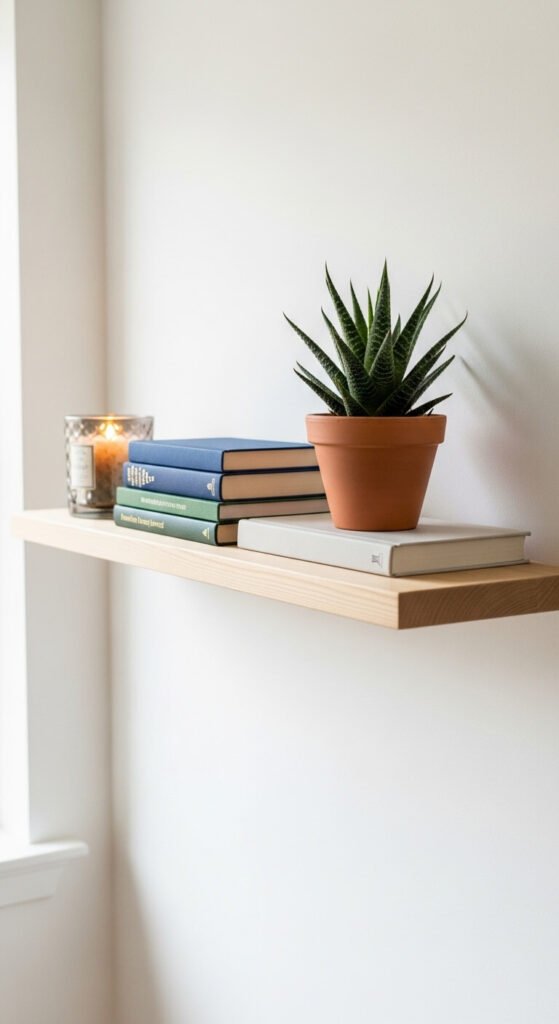
Your Designer Shelves Await
Building floating shelves that look expensive is entirely about attention to detail—quality finishing, proper installation, and strategic styling. You’ve just saved hundreds of dollars while creating something custom that perfectly fits your space and style.
The best part? Once you’ve made your first set, you’ll probably want to add them to every room. They’re that satisfying to build and that impressive to look at.
Ready to start your project? Save this guide and head to the hardware store this weekend—your walls are waiting for an upgrade!