Let’s be honest—opening a drawer and seeing a jumbled mess of socks, utensils, or office supplies is nobody’s idea of fun. But before you rush to buy expensive organizing systems, look around your home. You’re probably sitting on a goldmine of materials that can transform chaotic drawers into perfectly organized spaces. From old cereal boxes to shoeboxes you were about to recycle, the solution to your drawer drama is closer than you think.
Why DIY Drawer Dividers Make Sense
Store-bought organizers can cost anywhere from $15 to $50, and they’re often not quite the right size for your drawers anyway. Making your own dividers means you get custom-fit organization without spending a dime. Plus, you’re giving materials a second life instead of tossing them in the recycling bin. It’s budget-friendly, eco-conscious, and surprisingly satisfying.
Materials You Can Use Right Now
Raid your recycling bin and closets for these hidden organizing gems:
- Cardboard boxes (cereal boxes, pasta boxes, shoe boxes)
- Plastic containers (takeout containers, berry baskets)
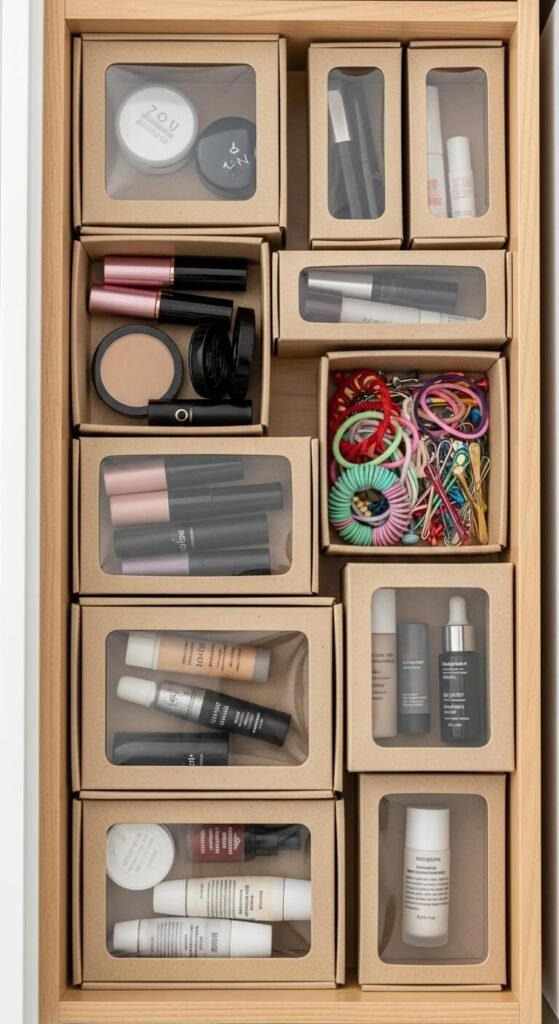
- Small gift boxes or product packaging
- Thick cardboard from shipping boxes
- Old picture frames (without glass)
- Foam board or poster board scraps
- Ruler or measuring tape
- Scissors or box cutter
- Packing tape or hot glue gun
How to Create Cardboard Drawer Dividers
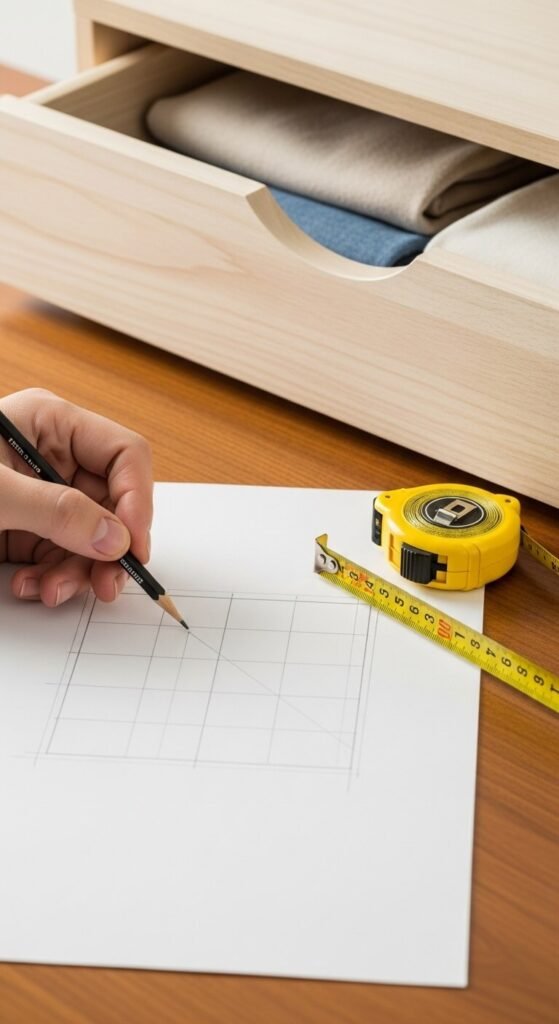
Step 1: Measure Your Drawer
Start by measuring the length, width, and depth of your drawer. Write these numbers down—you’ll need them for every divider you create. The key to professional-looking results is precision, so don’t skip this step.
Step 2: Plan Your Layout
Think about what you’re organizing. Socks need smaller squares, while kitchen utensils might need longer rectangles. Sketch a simple grid on paper showing where you want each divider to go. This blueprint prevents frustrating do-overs later.
Step 3: Cut Your Vertical Dividers
Using cereal boxes or sturdy cardboard, cut strips that match your drawer’s depth (front to back). The height should be just slightly shorter than your drawer’s depth—about a quarter-inch less prevents catching when you open and close the drawer. You’ll need enough strips to create your planned columns.
Step 4: Cut Your Horizontal Dividers
Now cut strips that match your drawer’s width (side to side), again keeping them slightly shorter than the drawer’s height. These will create your rows and intersect with your vertical pieces.
Step 5: Create Interlocking Slots
Here’s where it gets clever. On your vertical dividers, cut slits halfway down from the top edge at regular intervals. On your horizontal dividers, cut slits halfway up from the bottom edge. These slits should be the same width as your cardboard thickness. When you slide them together, they’ll lock into a stable grid.
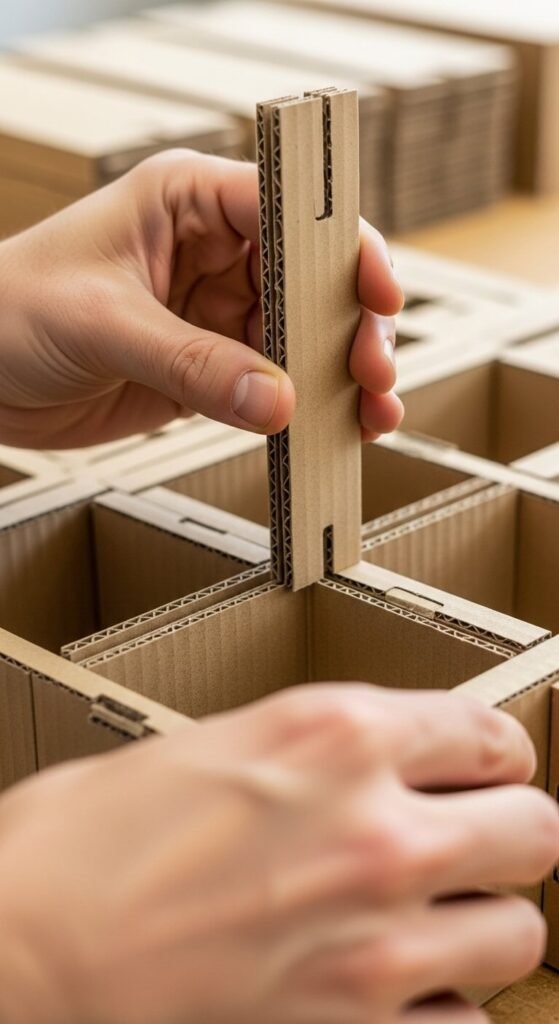
Step 6: Assemble and Adjust
Slide your dividers together to form the grid, then place the entire structure in your drawer. Make any necessary adjustments—trim pieces that are too tall or add extra support with tape if things feel wobbly.
Quick Alternative Methods
The Shoebox Technique
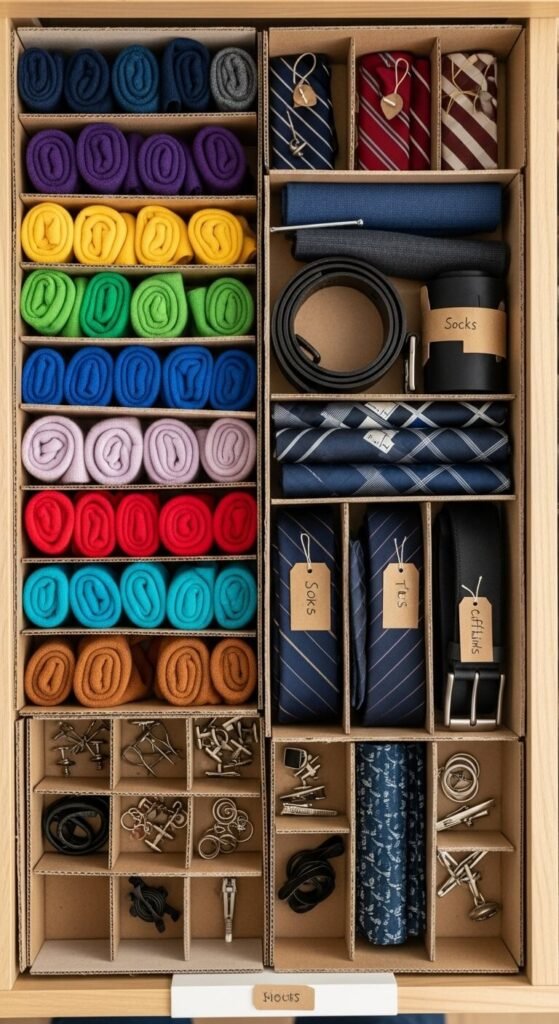
For drawers that need larger compartments, simply remove the lids from small shoeboxes or gift boxes and nestle them side by side in your drawer. This works beautifully for underwear, accessories, or craft supplies. No cutting required.
The Basket Approach
Repurpose plastic berry baskets or small takeout containers by lining them up in your drawer. They’re perfect for junk drawers, office supplies, or kids’ art materials since you can lift them out easily.
Making Them Pretty (Optional)
Your dividers work just fine as plain cardboard, but if you want Pinterest-worthy results:
- Wrap them in wrapping paper or contact paper
- Paint them with leftover craft paint
- Cover them with fabric scraps using a glue stick
- Line them with decorative scrapbook paper
The Bottom Line
You don’t need a Container Store budget to have organized drawers. With materials you already own and about 30 minutes of effort, you can create custom dividers that fit your exact needs. Start with one drawer—maybe that chaotic utensil drawer or your overflowing sock collection—and see how satisfying it feels to open a perfectly organized space.
Ready to tackle your messiest drawer? Save this guide and transform your storage today—no shopping required!