Let’s be honest—scrolling through Pinterest and seeing those perfectly organized pantries with matching jars, pristine labels, and color-coordinated shelves can feel completely out of reach. But here’s the secret nobody tells you: you don’t need to spend hundreds of dollars at The Container Store to create a beautiful, functional pantry that’s worthy of double-taps. With a little creativity, some dollar store finds, and smart repurposing, you can transform your chaotic pantry into an organized oasis that looks like it belongs in a home magazine.
Ready to create pantry magic without breaking the bank? Let’s dive in.
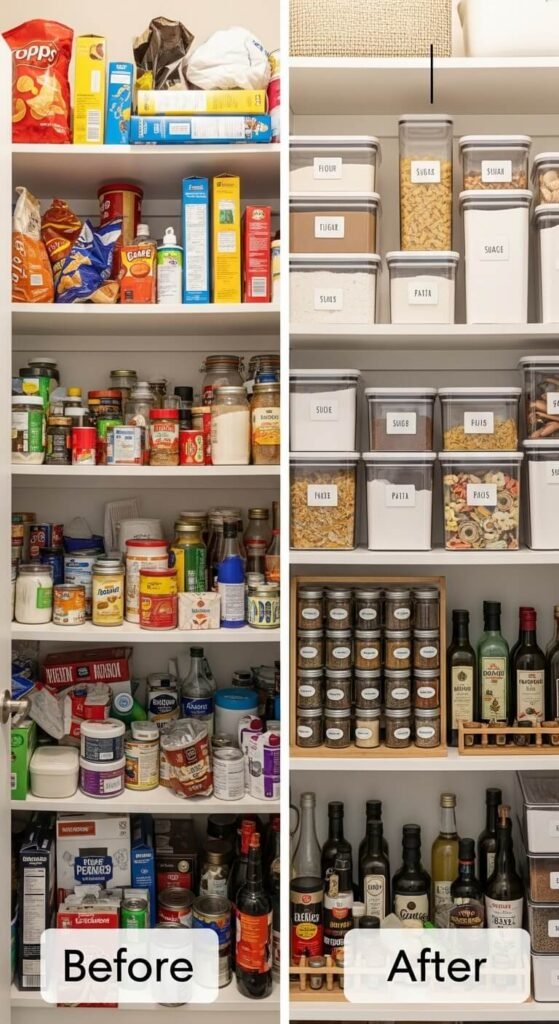
Start With a Complete Pantry Purge
Before you spend a single dollar, you need to see what you’re actually working with. Pull everything out of your pantry—yes, everything. This might seem overwhelming, but it’s the only way to truly assess your space and needs.
As you remove items, check expiration dates and toss anything that’s past its prime. Group similar items together: baking supplies, snacks, canned goods, pasta and grains, oils and vinegars. This sorting process will help you understand exactly how many containers and organizers you actually need, preventing you from overbuying.
Give your empty shelves a good wipe-down. You’re creating a fresh canvas for your pantry transformation.
Hunt for Budget-Friendly Storage Solutions
Here’s where the magic happens. You don’t need expensive custom containers when these budget options work just as beautifully:
- Dollar store bins and baskets: Perfect for corralling snack bags, seasoning packets, or baking supplies
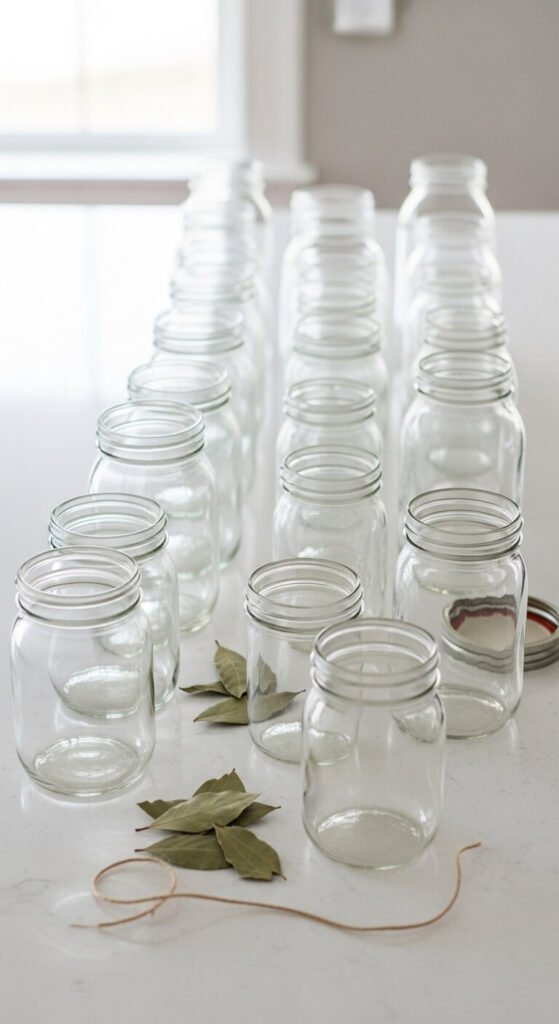
- Mason jars you already own: Ideal for storing dry goods like rice, pasta, flour, and sugar
- Repurposed glass jars: Save pasta sauce jars, pickle jars, and jam jars—they work beautifully for pantry storage once labels are removed
- Shoe boxes covered in contact paper: Create custom drawer-style organizers for packets and small items
- Tension rods: Install them vertically to create dividers for baking sheets and cutting boards
Thrift stores are also goldmines for affordable storage solutions. Look for baskets, vintage canisters, and wire organizers at a fraction of retail prices.
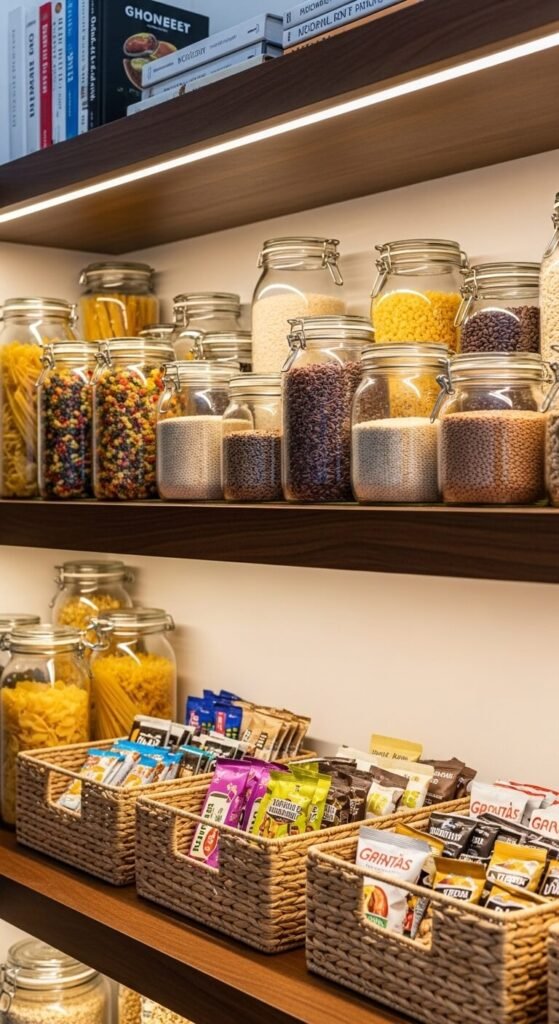
Decant and Organize by Category
Now comes the satisfying part—transferring your items into containers and organizing them by category. Decanting (transferring items from their original packaging into uniform containers) is the secret to that Pinterest-perfect look.
Focus on decanting items you use frequently and buy regularly: flour, sugar, pasta, rice, oats, coffee, and cereal. Keep less-used items in their original packaging to save on containers.
Create zones in your pantry:
- Breakfast zone: Cereal, oats, coffee, tea
- Baking zone: Flour, sugar, baking powder, chocolate chips
- Snack zone: Chips, crackers, granola bars
- Dinner prep zone: Pasta, rice, canned goods, oils
Place frequently used items at eye level and less-used items on higher or lower shelves. This creates both visual appeal and practical functionality.
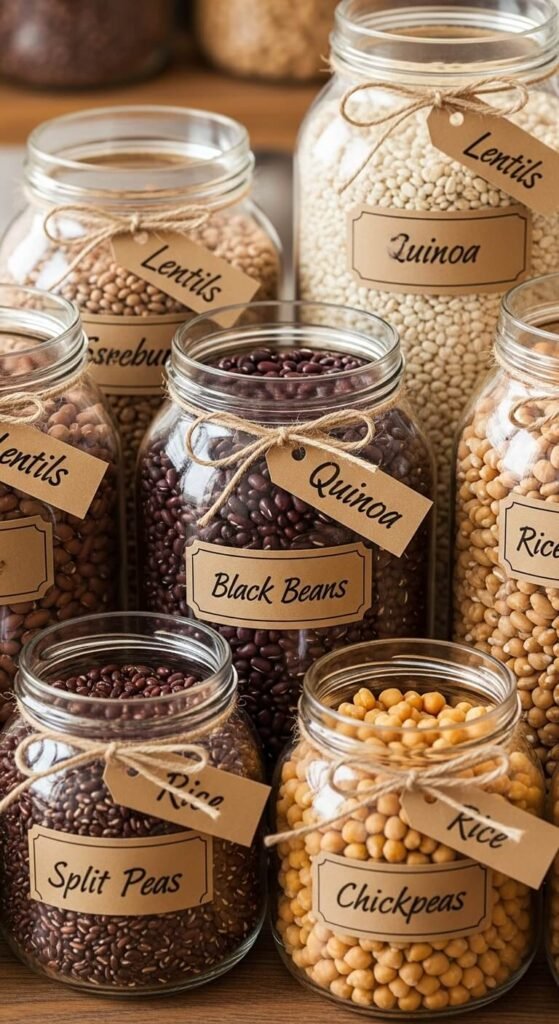
Create Beautiful Labels Without Spending a Fortune
Labels are what take your pantry from organized to Instagram-worthy. But you don’t need a fancy label maker or expensive vinyl stickers.
Budget-friendly labeling options:
- Printable labels: Use free Canva templates and print on adhesive paper from the dollar store
- Chalkboard labels: Dollar store chalkboard stickers and a white paint pen create a timeless look
- Masking tape and Sharpie: Simple, rustic, and completely free if you already have them
- Printed cardstock tags: Cut rectangles from cardstock, write with pretty handwriting, and attach with twine
Keep your labeling style consistent throughout the pantry for a cohesive, professional appearance.
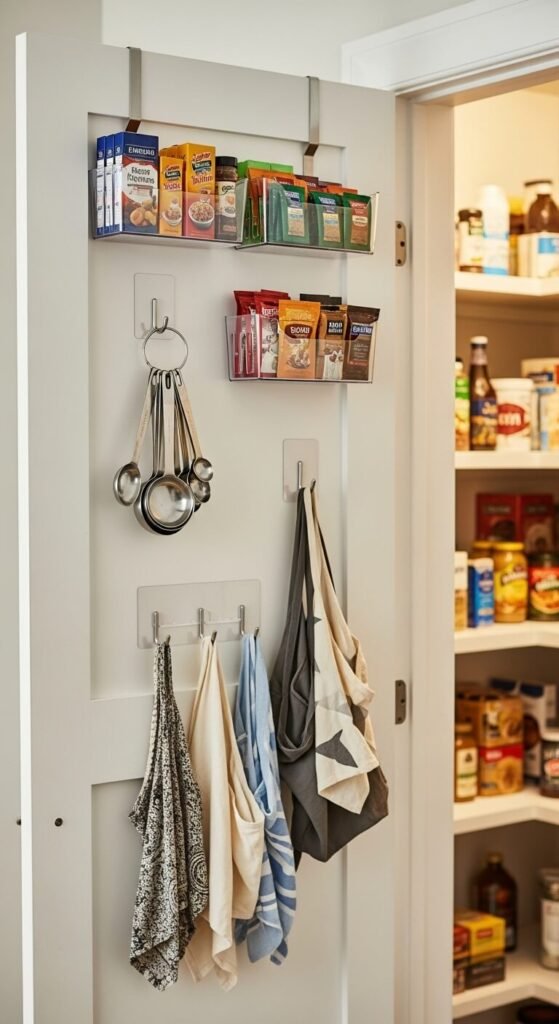
Maximize Vertical Space and Odd Corners
Don’t let any space go to waste. Use these tricks to maximize every inch:
Install adhesive hooks on the inside of your pantry door for measuring cups, reusable bags, or aprons. Stack cans using a simple DIY tiered organizer made from cardboard boxes. Use lazy Susans (dollar store finds!) in corners to make everything accessible and visually appealing.
Maintain Your Beautiful Pantry
The key to keeping your pantry Instagram-worthy is maintenance. Spend five minutes each week straightening items, wiping up spills, and returning things to their designated zones. When you grocery shop, immediately decant new items into your containers instead of letting packaging pile up.
Take a photo of your finished pantry and set it as your phone wallpaper—it’ll motivate you to keep it looking gorgeous!
Your dream pantry doesn’t require a dream budget. With creativity, patience, and these smart organizing strategies, you can create a space that’s both beautiful and functional. The best part? You’ll actually enjoy cooking and meal planning when you can see exactly what you have and everything has its place.
Ready to transform your pantry? Start this weekend and save this guide for reference! Your organized, budget-friendly, Instagram-worthy pantry is waiting.