Your kitchen is the heart of the home — but if your counters are cluttered and your cabinets are bursting at the seams, it can feel more chaotic than cozy. A kitchen island with built-in storage is one of the smartest upgrades you can make. It adds prep space, organizes your essentials, and gives your kitchen that polished, purposeful look you’ve been dreaming about.
The best part? You don’t need to be a master carpenter to pull it off.
Plan Your Island Before You Build
Before you pick up a single tool, spend time planning. This is where most DIY projects go right — or wrong.
Ask yourself:
- How much floor space do you have? A standard island needs at least 42–48 inches of clearance on all walkable sides.
- What will you store? Pots and pans, cookbooks, small appliances, and wine bottles all need different kinds of storage.
- Fixed or movable? A rolling island on locking casters is flexible and renter-friendly. A fixed island feels more built-in and permanent.
Sketch a rough layout on paper or use a free tool like SketchUp. Even a basic drawing helps you visualize proportions before you commit.
Choose the Right Base Structure
The foundation of your island determines how sturdy and functional it will be. You have a few solid options:
1. Repurposed Cabinet Bases Buy two or three base cabinets from IKEA or a home improvement store, join them together, and add a countertop. This is the most beginner-friendly approach and gives you instant drawer and door storage right out of the box.
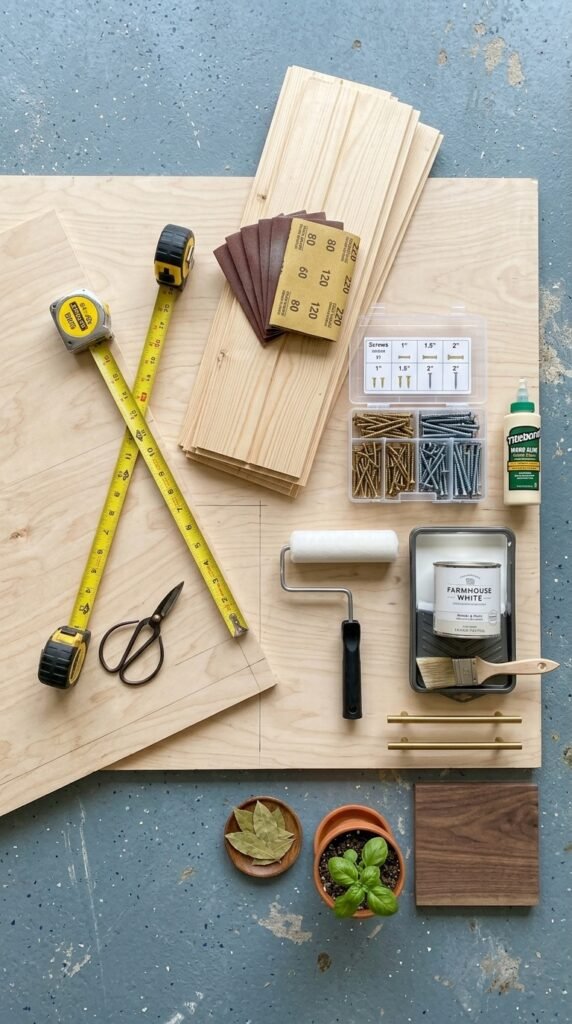
2. Build a Plywood Box Frame For a more custom look, build a simple box frame from 3/4-inch plywood. This method lets you control every dimension and is surprisingly affordable — a full island frame can cost under $150 in materials.
3. Repurpose Old Furniture A vintage dresser, a sturdy console table, or an old butcher block cart can be transformed into a charming island with some paint and new hardware. This is a great budget-friendly and eco-conscious option.
Add Smart Storage Features
This is where the magic happens. Think beyond basic shelves — design your island storage around how you actually cook and live.
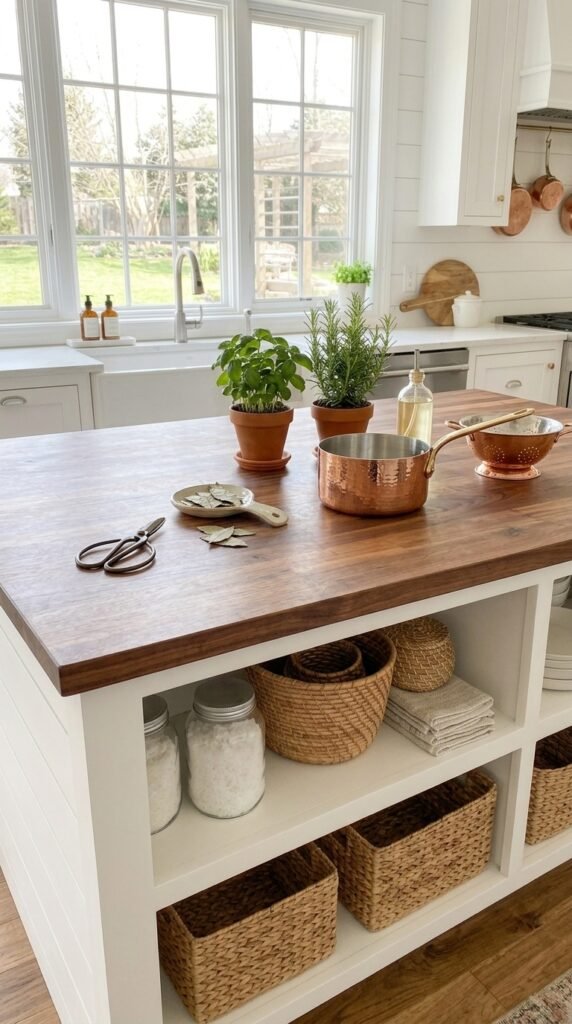
Open Shelving on One Side Lower open shelves are perfect for storing cookbooks, cutting boards, or a row of labeled baskets. They keep things accessible and add visual texture to the space.
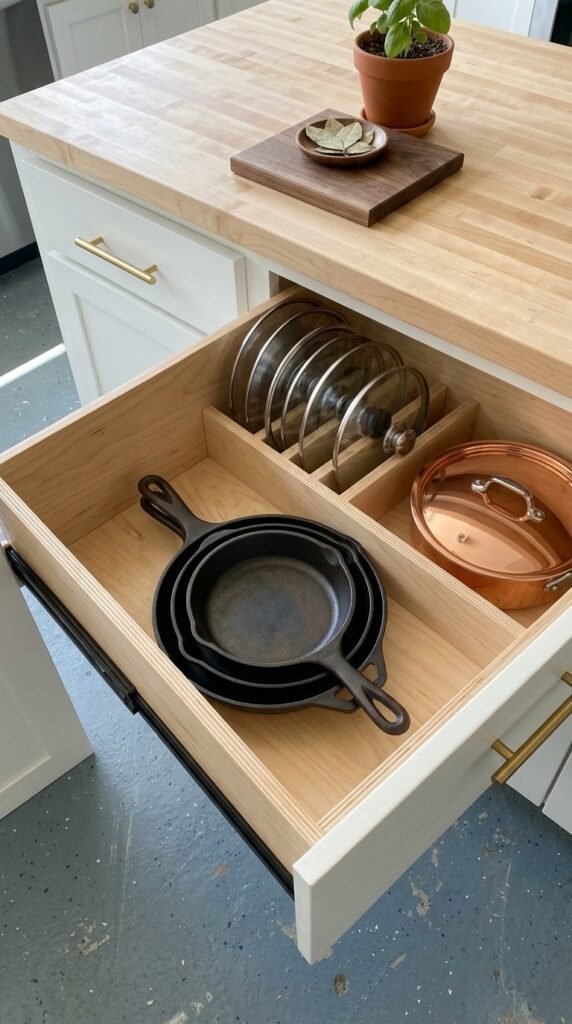
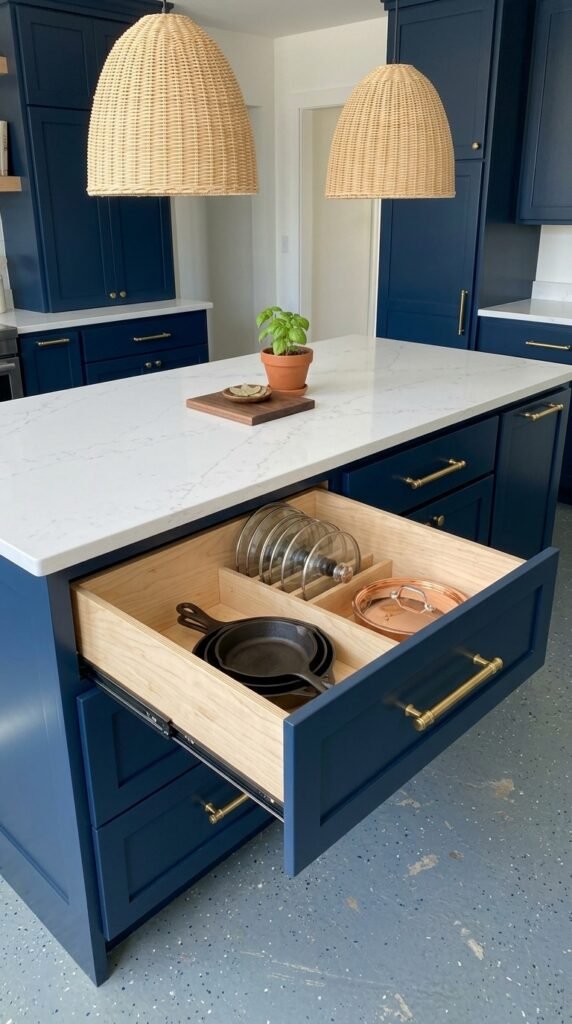
Deep Drawers for Pots and Pans Deep drawers beat cabinet doors every time for heavy cookware. You can see everything at a glance and pull it out without digging. Use soft-close drawer slides for a premium feel.
Pull-Out Trash and Recycling Hide your trash and recycling bins behind a cabinet door with a pull-out drawer insert. It keeps things tidy and frees up floor space nearby.
Wine Rack or Bottle Cubbies If you entertain, build a simple angled wine rack into one end of the island. It looks intentional, not afterthought-ish.
Hooks and Hanging Rails Mount a small rail along one side of the island for hanging utensils, towels, or small baskets. Maximum function, minimal footprint.
Finish It to Match Your Kitchen
Your island should look like it belongs — not like it was dragged in from the garage.
- Paint: Match your existing cabinetry or go bold with a contrasting color like navy, forest green, or matte black for a designer look.
- Countertop: Butcher block is warm and DIY-friendly. Quartz or granite remnants can be surprisingly affordable from local stone yards.
- Hardware: Swapping out drawer pulls and door handles is a small detail that makes a big visual impact. Mix metals thoughtfully — brushed brass or matte black are both trending right now.
- Legs or Toe Kicks: Add furniture-style legs to the corners for a more freestanding, custom feel, or install a simple painted toe kick for a built-in appearance.
Make It Work Harder With These Final Touches
Once your island is built and finished, optimize it with a few thoughtful extras:
- Add outlet strips inside a drawer or on the side panel for charging devices or powering small appliances.
- Use drawer dividers and organizers to keep utensils, spices, and wraps neatly separated.
- Install under-shelf lighting beneath the countertop for ambiance and task lighting at the same time.
- Label baskets and bins on open shelves so everyone in the household knows where things live.
Your Dream Kitchen Is Closer Than You Think
Building kitchen island storage doesn’t have to be a massive renovation project. With a solid plan, the right materials, and a few weekends of work, you can create a hardworking centerpiece that transforms how your kitchen looks and functions every single day.
Start small, stay organized, and build something you’re genuinely proud of.
Save this article for your next weekend project — and share it with anyone who’s been dreaming about a more functional kitchen!