That tangled pile of necklaces on your dresser? The earrings you can never find a matching pair for? There’s a beautiful, budget-friendly fix — and it’s probably leaning against a wall in your attic right now. Old picture frames are the secret weapon of every organized, Pinterest-worthy bedroom, and turning them into a jewelry holder takes less than an afternoon. No special skills required.
Why Picture Frames Make Perfect Jewelry Organizers
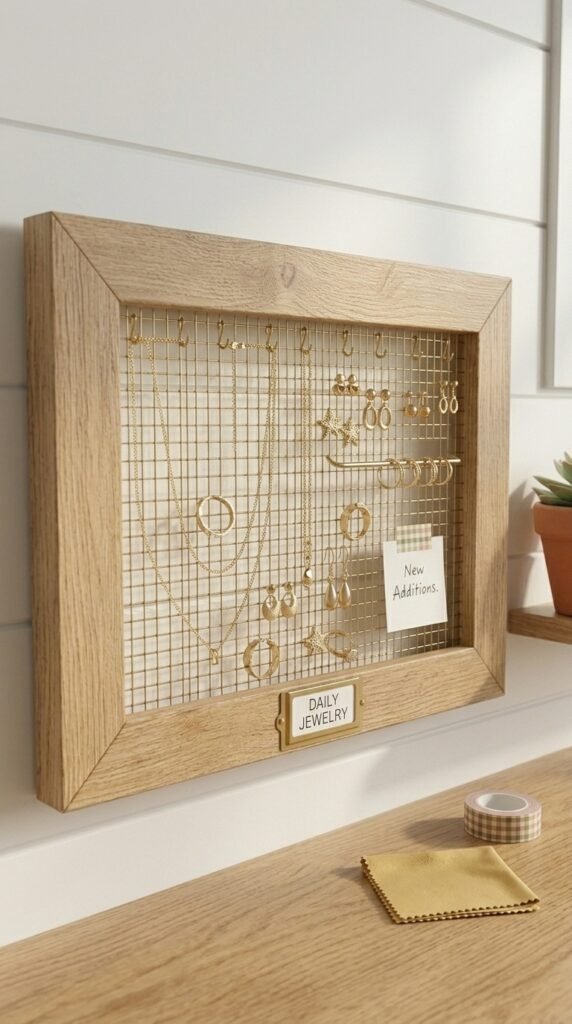
Before you run to buy an organizer, think about what a picture frame already is: a beautiful border, ready to hang. With a little hardware store magic, it becomes a functional display piece that keeps your jewelry visible, accessible, and — honestly — decorative.
- Cost: Nearly free if you already have frames
- Time: 1–2 hours from start to finish
- Skill level: Beginner-friendly
- Style: Totally customizable to your room
You can go boho with a driftwood frame, sleek with a black metal one, or cottage-core with a chippy painted vintage find. The frame sets the whole vibe.
What You’ll Need
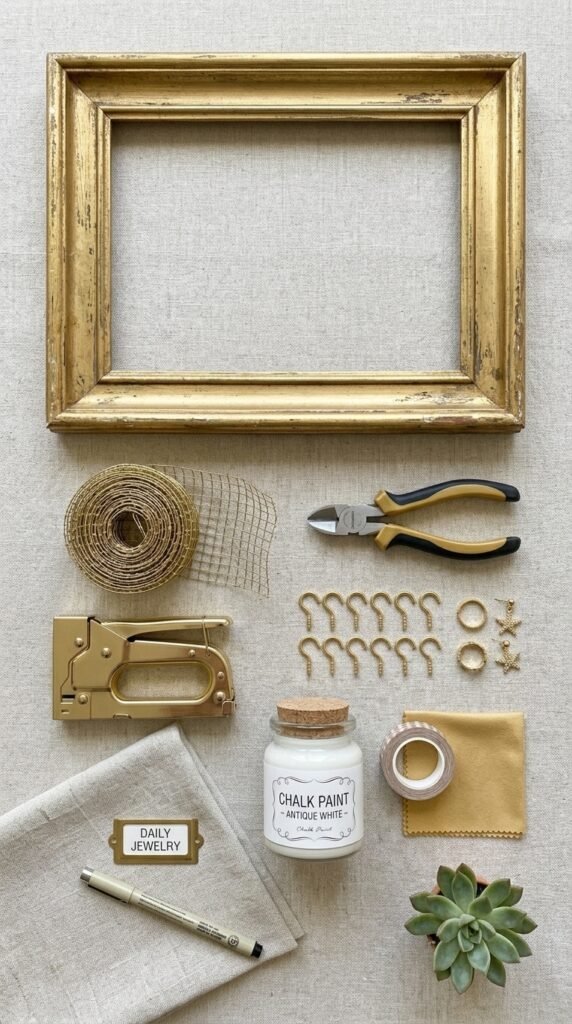
Gather these supplies before you start:
- An old picture frame (any size — larger frames hold more jewelry)
- Wire mesh, chicken wire, or decorative fabric (for the backing)
- Small cup hooks or S-hooks (for necklaces and bracelets)
- Staple gun or strong adhesive
- Sandpaper and paint (optional, for a refresh)
- Wire cutters (if using mesh)
- Hanging hardware (D-rings or sawtooth hangers)
Step 1: Prep and Paint Your Frame
Remove any glass or backing from the frame — you won’t need them. If the frame is looking tired, this is your chance to give it new life.
- Lightly sand rough spots
- Wipe clean with a damp cloth
- Apply chalk paint, spray paint, or leave it raw for a rustic look
- Let it dry fully before moving on
Pro tip: Two thin coats of paint look much better than one thick glob. Patience here pays off.
Step 2: Cut and Attach Your Backing
This is the functional heart of your jewelry holder. The backing is what your pieces will actually hang from.
For necklaces and bracelets: Use chicken wire or metal mesh — it’s sturdy, has natural gaps for hooks, and has an effortlessly rustic feel.
For earrings: Try a piece of fine mesh screen or even stretched lace fabric stapled to the back of the frame. The small holes are perfect for stud and drop earrings.
Cut your material about an inch larger than the frame opening on each side, pull it taut, and staple it firmly to the back of the frame. No wrinkles, no sag.

Step 3: Add Hooks for Necklaces
Screw small cup hooks into the bottom inner edge of the frame, spaced about 1.5–2 inches apart. These are perfect for hanging necklaces individually so they never tangle again.
You can also press small S-hooks through the wire mesh to create extra hanging points anywhere on the surface.
How many hooks? A standard 8×10 frame comfortably holds 4–6 necklaces. An 11×14 frame? Easily 8–10.
Step 4: Hang It Up
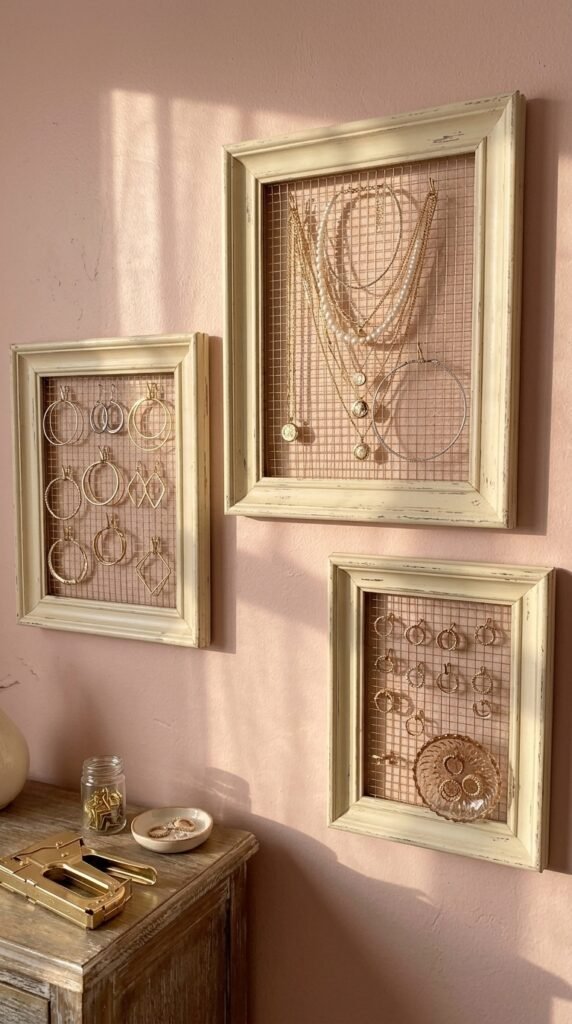
Attach D-ring hangers to the back of the frame — one on each side — then hang it on your wall just like art. For a gallery wall effect, group two or three frames together at different heights.
Make sure it’s level. A tilted jewelry frame is a jewelry avalanche waiting to happen.
Ways to Customize Your Jewelry Frame
Once you have the basic version down, the fun really begins:
- Add velvet ribbon along the bottom edge for rings to press into
- Paint the mesh with gold spray paint for a glam look
- Use a frame with ornate molding for a vintage vanity vibe
- Attach a small shelf below the frame for perfume bottles or ring dishes
- Mix materials — lace for earrings + wire for necklaces in one large frame
The Finished Result
You’ll end up with something that’s equal parts organizer and wall art — the kind of thing people notice and immediately ask, “Where did you get that?”
And the answer? “Oh, I made it.”
Save this idea for your next weekend project — and share it with a friend who’s drowning in tangled jewelry! Pin it, make it, and transform that cluttered dresser into a space you actually love getting ready in. ✨