Your dream closet doesn’t have to cost $5,000 or require a professional contractor. With the right plan, a few smart purchases, and a free weekend, you can build a closet system so polished and functional it’ll look like it came straight from a high-end showroom. Yes, really.
Whether you’re working with a tiny reach-in or a spacious walk-in, the secret is in the planning — not the price tag. Here’s exactly how to make it happen.
Step 1: Measure Everything (Twice)
Before you buy a single shelf bracket, grab a tape measure and get obsessive about your space.
- Measure the width, height, and depth of your closet
- Note any obstacles: light fixtures, outlets, door swings, or awkward corners
- Sketch a rough floor plan on paper or use a free tool like IKEA’s PAX planner or ClosetMaid’s design tool
Pro tip: Standard closet depth is 24 inches for hanging clothes. If yours is shallower, plan for folded storage and accessories instead.
Step 2: Audit Your Wardrobe Before You Design
This step is non-negotiable. Designing storage for clothes you don’t actually own (or wear) wastes money and space.
Sort everything into categories:
- Long hang – dresses, coats, jumpsuits
- Short hang – shirts, jackets, folded pants
- Folded – sweaters, jeans, tees
- Shoes – count every pair
- Accessories – belts, bags, jewelry
Once you know what you’re storing and how much, you can design a layout that fits your real life — not a Pinterest fantasy.

Step 3: Choose Your System Wisely
You have three main options, and each has a sweet spot:
1. Freestanding modular units (like IKEA PAX or The Container Store’s Elfa)
- Most flexible and DIY-friendly
- Easy to reconfigure as your needs change
- Great for renters
2. Wire shelving systems (ClosetMaid, Rubbermaid)
- Budget-friendly and durable
- Good airflow keeps clothes fresh
- Less polished-looking but highly functional
3. DIY built-ins using plywood or MDF
- Most custom look for the lowest price
- Requires basic woodworking skills and tools
- Ideal if you want that true “built-in” finish
For most people, modular systems hit the sweet spot between cost, flexibility, and visual impact.
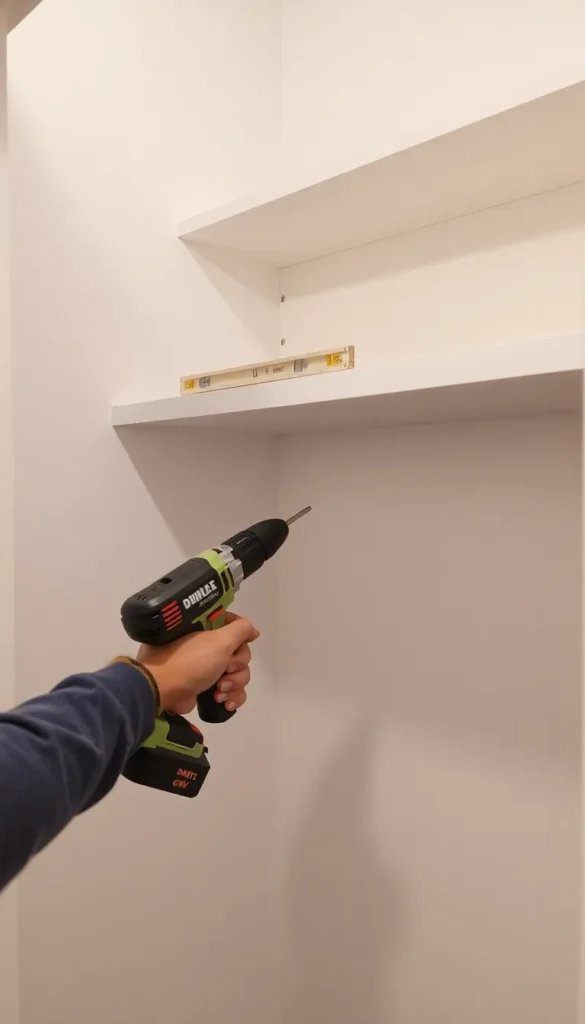
Step 4: Install Like a Pro
Once your system is chosen and delivered, installation day is where it all comes together.
- Always anchor to studs. Use a stud finder before drilling — especially for load-bearing shelves
- Start from the top down. Install upper hanging rods and shelves first, then work toward the floor
- Use a level religiously. Even a slight tilt looks terrible once clothes are hanging
- Leave breathing room. Don’t pack shelving edge-to-edge; visual white space makes everything look more intentional
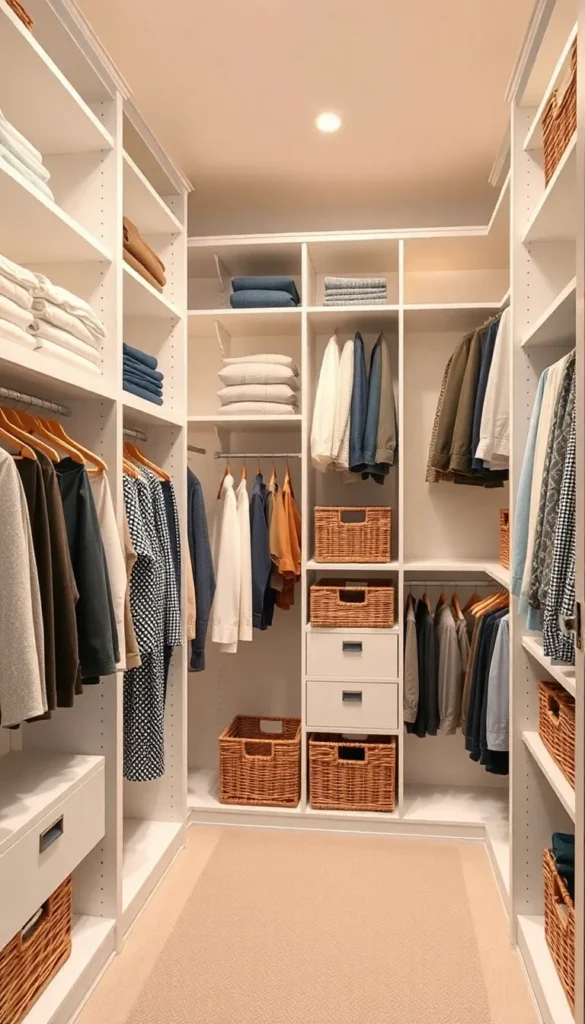
Step 5: Style It Like a Boutique
This is where your closet goes from functional to jaw-dropping.
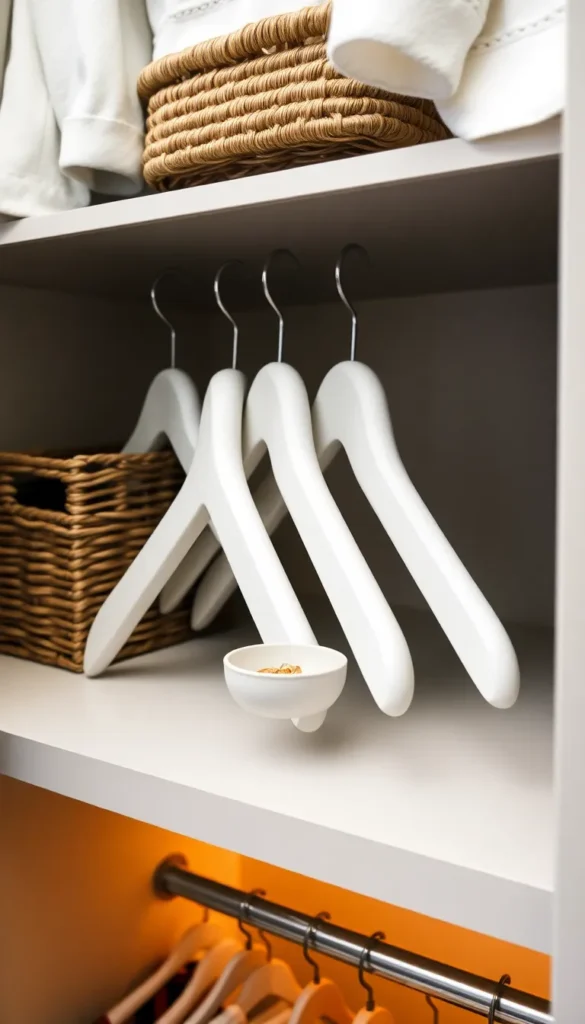
- Matching hangers — velvet slim hangers in one color instantly elevate the look
- Labeled bins and baskets — woven or linen boxes for folded items add texture and hide clutter
- Consistent color-coding — arrange clothes by color within each category for visual harmony
- Lighting — plug-in LED strip lights or puck lights under shelves make everything look luxurious (and help you actually find things)
- A small mirror or tray — for jewelry or a perfume display that feels boutique-worthy
The Result: A Closet That Works For You
A well-built closet system isn’t just about aesthetics — it’s about starting every morning with less stress, less searching, and more clarity. When everything has a home, getting dressed becomes genuinely enjoyable.
The best part? A DIY closet system using modular components typically costs $300–$800, compared to $3,000–$10,000 for custom installations. Same look. A fraction of the price.
Ready to transform your space? Save this guide, sketch out your measurements this week, and start with just one section if a full overhaul feels overwhelming. Small progress is still progress — and your dream closet is closer than you think. 🗂️