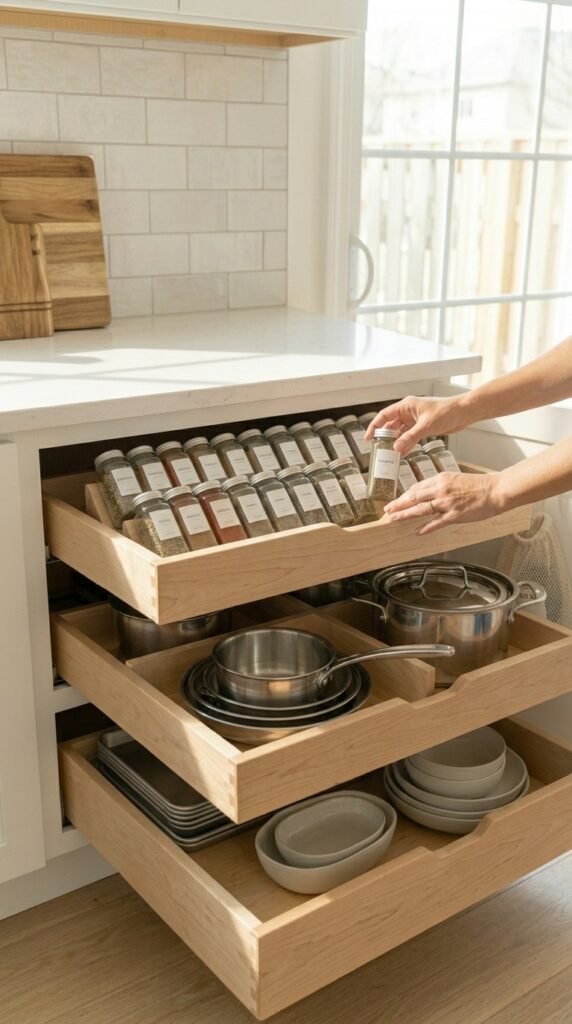
If you’ve ever crouched on the kitchen floor, arm buried in the back of a cabinet searching for that one pot lid, you already know the frustration. Pull-out drawers are the simple, satisfying fix — and the best part? You don’t need to be a master carpenter to build them. With a free weekend, a few basic tools, and this guide, you can transform even the most chaotic cabinet into an organized dream.
What You’ll Need Before You Start
No fancy workshop required. Here’s a straightforward list of tools and materials to gather:
Tools:
- Tape measure
- Circular saw or miter saw
- Drill with drill bits
- Screwdriver (or drill with screwdriver bit)
- Clamps
- Level
- Pencil and square
Materials:
- ¾-inch plywood or birch boards (for the drawer box)
- Drawer slides (full-extension, ball-bearing slides work best)
- Wood screws (1¼-inch and 2-inch)
- Wood glue
- Sandpaper (120 and 220 grit)
- Optional: drawer pulls or handles
Pro tip: Before buying anything, measure your cabinet interior carefully — width, depth, and height. Write it down. Then measure again. Seriously.
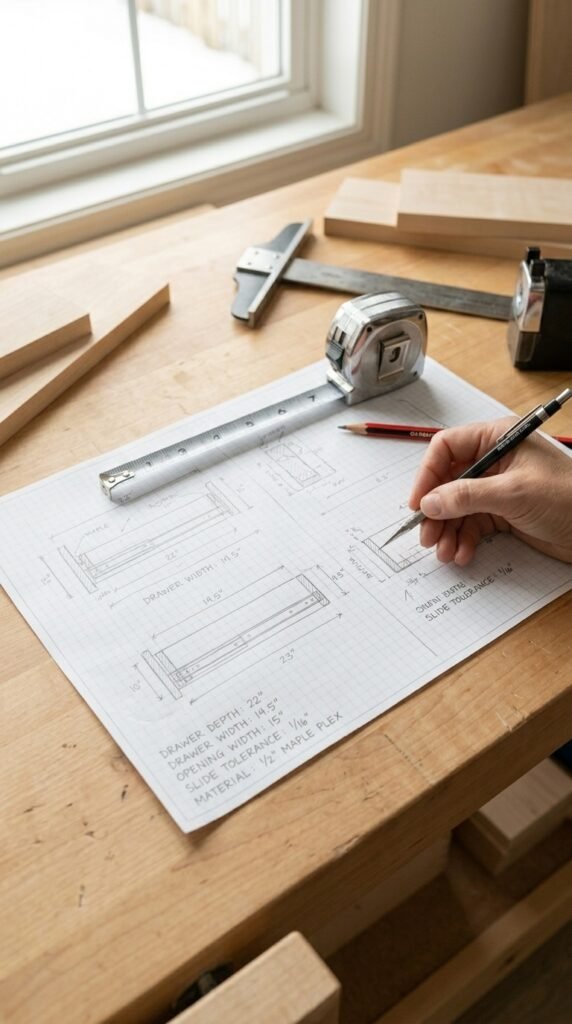
Step 1 — Measure and Plan Your Drawer Dimensions
This is the most important step, so don’t rush it.
- Width: Subtract 1 inch from the cabinet’s interior width to account for the drawer slides (½ inch per side).
- Depth: Match the cabinet’s depth, leaving about 1 inch of clearance at the back.
- Height: Decide how tall you want the drawer. For a single pull-out, 4–6 inches works well for most kitchen cabinets.
Sketch it out on paper before cutting anything. A rough diagram saves a lot of wasted wood.
Step 2 — Cut Your Drawer Pieces
Once you have your measurements, it’s time to cut. A standard drawer box has five pieces:
- Two side panels — the full depth of the drawer
- One front panel — the full width
- One back panel — the same width as the front
- One bottom panel — fits inside all four walls
Use your circular saw or miter saw to make clean, straight cuts. Sand all edges after cutting with 120-grit sandpaper so everything fits together smoothly.
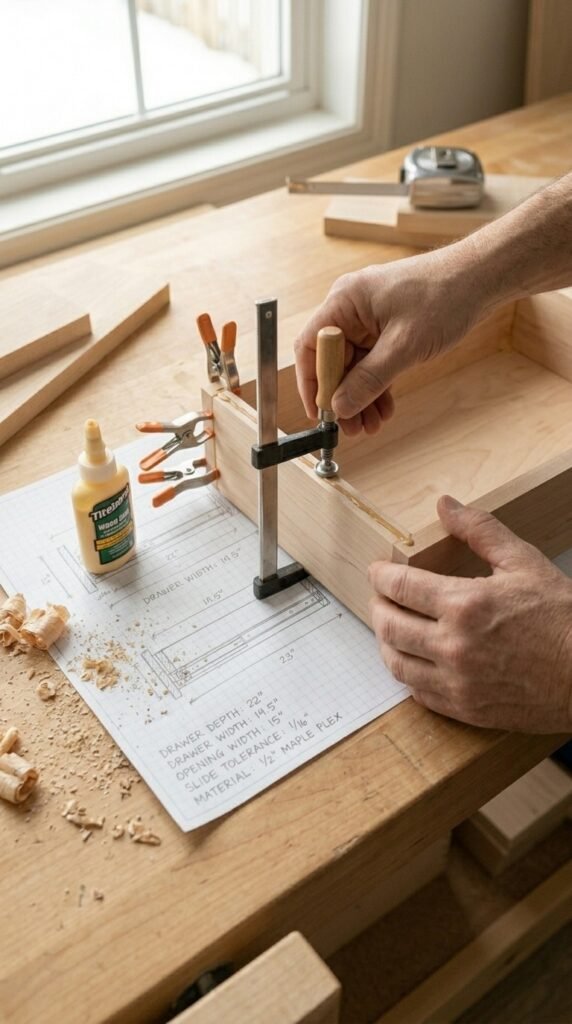
Step 3 — Assemble the Drawer Box
This is where it starts looking like a real drawer!
- Apply a thin bead of wood glue along the edges before screwing the pieces together.
- Attach the side panels to the front and back panels using 1¼-inch screws.
- Slide the bottom panel into place and secure it from underneath.
- Use a square to confirm all corners are at 90 degrees before the glue dries — a twisted drawer won’t slide properly.
- Let glue dry for at least 30 minutes before moving on.
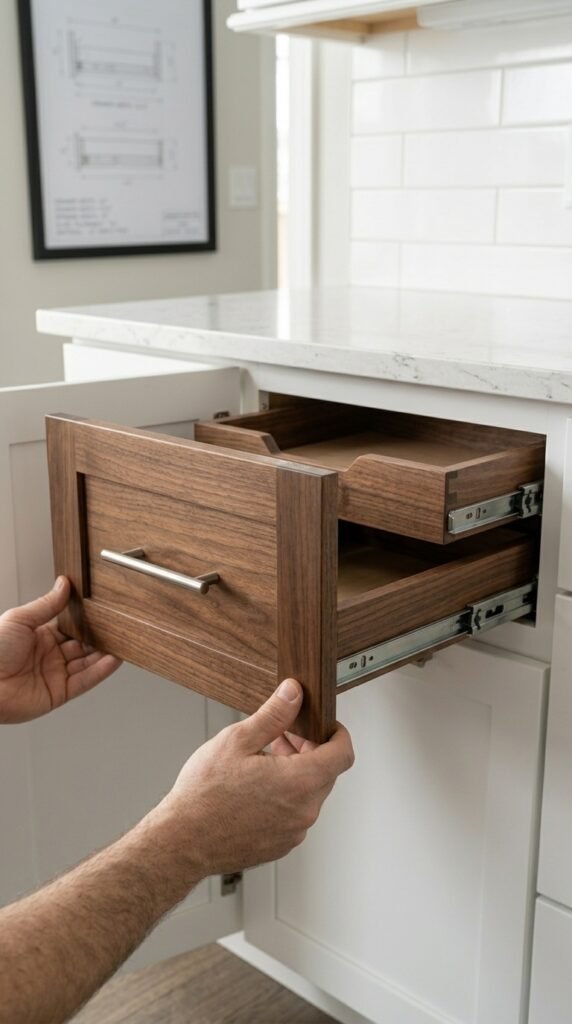
Step 4 — Install the Drawer Slides
Drawer slides are sold in pairs and come with all the hardware you need. Here’s how to install them cleanly:
- Mark the slide height inside your cabinet using a level and pencil. Both sides must be perfectly even or the drawer will tilt.
- Screw the cabinet-side rail to the inside wall of the cabinet.
- Attach the drawer-side rail to the outside of your drawer box.
- Test the fit by sliding the drawer in and out before finalizing all screws.
Full-extension ball-bearing slides are worth the few extra dollars — they glide smoothly and let you access the full depth of the drawer effortlessly.
Step 5 — Finish and Install
You’re almost done! A few finishing touches make all the difference:
- Sand the drawer box with 220-grit sandpaper for a smooth finish.
- Apply paint, stain, or a clear wood sealant to protect the wood.
- Add a drawer pull or handle to the front panel — it makes the drawer easier to grab and looks polished.
- Slide the completed drawer into its rails and test it several times.
Tips to Make Your Drawers Last
- Always use full-extension slides — cheap slides wear out fast and stick over time.
- Pre-drill all screw holes to prevent the wood from splitting.
- If you’re building multiple drawers in one cabinet, space them evenly and double-check clearance between each one.
- For heavy items like cast iron pans, go with ¾-inch plywood — thinner boards can sag under weight.
The Payoff Is Totally Worth It
Building pull-out drawers for your cabinets is one of those satisfying DIY projects that makes you wonder why you didn’t do it sooner. The process is forgiving for beginners, the materials are affordable, and the end result is something you’ll use every single day.
Whether you’re tackling a cluttered kitchen, a messy bathroom vanity, or a chaotic garage cabinet — this project is 100% beginner-friendly and endlessly customizable.
Save this guide, pin it for your next weekend project, and get ready to finally stop losing things in the back of your cabinets!