You open the spice drawer, and it’s a full avalanche. Paprika rolls into the back corner, you accidentally grab cinnamon instead of cumin — again — and by the time you’ve found the garlic powder, whatever was on the stove has gone from “perfectly golden” to “call for pizza.” Sound familiar? Here’s the thing: store-bought spice organizers are designed to fit some imaginary average drawer that probably isn’t yours. But a custom-built spice drawer insert? It fits your drawer, holds your bottles, and costs less than $20 to make. No fancy tools, no woodworking experience required.
Measure First — Everything Else Follows
This is the step most people want to skip, and it’s the one that matters most. A custom insert lives or dies by accurate measurements.
Grab a tape measure and write down:
- Interior width of the drawer (measure at both the front and back — drawers aren’t always perfectly square)
- Interior depth (front to back)
- Interior height — measure from the bottom of the drawer to the underside of the drawer above it when closed, not just the drawer walls
- Your spice bottle diameter — measure your actual bottles, since jar sizes vary wildly by brand
The height measurement is critical. Your finished insert plus your tallest spice jar needs to clear the drawer above it when you slide it closed. A quarter-inch mistake here means the whole thing won’t close.
Pro tip: Measure three times, cut once. Write the numbers down immediately — don’t trust your memory for this part.
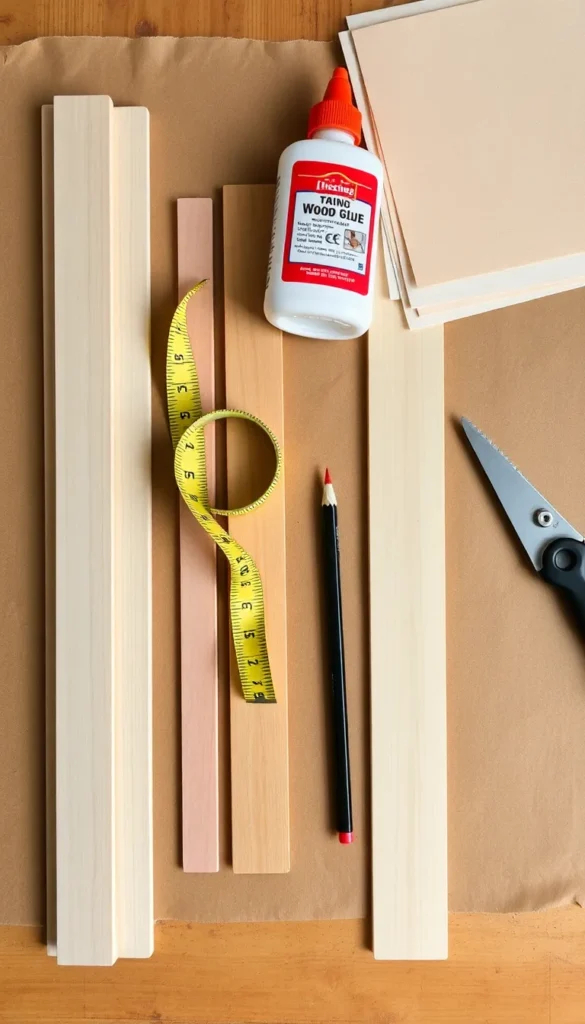
Gather Your Materials
The beauty of this project is how simple the supply list is. You have two main route options depending on your tool comfort level:
Option A — Balsa or craft wood (beginner-friendly):
- Thin hobby wood boards (available at any craft store, usually ¼” thick)
- Wood glue
- A sharp craft knife or small hand saw
- Sandpaper (220 grit)
- Optional: wood stain or paint for a finished look
Option B — Plywood or pine (sturdier, longer-lasting):
- ¼” or ⅜” plywood or pine boards cut to size at the hardware store
- Wood glue and finishing nails or a brad nailer
- Sandpaper
- Optional: food-safe sealant or polyurethane finish
If you choose Option B, most hardware stores will make straight cuts for free or a small fee. Just bring your measurements written out clearly — this saves a ton of time and makes the project genuinely beginner-accessible.
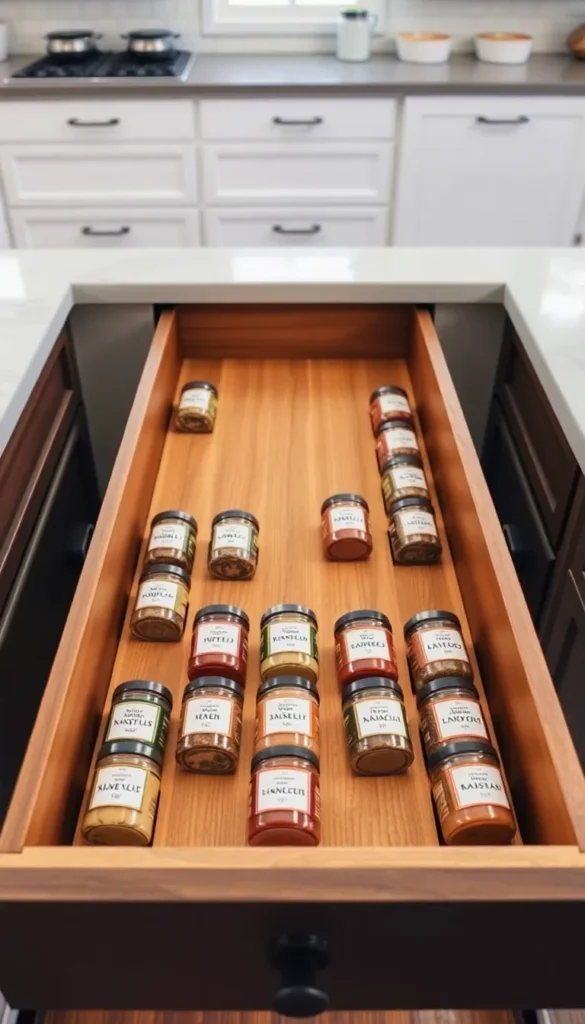
Design Your Row Layout
Before cutting anything, sketch out how many rows you want and at what angle. The most functional spice drawer inserts use angled rows so jars tilt slightly toward you, making labels easy to read at a glance.
A simple and effective layout:
- Two rows for a shallow drawer (under 12″ deep)
- Three rows for a medium drawer (12″–18″ deep)
- Four rows for a deep drawer (18″+ deep)
Each row is essentially a shallow tray with a front lip that holds the jars at a slight tilt. The standard tilt angle is about 15–20 degrees, which you can achieve by making the front wall of each tray slightly taller than the back wall.
Sketch this out on paper first. Knowing exactly how many pieces you need to cut before you start saves enormous confusion at the workbench.
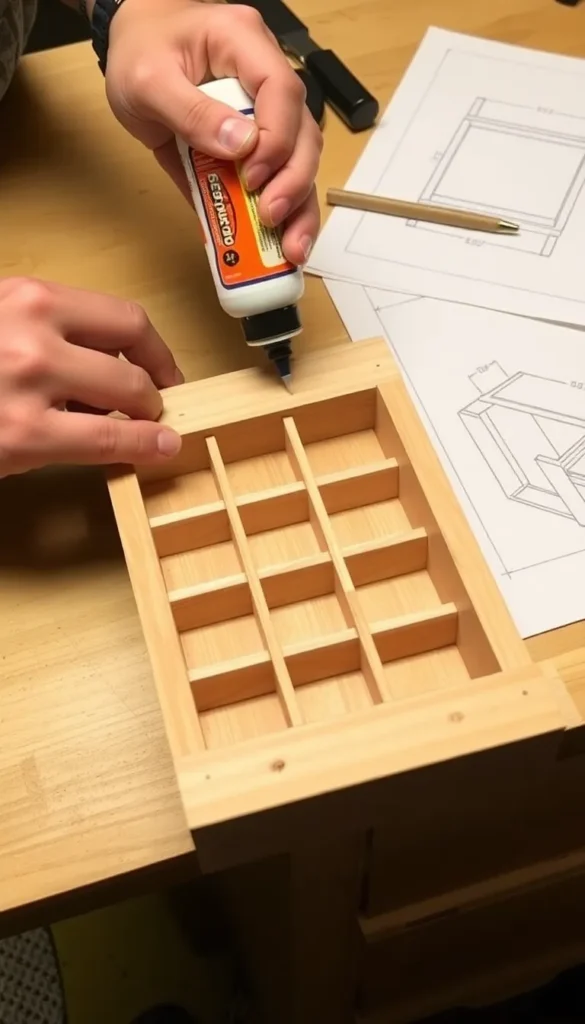
Cut and Assemble
With your design sketched and your wood ready, it’s time to build. Here’s the basic assembly sequence:
- Cut your base piece to the exact interior dimensions of your drawer — this is the foundation everything attaches to
- Cut your row dividers — horizontal pieces that run the full width of the drawer, creating the front lip of each row
- Cut side walls for each row if you want the jars contained laterally (optional but helpful for small jars)
- Dry-fit everything first — lay all pieces in place without glue to confirm the fit before committing
- Glue and clamp — apply wood glue to all joints, press firmly, and use binder clips or clamps to hold while drying (at least one hour, overnight is better)
- Sand all edges smooth once dry — no one wants a splinter while reaching for the oregano
Test the fit in your drawer before adding any finish. It should slide in snugly but lift out easily for cleaning.
Finish and Label for a Polished Look
The finishing touches are what take this from “DIY project” to “looks like it came from a kitchen showroom.”
Finishing options:
- Light wood stain: Brings out the grain beautifully and adds warmth
- White or black paint: Crisp and modern, great for contemporary kitchens
- Food-safe mineral oil: Quick, natural, no color change — just a subtle sheen
Once your insert is finished and dry, transfer your spices into uniform jars if you haven’t already — it makes a dramatic visual difference. Then label every lid or front-facing cap so you can read everything at a glance when the drawer is open.

The Custom Difference Is Real
A store-bought insert that almost fits will always frustrate you. One built to your exact dimensions — your drawer, your bottles, your kitchen — just works. And once you’ve cooked with a perfectly organized spice drawer for a week, you’ll wonder how you ever managed the avalanche version.
The whole project takes an afternoon, costs under $20, and lasts for years.
Save this article to your kitchen organization board and share it with the home cook in your life who deserves a drawer that finally makes sense! 🌿