You’re already five minutes late and your keys have vanished — again. You’ve checked the counter, the couch cushions, your jacket pockets, and somehow the freezer (don’t ask). Sound familiar? A wall-mounted key holder is one of those tiny home upgrades that sounds almost too simple, but genuinely changes your daily routine. One hook. One spot. Zero chaos.
The best part? You can make one yourself in an afternoon — no advanced woodworking skills required. Whether you want something sleek and modern or warm and rustic, here’s a complete guide to building a DIY wall key holder that’s both functional and seriously stylish.
Step 1: Decide on Your Style and Size
Before you grab any tools, spend five minutes thinking about the vibe you’re going for. Your key holder should feel like it belongs in your entryway, not like an afterthought.
A few popular styles to consider:
- Rustic wood with vintage hooks — warm, farmhouse-friendly, pairs beautifully with shiplap or natural textures
- Painted MDF with labeled hooks — clean, minimal, great for modern or Scandinavian interiors
- Repurposed items — an old ruler, a piece of driftwood, or a reclaimed pallet board all make charming bases
- Floating shelf with hooks underneath — adds bonus storage for sunglasses, mail, or a small dish for coins
As for size: a board between 10 and 18 inches wide is ideal for most households. Factor in how many keys you need to hang — a family of four needs at least four hooks, plus one or two spares.
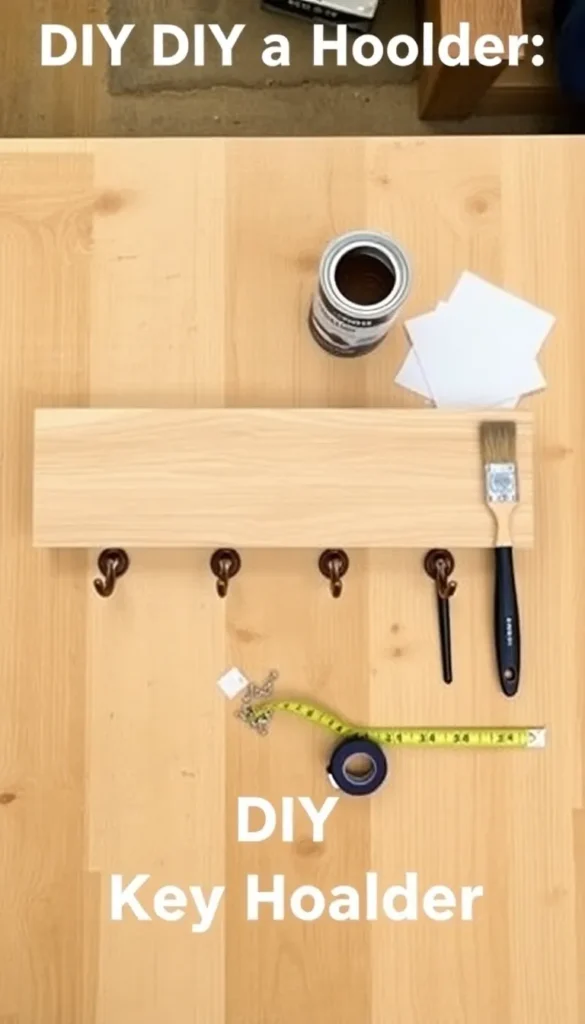
Step 2: Gather Your Materials
Here’s what you’ll need for a basic DIY wood key holder:
- A wood board — pine, oak, or reclaimed wood all work well (1-inch thickness is sturdy without being bulky)
- Hooks — cup hooks, S-hooks, or decorative coat hooks depending on your style
- Sandpaper — 120-grit for smoothing, 220-grit for a final polish
- Wood stain, paint, or sealant — to finish and protect the wood
- Wall anchors and screws — for a secure, lasting mount
- A drill and screwdriver
- A level — so your finished piece hangs perfectly straight
Optional extras that elevate the look: a wood-burning pen for labeling hooks, small brass numbers, or a coat of chalk paint for a matte finish.
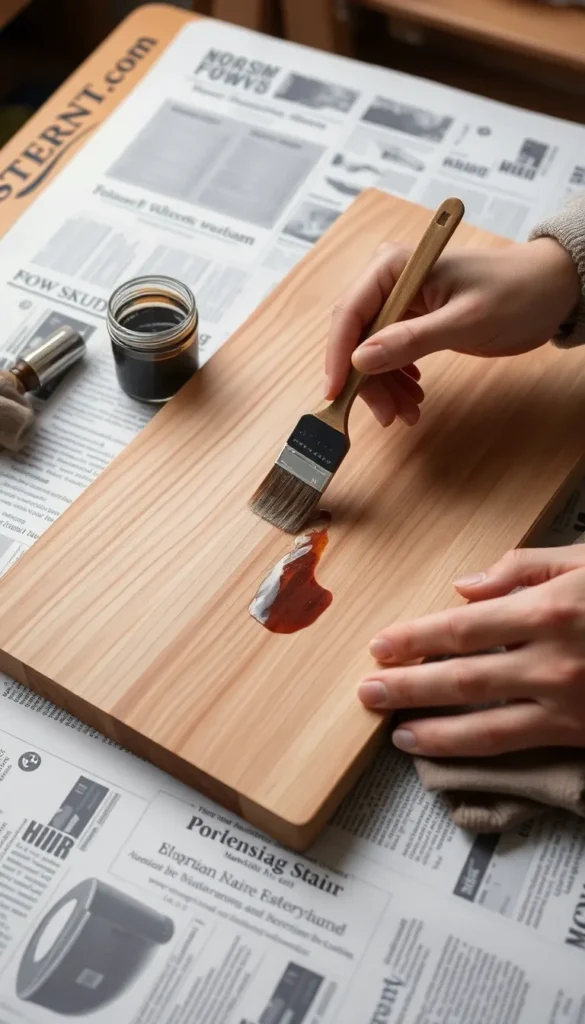
Step 3: Cut, Sand, and Finish the Board
If your lumber yard hasn’t already cut the board to size, a simple handsaw or circular saw will do the job in under a minute.
Once you have your piece:
- Sand the surface starting with 120-grit to remove rough spots, then finish with 220-grit for a silky-smooth feel
- Wipe away dust with a slightly damp cloth and let it dry completely
- Apply your finish — brush on wood stain in long, even strokes and wipe off the excess after a few minutes, or apply two thin coats of paint, letting each dry fully
- Seal it with a clear matte or satin topcoat for durability — especially important near a front door where humidity and handling are constant
This is also the moment to add any personalization: burn your family name into the wood, stencil a quote, or add a small chalkboard section for notes.
Step 4: Attach the Hooks
Once your board is fully dry, it’s time to add the hooks — and spacing matters more than you’d think.
- Mark hook placements with a pencil, spacing them 2 to 3 inches apart so keys don’t tangle
- Pre-drill small pilot holes to prevent the wood from splitting
- Screw in your hooks by hand — cup hooks twist in easily, while decorative hooks usually require a small screw
- Give each hook a gentle tug to confirm it’s secure before mounting
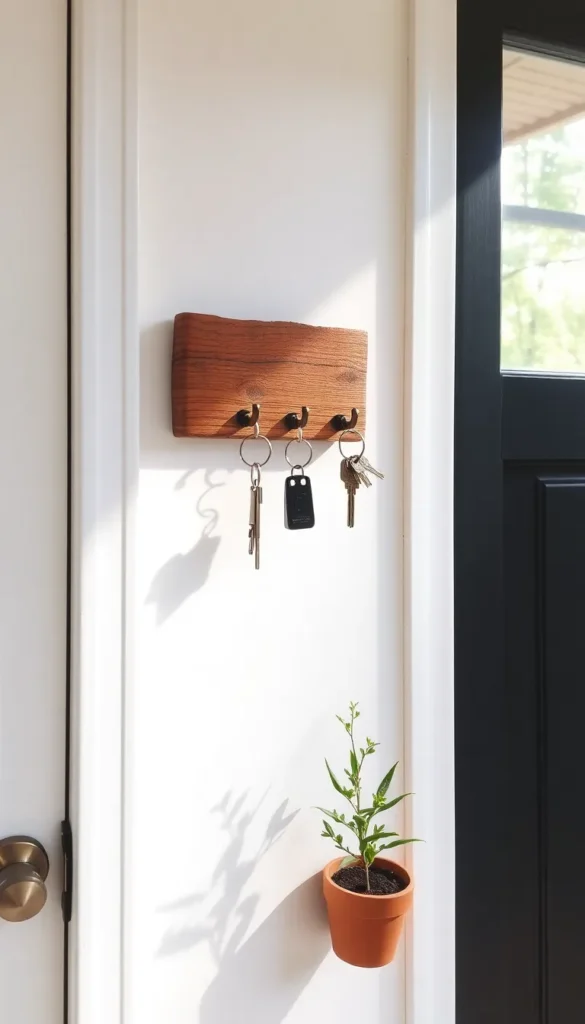
Step 5: Mount It to the Wall
This is the step where patience pays off. A crooked key holder will bother you every single day.
- Use a stud finder to locate a wall stud, or use drywall anchors rated for at least 20 lbs
- Hold the board against the wall and use a level to get it perfectly straight
- Mark your drill points, pre-drill, and screw in firmly
- Step back and admire — you’re done

One Small Project, One Big Daily Win
It sounds almost too simple, but a dedicated spot for your keys is one of the highest-impact changes you can make to your morning routine. No more frantic searching. No more “has anyone seen my keys?” echoing through the house at 8am.
A DIY key holder takes about two hours to make, costs under $20 in materials, and lasts for years. That’s a pretty incredible return on a Sunday afternoon project.
Save this guide and make it your next weekend build — your future self (the one who’s never late again) will be very, very grateful. 🔑