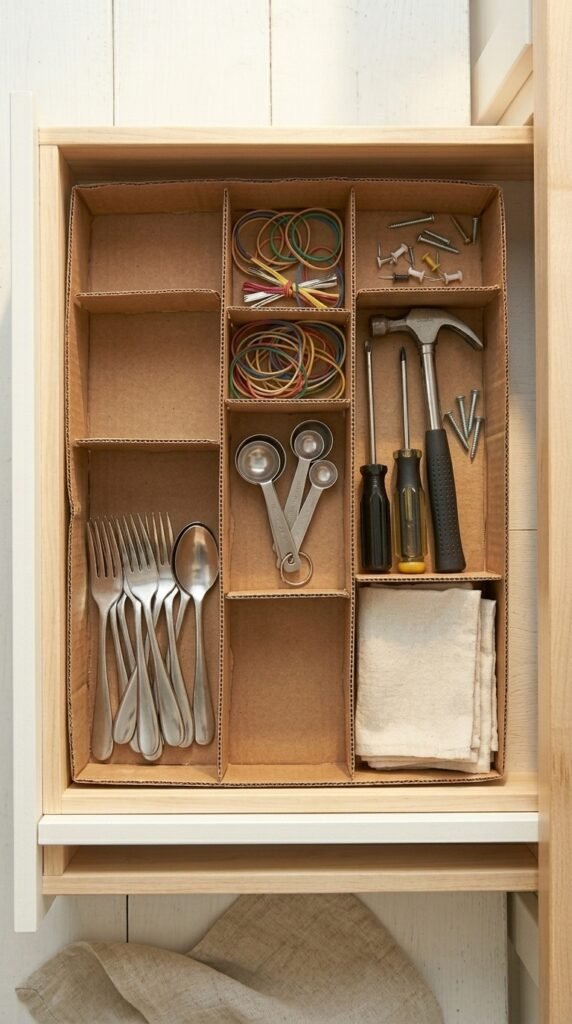
Your junk drawer is judging you. We all have one — that chaotic abyss of tangled earphones, mystery batteries, and pens that may or may not work. The good news? You don’t need to buy fancy organizers to fix it. All you need is cardboard, a few basic supplies, and less than 30 minutes.
These DIY cardboard drawer organizers are budget-friendly, surprisingly sturdy, and fully customizable to fit any drawer in your home. Let’s get into it.
What You’ll Need
No special tools required — you probably already have everything on hand:
- Cardboard — cereal boxes, shipping boxes, or shoeboxes all work perfectly
- Scissors or a craft knife
- A ruler and pencil
- Hot glue gun (or strong tape as a backup)
- Decorative paper or washi tape (optional, but it makes them look so cute)
That’s it. Seriously.
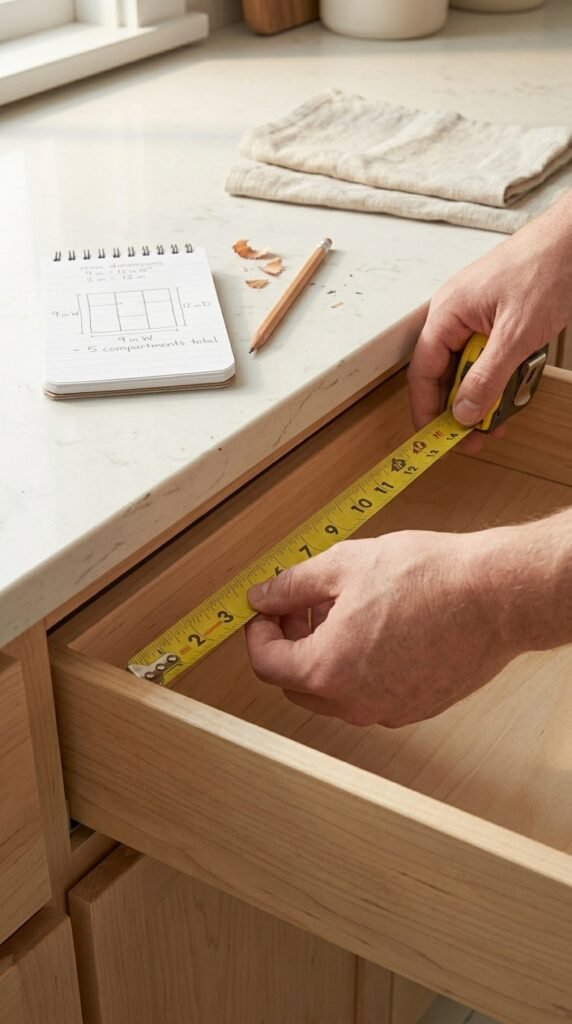
Step 1: Measure Your Drawer
Before you cut a single piece of cardboard, grab your ruler and measure the inside of your drawer — the length, width, and depth.
Write these numbers down. This is the most important step because a perfectly sized organizer fits snugly without sliding around every time you open the drawer.
- Decide how many sections you want
- Sketch a rough grid on paper (even a napkin sketch works)
- Think about what will go in each section — small items like paper clips need tiny cells, while pens need longer slots
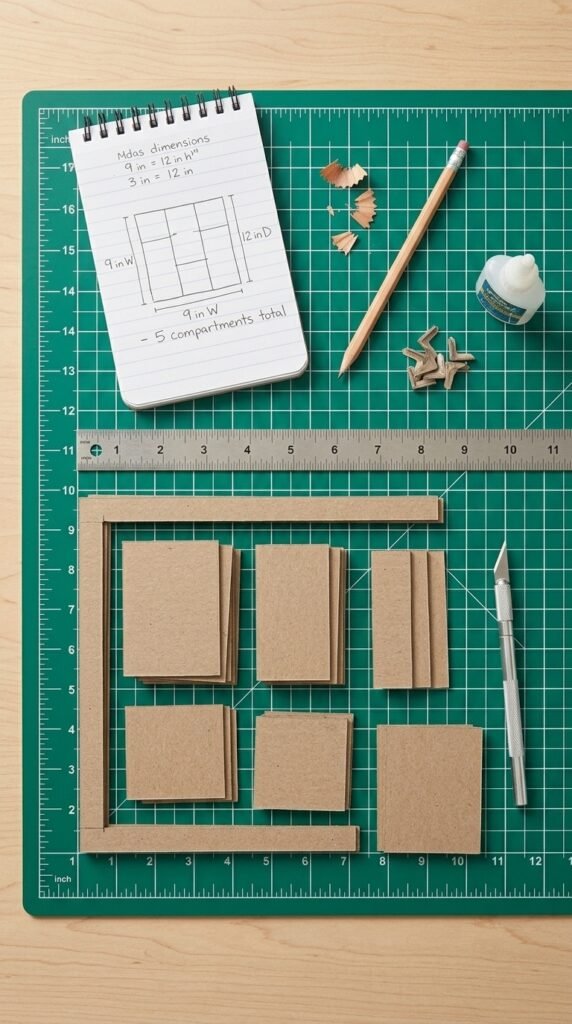
Step 2: Cut Your Cardboard Pieces
Now it’s cutting time. Use your measurements to cut:
- Two long side pieces — these run the full length of your organizer
- Two short end pieces — these close off the ends
- Interior dividers — as many as you need for your sections
Pro tip: Use the corrugated side of cardboard for the walls — it’s much sturdier than the flat outer layer alone. Double up two pieces and glue them together for extra strength if your drawer holds heavy items.
Score the cardboard lightly with your craft knife before bending — this gives you clean, crisp edges every time.
Step 3: Assemble the Box
This is where it all comes together — and it goes faster than you think.
- Hot glue the two long pieces to the two short end pieces to form the outer rectangle
- Hold each joint for about 10 seconds until the glue sets
- Once the outer frame is solid, glue your interior dividers in place at your desired intervals
Don’t have a hot glue gun? Strong double-sided tape or even packing tape works in a pinch. It won’t be quite as sturdy, but it’s more than enough for a sock drawer or bathroom cabinet.
Let the whole thing sit flat for 2–3 minutes before testing it.
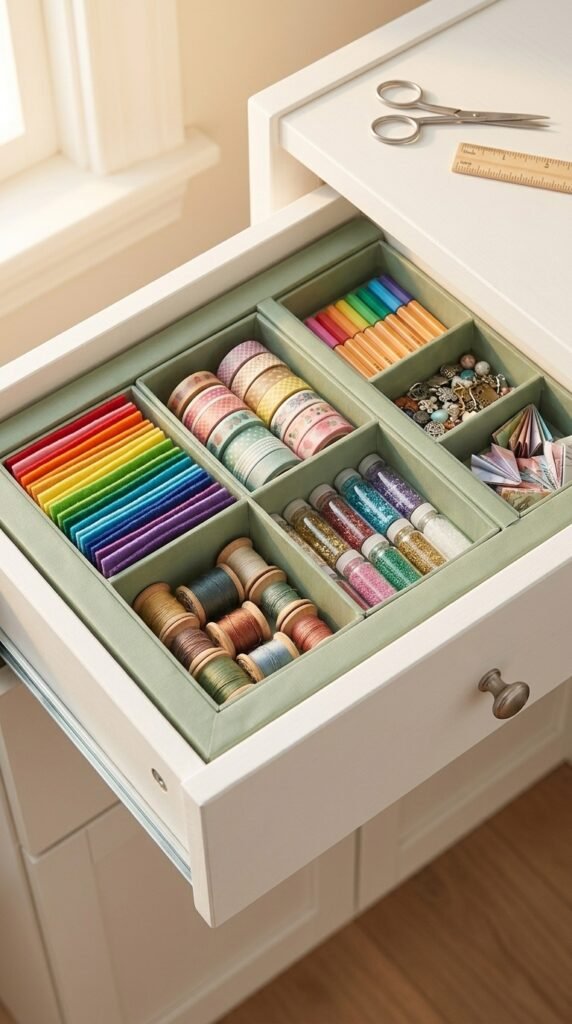
Step 4: Make It Pretty (Optional but Worth It)
This is the fun part. Plain cardboard works, but a few finishing touches take your organizer from “functional” to “I made this and I’m proud of it.”
- Wrap sections in kraft paper for a clean, neutral look
- Use patterned washi tape along the edges for a pop of color
- Try contact paper with a marble or linen print for a high-end feel
- Paint the inside with a coat of acrylic paint in a color that matches your space
Tips for Making Them Last
- Seal with Mod Podge if your drawer will hold anything slightly damp (like in a bathroom)
- Make multiples — once you have the sizing down, you can crank out a whole set in one sitting
- Label your sections with a small tag or a strip of washi tape and a marker
Your Drawers Will Never Be the Same
The best part about this project isn’t just the organized drawer — it’s the fact that you made something useful out of something you would have recycled anyway. That’s a win on every level.
Once you start, you won’t stop at one drawer. Fair warning.
Pin this for later and tackle a different drawer every weekend — your future self will thank you!