Your walls are prime real estate — and blank space is wasted potential. Whether you’re drowning in mail, tangled in keys, or just tired of a cluttered entryway, a DIY wall organizer can fix all of that and look stunning doing it. The best part? You don’t need to be a craftsperson to pull this off. With a few materials and a free afternoon, you can build something that’s genuinely Pinterest-worthy.
What You’ll Need Before You Start
Gather your supplies first — nothing derails a project faster than a mid-craft hardware run. Here’s the basic list:
- A wooden board or frame (pine, plywood, or even a thrifted picture frame works great)
- Small baskets, metal mesh, or fabric pouches for holding items
- Hooks or pegboard hardware for keys and bags
- Paint, stain, or wallpaper to decorate your base
- Sandpaper (120–220 grit)
- A drill, screws, and wall anchors
- Command strips (if you’re renting or avoiding wall damage)
- Hot glue gun for attaching lightweight elements
You can keep this budget-friendly by shopping at dollar stores, thrift shops, or even repurposing items you already have at home.
Step 1: Plan Your Layout and Purpose
Before touching a single tool, ask yourself: What does this organizer actually need to do?
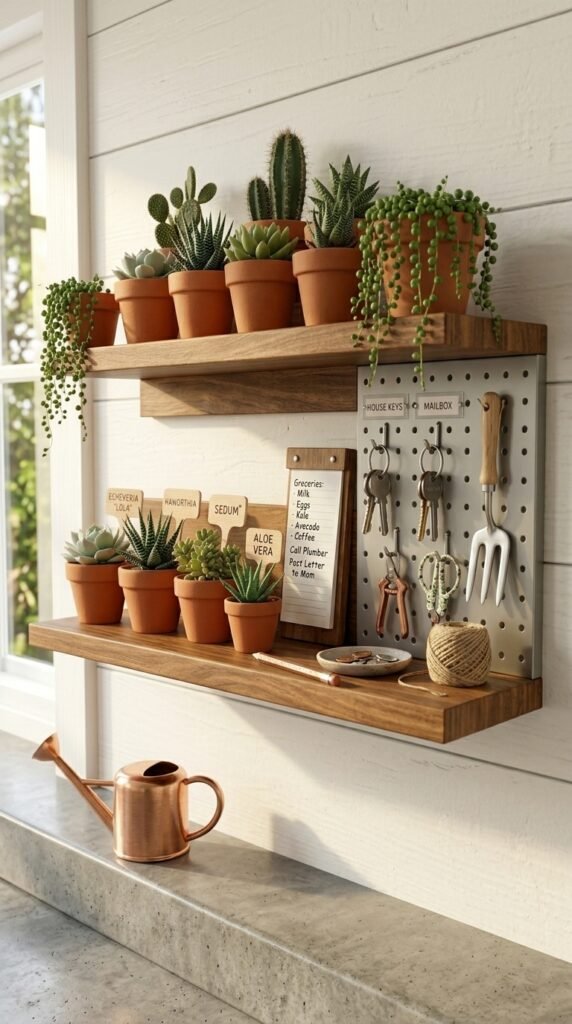
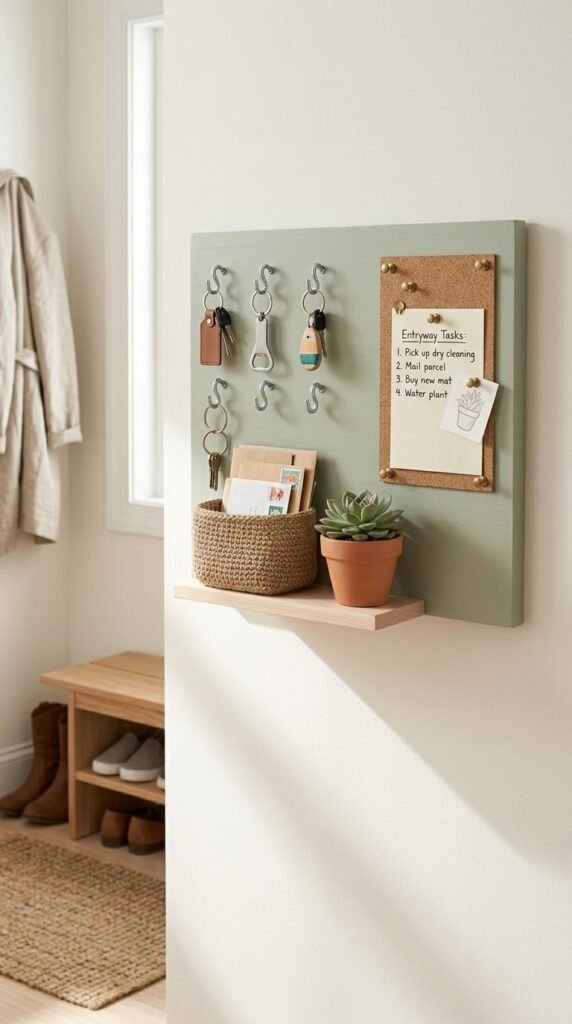
A mudroom organizer needs hooks for bags, a spot for shoes, and maybe a mail slot. A home office organizer needs pen holders, a corkboard section, and paper trays. A bathroom organizer needs hooks for towels and small shelves for products.
Sketch a rough layout on paper — nothing fancy, just boxes and lines. Decide how many “zones” you need and what each one holds. This step saves you from rebuilding halfway through.

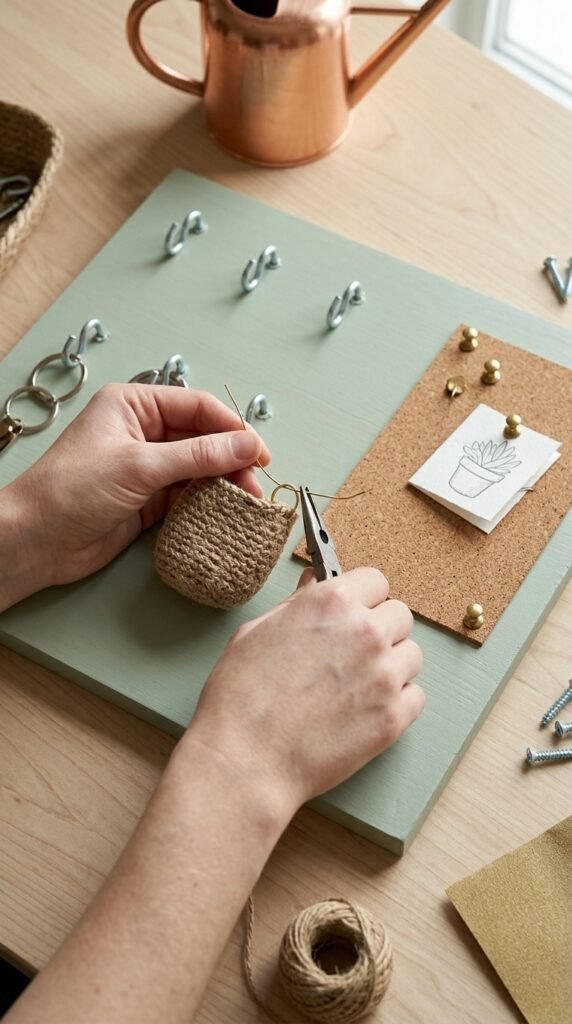
Step 2: Prep and Decorate Your Base Board
Sand your wooden board smooth, wiping away dust with a damp cloth. Now comes the fun part — making it yours.
Some ideas to style your base:
- Paint it in a matte neutral (white, sage green, terracotta) for a modern look
- Stain it with a light wood stain for that warm, Scandi-style vibe
- Cover a section with peel-and-stick wallpaper or fabric for a pop of pattern
- Burn a design into the wood with a woodburning tool for a rustic touch
Let everything dry completely before moving on. This is non-negotiable — wet paint plus baskets equals smudged regrets.
Step 3: Attach Your Storage Elements
Now assemble the functional pieces. Work from top to bottom and largest to smallest:
- Affix hooks first — drill them directly into the board for durability, or use adhesive hooks for a lighter-duty option.
- Mount shelves or ledges — small floating shelves can be attached to the board with screws before the whole piece goes on the wall.
- Attach baskets or bins — use zip ties, wire, or hot glue depending on the weight. Wire mesh baskets look incredible and hold surprisingly well.
- Add a corkboard or chalkboard section — glue a pre-cut piece directly onto the board for notes and reminders.
- Tuck in greenery — a small air plant or faux eucalyptus sprig instantly elevates the whole thing.
Step 4: Mount It on the Wall
This step intimidates people, but it’s straightforward with the right prep.
- Find studs using a stud finder or the knock-test method.
- Use anchors if you can’t hit a stud — they hold far more weight than bare drywall screws.
- Level it before marking your drill holes (a small bubble level is worth every penny).
- For renters: large Command strips rated for the weight of your organizer work beautifully on smooth, painted walls.
Once it’s up, step back and make sure it’s straight. Then load it up!
Tips to Keep It Looking Good Long-Term
A pretty organizer stays pretty only if it stays organized. A few habits help:
- One in, one out rule — for every item added, remove something that doesn’t belong.
- Label your sections so everyone in the household knows what goes where.
- Swap decor seasonally — change the greenery, swap a print, or repaint a section to keep things fresh.
- Wipe it down weekly — a 30-second dust with a microfiber cloth keeps it looking brand new.
The Takeaway
A wall organizer isn’t just a storage solution — it’s a daily mood-setter. Walking past a beautiful, functional wall display every morning genuinely changes how you feel about your space. And building it yourself means it fits exactly what you need, in exactly your style.
Pin this guide, grab your supplies this weekend, and make something you’ll actually love looking at. Your walls — and your sanity — will thank you. 📌