There’s a special kind of frustration that strikes when you’re ready to garden — sun is out, soil is calling — and you spend the first twenty minutes just finding your trowel. It’s buried under a hose, tangled in netting, and somehow sharing a corner with a bag of fertilizer from three seasons ago. Sound familiar? A well-organized garden shed or garage doesn’t just save time. It makes you want to get out there and garden more. Here’s how to build a system that keeps every tool exactly where it should be, season after season.
Step 1: Start With a Full Clear-Out
You cannot organize around clutter. Before any system goes in, everything comes out. Pull every tool, pot, bag, and mystery item out of your shed or garage and lay it all somewhere visible — a driveway or lawn works perfectly.
As you sort through everything, be genuinely honest:
- Is it still functional? Rusted, broken, or missing-handled tools don’t deserve storage space — they deserve the bin or a trip to a metal recycler
- Have I used this in the last two seasons? Specialty tools you never reach for can be donated or sold
- Do I have duplicates? Three trowels, two pairs of the same shears — keep the best, release the rest
- Is it consumable and still good? Check fertilizer, pesticides, and seed packets for expiration dates and viability
What you’re left with after the clear-out is your actual working tool collection — and organizing that is a completely manageable task.
Step 2: Sort by Frequency of Use and Tool Type
Not all tools belong at the same level of accessibility. The key to a great organization system is making sure the things you reach for most are the easiest to grab.
Categorize your tools into three groups:
Daily or weekly use:
- Hand trowels, pruners, garden scissors
- Gloves and kneeling pads
- Watering cans and hose nozzles
Seasonal or regular use:
- Spades, forks, rakes, hoes
- Wheelbarrow
- Loppers and long-handled pruners
Occasional or once-a-year use:
- Aerators, post-hole diggers, specialized equipment
- Bulb planters, frost covers, irrigation parts
- Spare pots and seed trays
The first group should live at arm’s reach. The second group should be clearly visible and accessible. The third can live on higher shelves or in back corners — it just needs to be findable.
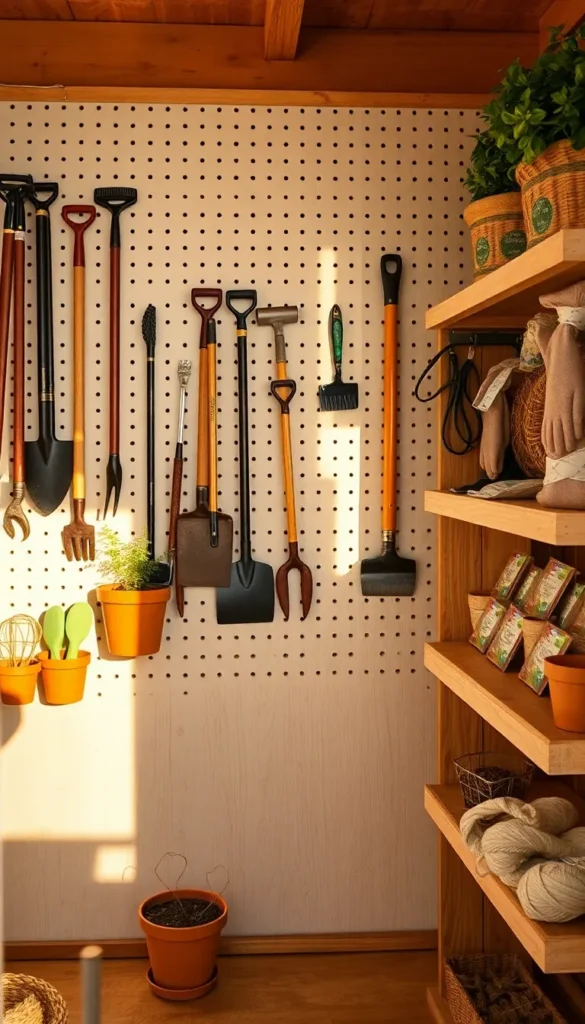
Step 3: Conquer Long-Handled Tools With Wall Storage
Long-handled tools — rakes, spades, forks, hoes, brooms — are the most space-hungry items in any shed and the most likely to end up in a chaotic pile in the corner. Wall storage solves this completely.
The best wall storage options for long tools:
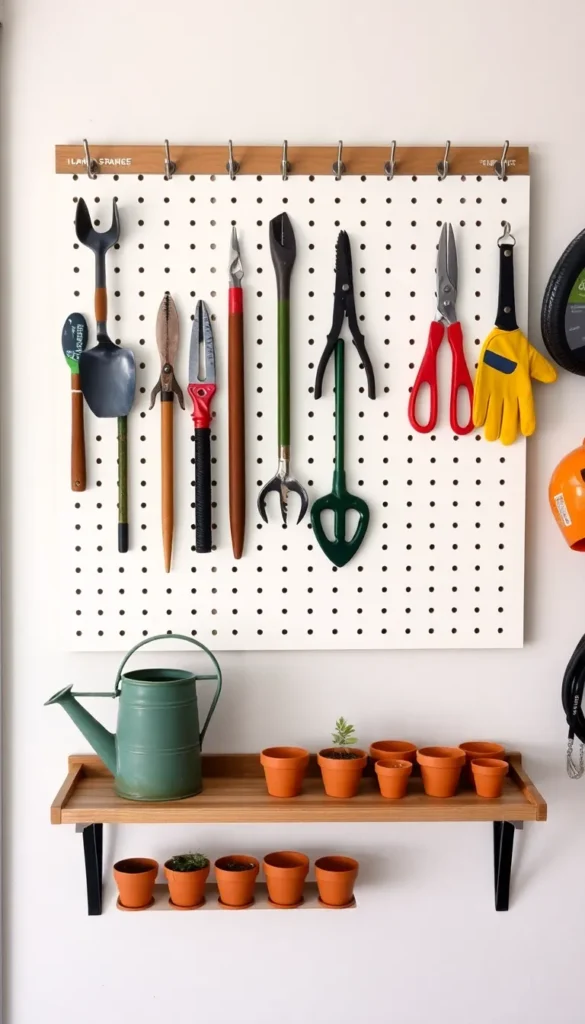
- Pegboard with heavy-duty hooks — the most flexible system; hooks rearrange as your collection changes
- Wall-mounted tool rack strips — spring-loaded clamps grip handles of all sizes; install a row and hang tools vertically
- DIY wooden dowel rack — drill angled dowels into a wall-mounted board; tools lean in and stay put
- Repurposed wooden pallets — mount a pallet flat on the wall and use the slat gaps to store handles horizontally
Space tools slightly apart so you can grab one without displacing the others. This single change alone transforms how a shed feels and functions.
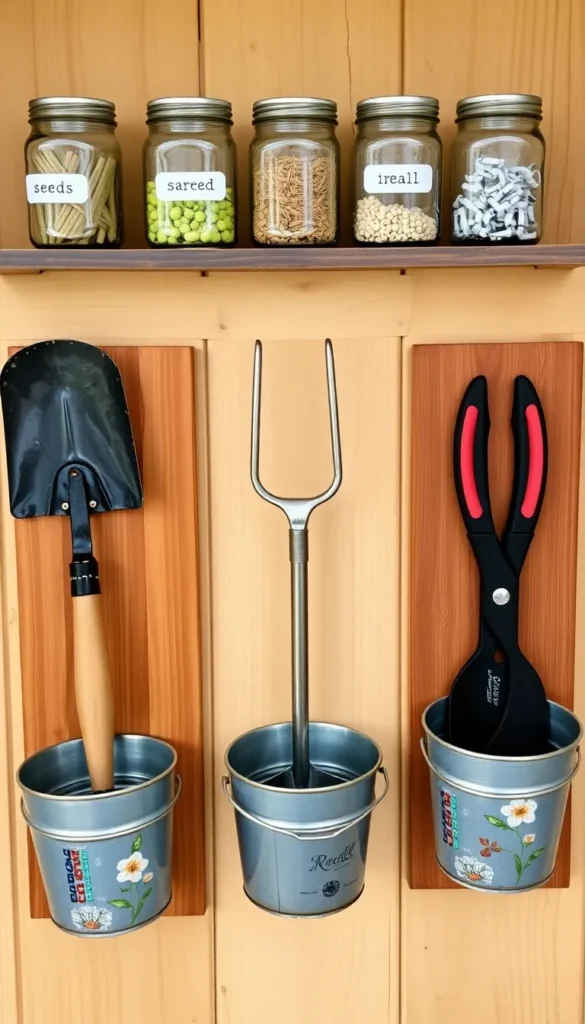
Step 4: Create Zones for Small Tools and Supplies
Hand tools and supplies need their own dedicated zone — a spot where every small item has a home and nothing gets lost at the bottom of a bag.
Brilliant storage ideas for small tools and supplies:
- Terracotta pots or galvanized buckets — group hand tools upright by type; beautiful and completely functional
- Wall-mounted wire baskets — perfect for gloves, ties, plant labels, and seed packets
- A pegboard section with small bins — attach labeled bins for clips, twist ties, batteries, and small spare parts
- A magnetic strip — mounts on the wall and holds small metal tools, scissors, and spare keys
- A repurposed spice rack or shallow shelf — ideal for organizing seed packets alphabetically or by season
The goal is that nothing small lives in a pile or a general “junk” container. Every category gets its own spot.
Step 5: Store Chemicals and Fertilizers Safely
Garden chemicals — pesticides, herbicides, fertilizers, and concentrated feeds — need dedicated, safe storage that keeps them contained, labeled, and away from children and pets.
Key rules for chemical storage:
- Always store in original containers with original labels intact
- Keep on a dedicated shelf separate from tools — never mixed in with general supplies
- Store at consistent temperatures — extreme heat or cold can degrade effectiveness or create safety risks
- Keep a small plastic bin to corral bottles so spills are contained
- Dispose of expired products properly — check your local council or municipality for chemical disposal days rather than pouring down drains
A high shelf with a simple child-proof latch is the gold standard for households with young children or curious pets.
Step 6: Maintain It With One Simple End-of-Session Habit
The most organized shed deteriorates quickly without one non-negotiable rule: every tool goes back to its designated spot after every use.
It sounds obvious, but it’s the only thing that makes the difference between a system that lasts years and one that collapses after a few weeks.
To make it easier:
- Clean tools before returning them — knock off soil, wipe blades, hang dry before storing to prevent rust
- Keep a small wire brush and cloth near the door for a quick wipe-down before tools go back
- Do a 5-minute shed reset at the end of every gardening session — tools back, gloves hung, supplies returned

Your Best Gardening Season Starts With an Organized Shed
When your tools are easy to find, clean, and ready to use, the barrier to getting out into the garden drops dramatically. Fewer frustrating searches, more actual growing — that’s the real reward of a properly organized tool system.
Save this guide and schedule your shed clear-out for this weekend. A few focused hours now means every single gardening session from here on starts off on the right foot.