Your makeup collection deserves more than a cluttered drawer or a tangled pile of brushes. Getting your beauty products organized does not have to cost a lot of money. In fact, some of the most satisfying setups are built with dollar store finds, thrifted pieces, and a little weekend effort. Whether you have a tiny bathroom shelf or a full vanity, these DIY makeup organization ideas will help you turn your space into something that actually works for you — and looks amazing doing it.
1. Repurpose a Cutlery Tray for Drawer Organization
[Image Prompt: An open bathroom drawer viewed from above, showing a wooden cutlery tray with compartments neatly holding lipsticks, eyeliners, small palettes, and lip liners. Shot in bright overhead light on a white bathroom counter with a high-end mirrorless camera, crisp detail, no text visible.]
A simple kitchen cutlery tray fits perfectly inside most bathroom drawers. Each slot holds a different product category — lipsticks in one, eyeliners in another. It takes five minutes to set up. You can find these trays at any dollar store or thrift shop for under $3. No drilling, no gluing, no fuss. Just drop it in and start sorting. This is one of the easiest ways to go from chaos to clean without spending real money.
2. Use a Spice Rack as a Nail Polish Display
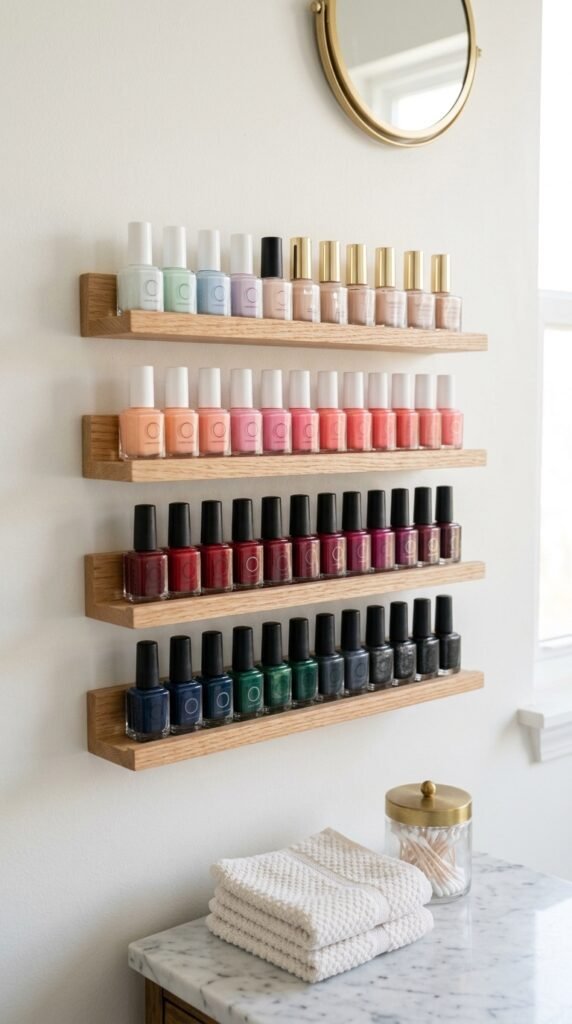
A wall-mounted spice rack from a kitchen store doubles as a perfect nail polish display. Mount it on a bathroom wall or the inside of a cabinet door. The tiered shelves keep every bottle visible and easy to grab. You can find spice racks at discount stores for $5–$10. Sort your polishes by color family for an organized, rainbow-style display that looks intentional. This is a small project that makes a big visual difference.
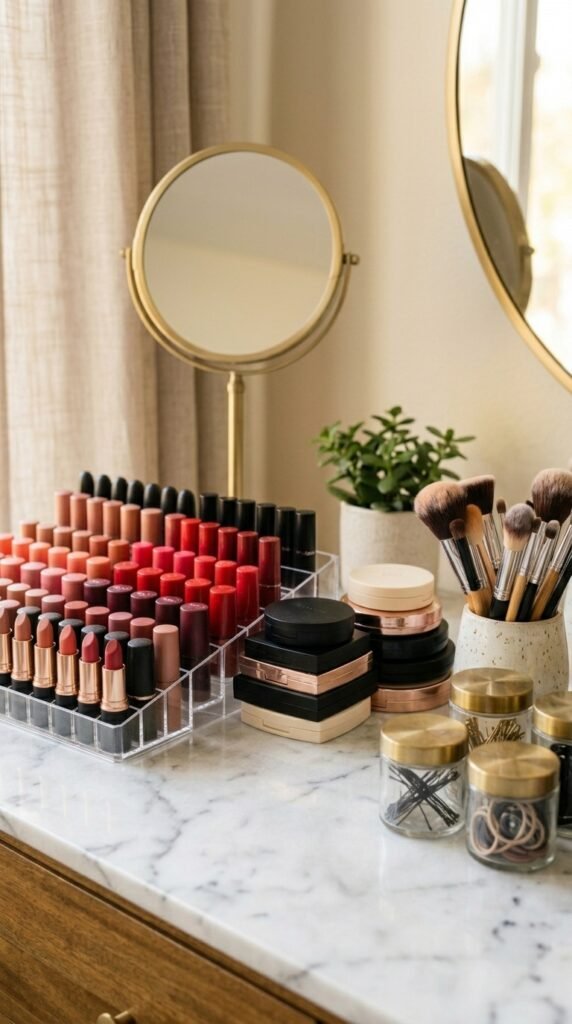
3. DIY Acrylic Organizer Makeover with Contact Paper
[Image Prompt: A clear acrylic makeup organizer on a vanity surface, wrapped on the base with a marble-effect contact paper, holding brushes, concealers, and eyeshadow sticks. Shot with studio-quality lighting, crisp and clean background, realistic textures visible, no text or branding shown.]
Plain acrylic organizers are affordable but can look generic. Wrap the base or back panels with marble, gold, or floral contact paper to make them feel custom. Contact paper rolls cost around $5–$8 online. Cut to size, peel, and press. No special tools needed. It takes about 15 minutes and completely changes the look. This trick works on any organizer — plastic bins, drawer dividers, or storage cubes. It is a low-cost way to make your setup look high-end.
4. Turn a Tiered Fruit Stand into a Makeup Tower

A tiered fruit stand — the kind you see in kitchens — makes an excellent countertop makeup tower. Each level holds a different product type. Foundations and serums on the bottom. Compacts in the middle. Lip products on top. These stands are easy to find at thrift stores or discount home shops for $5–$15. They spin on some models, which makes reaching everything even easier. This is a functional piece that adds some visual height to your vanity.
5. Magnetic Knife Strip for Bobby Pins and Metal Tools
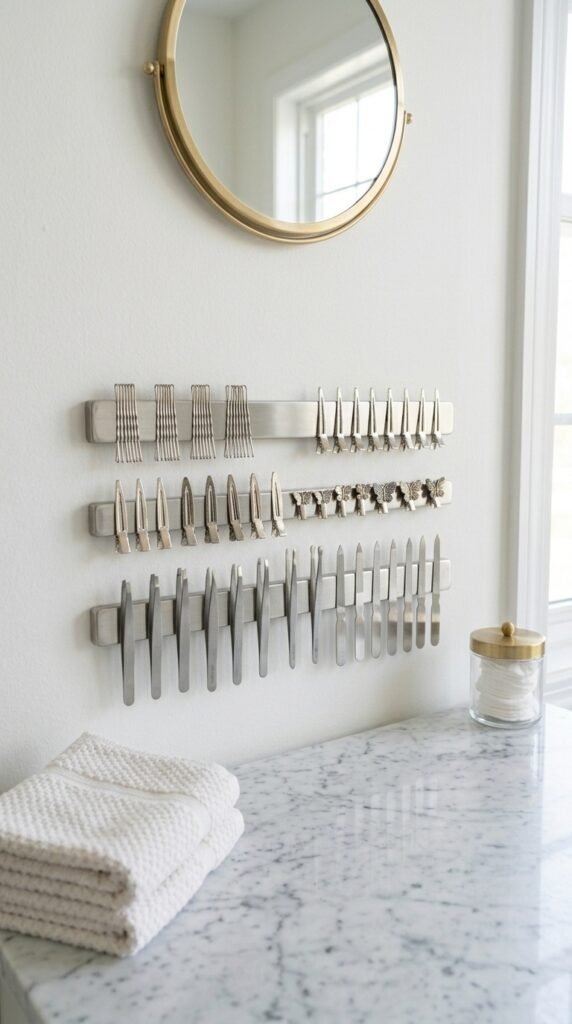
A magnetic knife strip mounted on your wall is a game-changer for small metal items. Bobby pins, tweezers, nail scissors, and metal hair clips all stick right on. No more digging through a random dish. These strips cost around $8–$15 at kitchen stores or online. Mount it at eye level near your mirror. Installation takes less than 10 minutes with basic wall anchors. Every tool stays visible, accessible, and — most importantly — actually findable when you need it.
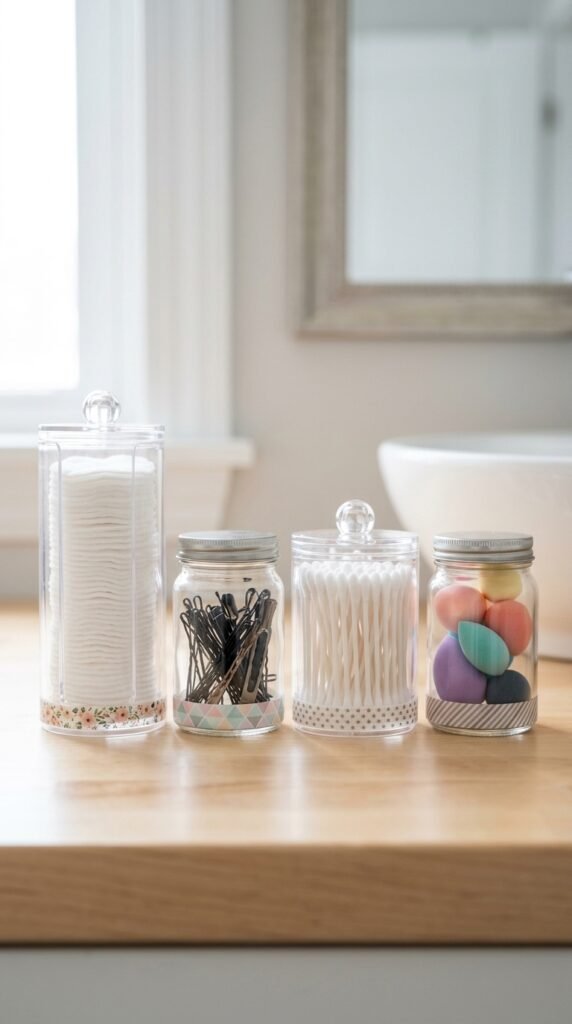
6. Mason Jar Brush Holder with Decorative Stones
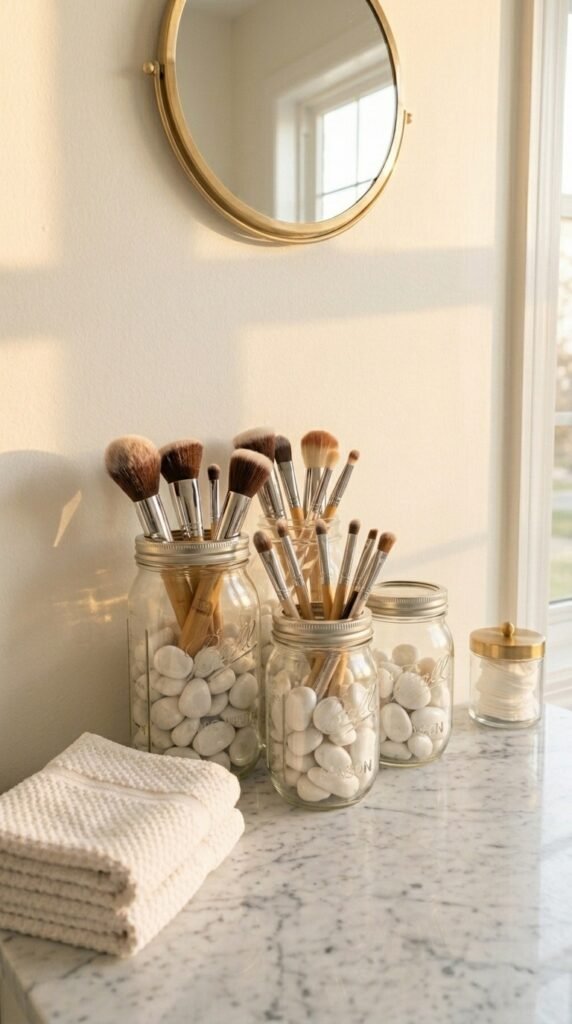
Mason jars are a classic DIY staple for good reason. Fill the bottom third with decorative pebbles, marbles, or river stones to keep brushes standing upright and separated. Use different jar sizes for different brush types. Seal the jar rim with a ribbon or twine for a polished look. You can buy a set of mason jars for under $10 and stones from a dollar store. This setup keeps brushes clean, aired out, and easy to sort through quickly.
7. Pegboard Vanity Wall for Tools and Accessories
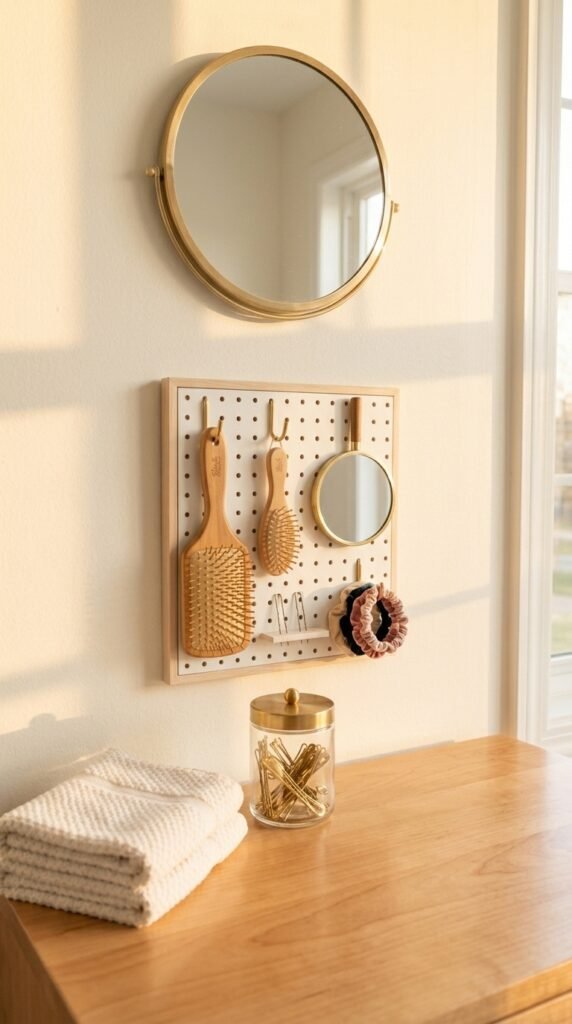
A small pegboard section above your vanity creates a wall-mounted tool station. Add hooks for hairbrushes, elastic loops for hair ties, and small shelves for frequently-used products. Pegboard panels are available at hardware stores for around $10–$20 and can be cut to any size. Paint it white, blush, or black to match your space. This setup keeps your counter clear while making everything visible. It works especially well in small bathrooms with limited shelf space.
8. Repurposed Wine Cork Board as a Hair Accessories Wall
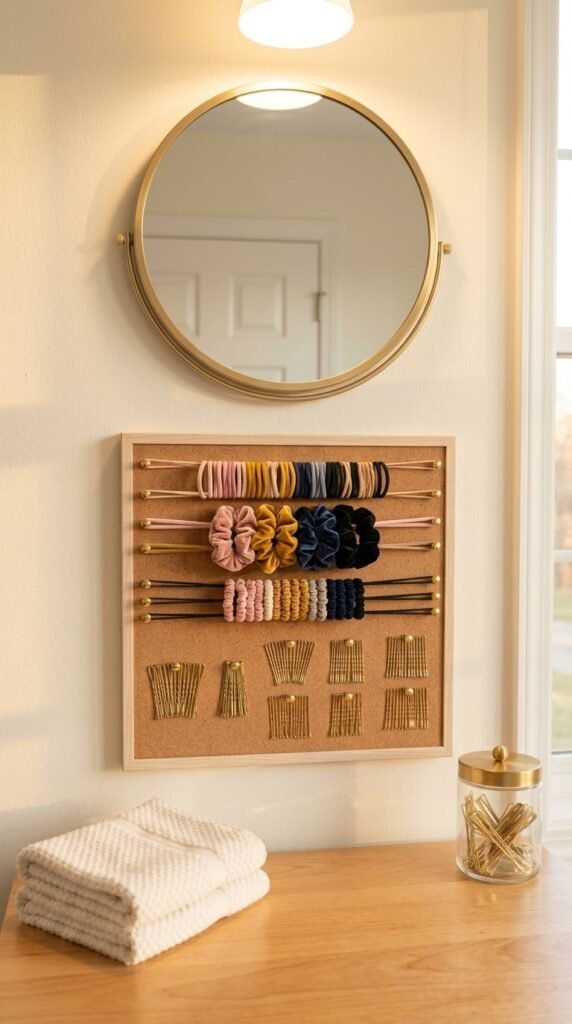
A simple cork board turns into the perfect hair accessories organizer. Push in rows of pins and stretch hair ties across them in color order. Use clusters of pins to hold bobby pins in groups. The whole setup costs almost nothing if you already have a cork board. Otherwise, you can buy a small one for $3–$6 at a dollar or office supply store. Hang it inside a cabinet door or on your wall. Every hair tie and pin stays sorted and easy to grab.
9. Ice Cube Tray Palette Storage in a Drawer
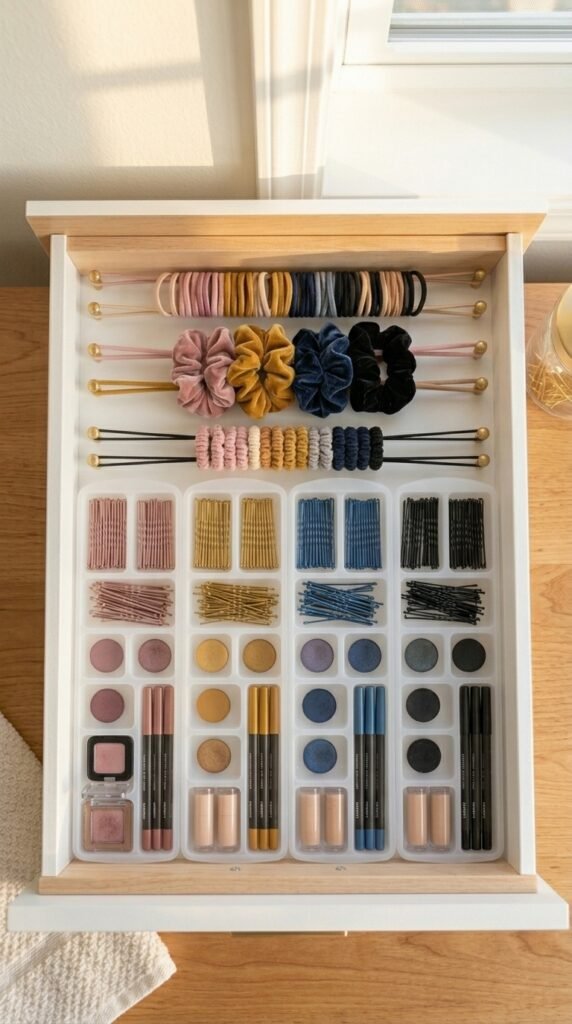
Silicone ice cube trays are perfect for storing individual eyeshadow pans, lip liner caps, or small concealer sticks. Each square holds one item, keeping everything separated and easy to see. A pack of two trays costs about $2–$4 at a dollar or kitchen store. Lay them flat inside a drawer. You can even pop eyeshadow pans out of old palettes and store them this way to save drawer space. Simple, cheap, and surprisingly effective.
10. Floating Shelves Styled as a Mini Beauty Shelf
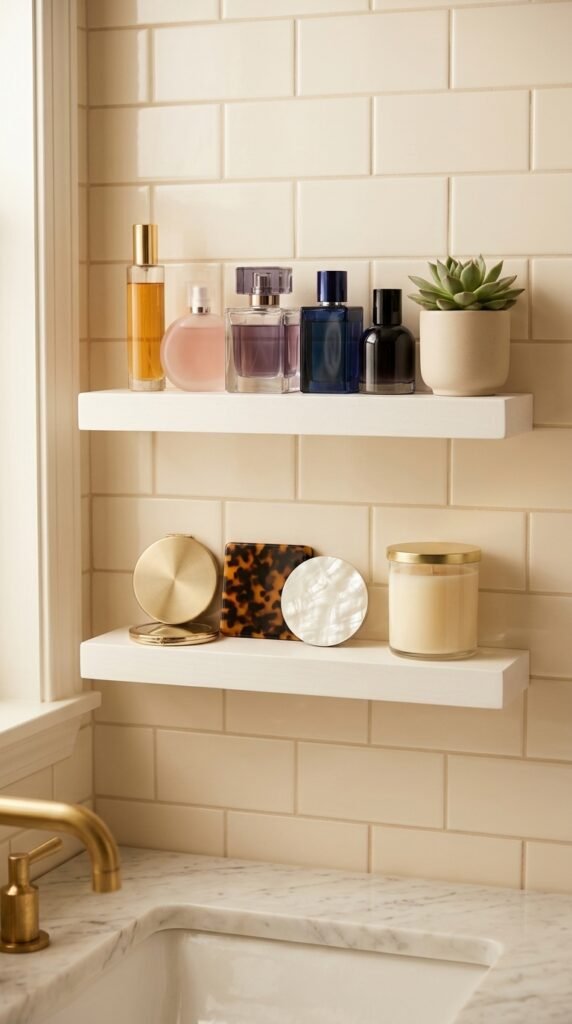
A pair of floating shelves gives you display space without taking up counter room. Style them with perfume bottles, stacked compacts, a small plant, and a candle for a look that feels like a magazine spread. Floating shelves from a hardware store run $8–$20 depending on size. Keep the shelves lightly loaded so they stay organized, not cluttered. Rotate products seasonally to keep the display feeling fresh. This is the easiest way to turn a blank bathroom wall into something beautiful.
11. Leather-Wrapped Tin Cans for a Boho Brush Holder
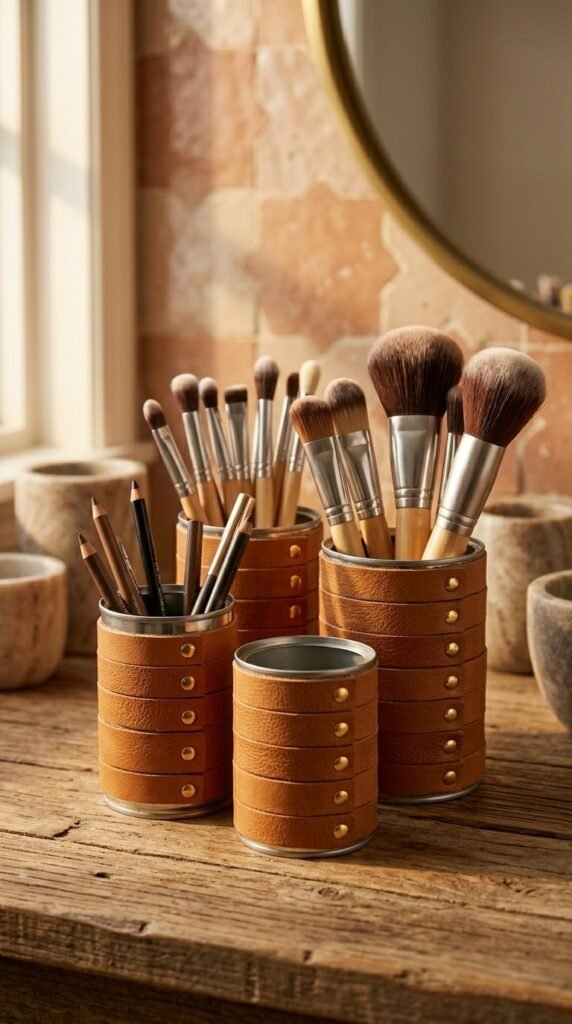
Save your tin cans from the recycling bin and wrap them with a strip of faux leather or suede fabric secured with a small brad or a dab of hot glue. The result looks intentional and stylish — far from a recycled can. A yard of faux leather fabric from a craft store costs $3–$5 and wraps multiple cans. Use different heights for different product types. Brushes, pencils, and mascara wands all stand upright and organized without any product tipping over.
12. Acrylic Drawer Dividers for Palette Storage
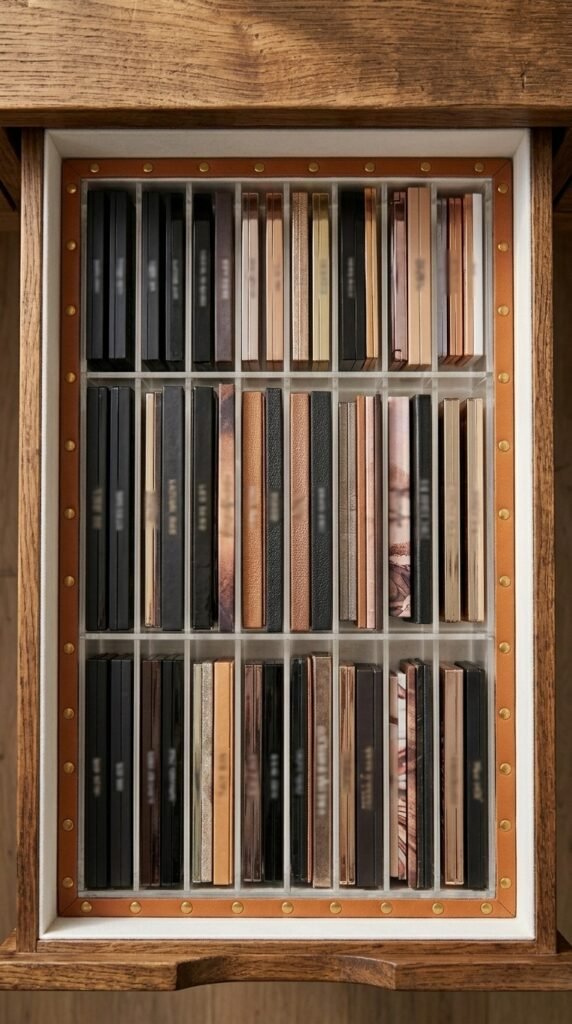
Standing your eyeshadow palettes upright — like books on a shelf — saves a huge amount of drawer space. Use clear acrylic drawer dividers to keep them standing without falling over. You can find divider sets for $8–$15 online. Label the spine of each palette with a small sticker if needed. This method makes it easy to flip through your palettes quickly instead of lifting and stacking. It also protects the palettes from scratches better than stacking them flat.
13. Lazy Susan Turntable for a Vanity Counter Organizer
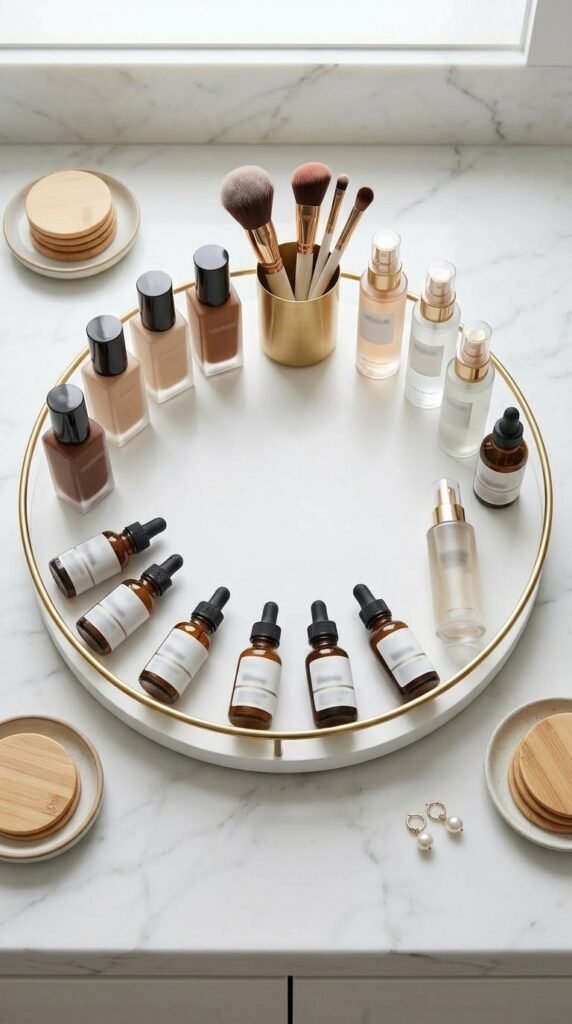
A lazy Susan — the kind used in kitchen cabinets — works brilliantly on a vanity counter. Spin it to access products at the back without knocking over everything in front. You can buy a basic turntable at a dollar store or discount shop for $3–$8. Use one large turntable for daily-use products or two smaller ones for different categories. This is especially useful in deep counters or shared bathrooms where space is tight and every second at the mirror counts.
14. Repurposed Jewelry Box for Lip Product Storage
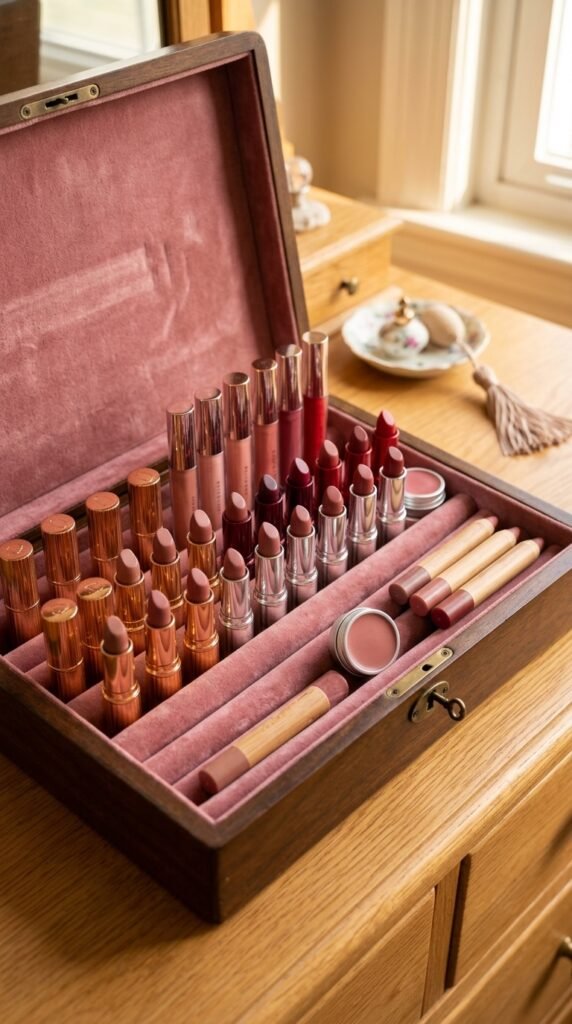
A jewelry box with ring rolls or small compartments holds lip products perfectly. Lipsticks stand upright in ring holder slots just like rings. Lip glosses fit in smaller trays. You might already own an old jewelry box you no longer use, or you can find one at a thrift store for $2–$5. Line the inside with a fresh piece of velvet fabric if the original looks worn. This doubles as a decorative piece on your dresser that keeps all your lip products in one beautiful spot.
15. DIY Makeup Bag Wall Hanger with Curtain Rod
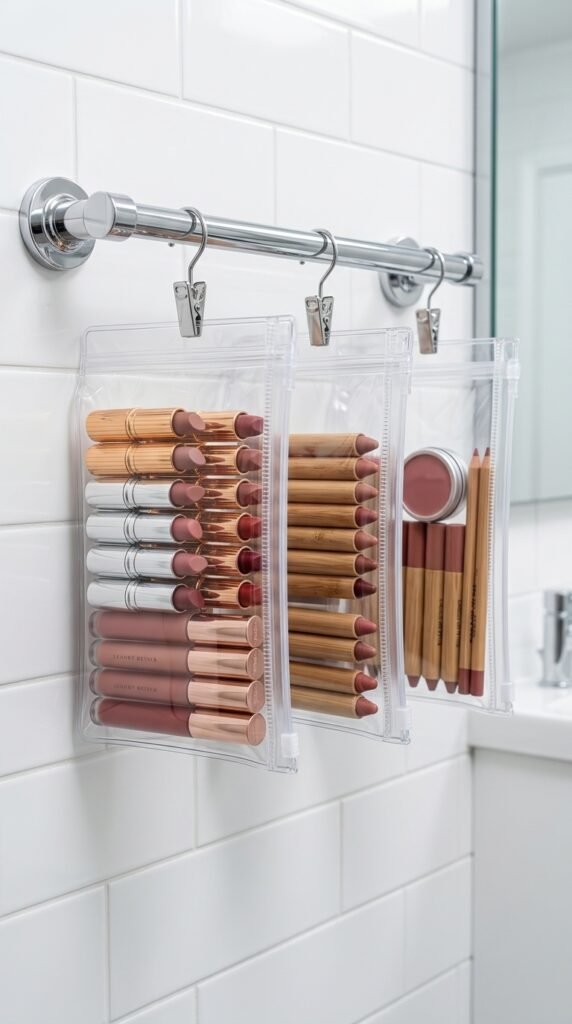
Mount a small curtain rod on the wall and hang clear zipper pouches from shower curtain rings. Sort products by category — one pouch for eye products, one for lips, one for skin prep. The pouches keep everything contained and the see-through material means no guessing what is inside. A basic curtain tension rod costs $3–$6. Clear pouches are $5–$8 for a set. This wall-mounted system works great in tiny bathrooms where counter space is almost nonexistent.
16. Painted Wooden Crates as Stacked Vanity Storage
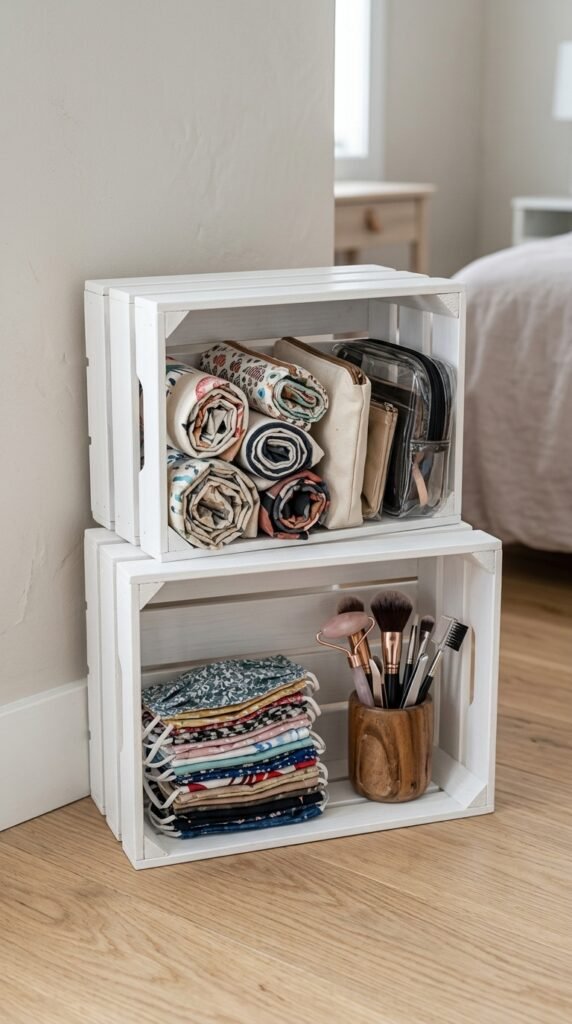
Small wooden crates stacked and painted in your choice of color create instant open shelving. Stack two or three at angles for a casual, editorial look. Fill them with rolled-up makeup bags, stacked face masks, hair tools, or extra product backups. Unfinished wooden crates cost $3–$7 each at craft stores. Sand lightly, prime, and paint with any leftover wall paint. Add small hooks to the outside for hanging accessories. This is a genuinely cute solution that takes up zero drawer space.
17. Command Hook Organizer Inside Cabinet Doors
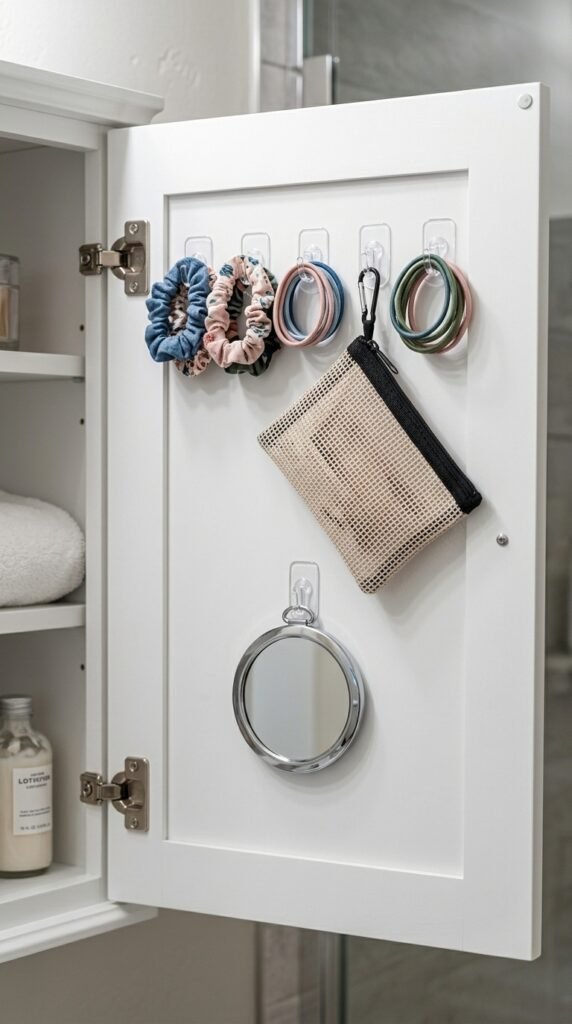
The inside of your cabinet doors is completely wasted space in most bathrooms. Add a few small command hooks to hang hair ties, lightweight pouches, a hand mirror, or a small organizer basket. Command hooks hold up to 3–5 lbs and come off cleanly, so they are safe for renters. A pack of 10 hooks costs about $3–$5. This hidden storage doubles your cabinet capacity without any drilling or permanent changes. It is one of those setups you wonder why you did not do sooner.
18. Color-Coded Labeled Bins for Backup Products
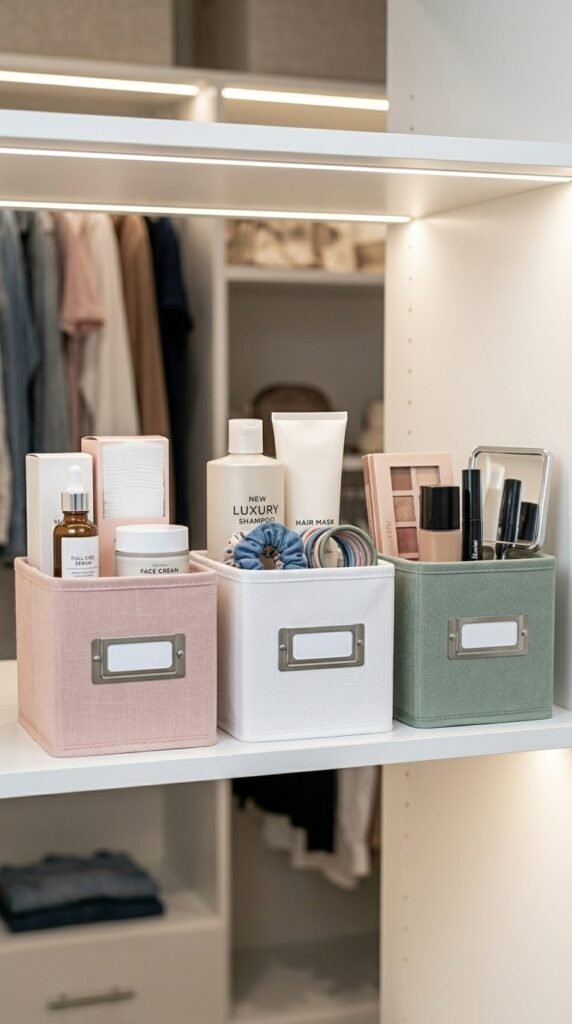
If you stock up on backup products, fabric bins sorted by category keep your supply closet from becoming a mess. Use one bin for backup skincare, one for makeup, one for haircare. Label the front of each bin with a tag or marker. Small fabric bins from dollar or discount stores cost $1–$3 each. Color-code them if you want to make sorting even faster. This system also makes it easy to see when you are running low on something before you actually run out.
19. Shadow Box Perfume Display on the Wall
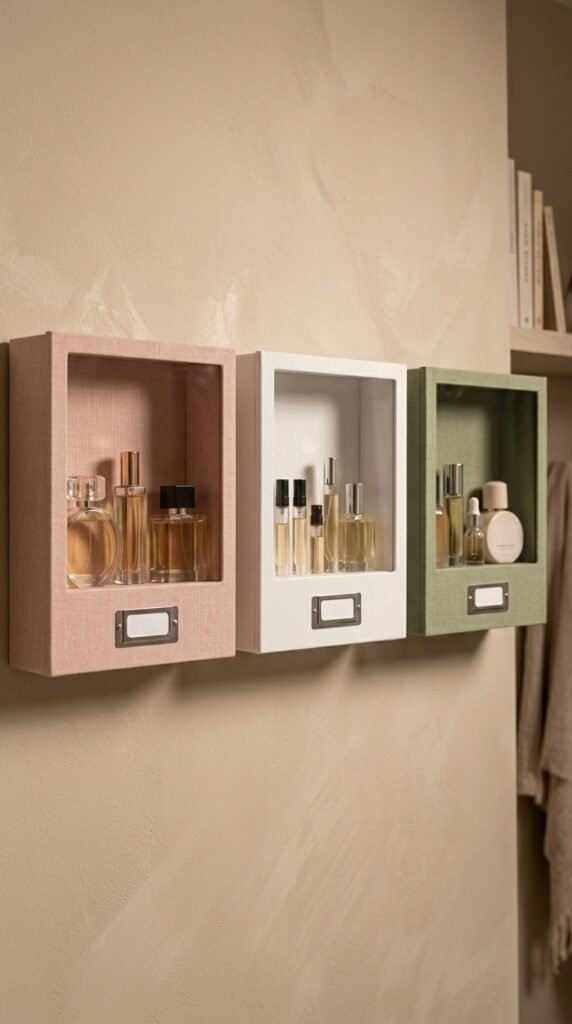
A deep shadow box frame from a craft store becomes a wall-mounted perfume shelf that looks like intentional wall art. Most shadow boxes are 2–4 inches deep, which is enough for perfume bottles. Mount it at nose height and arrange your bottles by size. Craft store shadow boxes run $8–$20. Paint the inside in a contrasting color for a bold look. This keeps perfumes off the counter and away from sunlight, which helps preserve the scent while making the display look genuinely beautiful.
20. Over-the-Door Shoe Organizer for Full Collection Storage
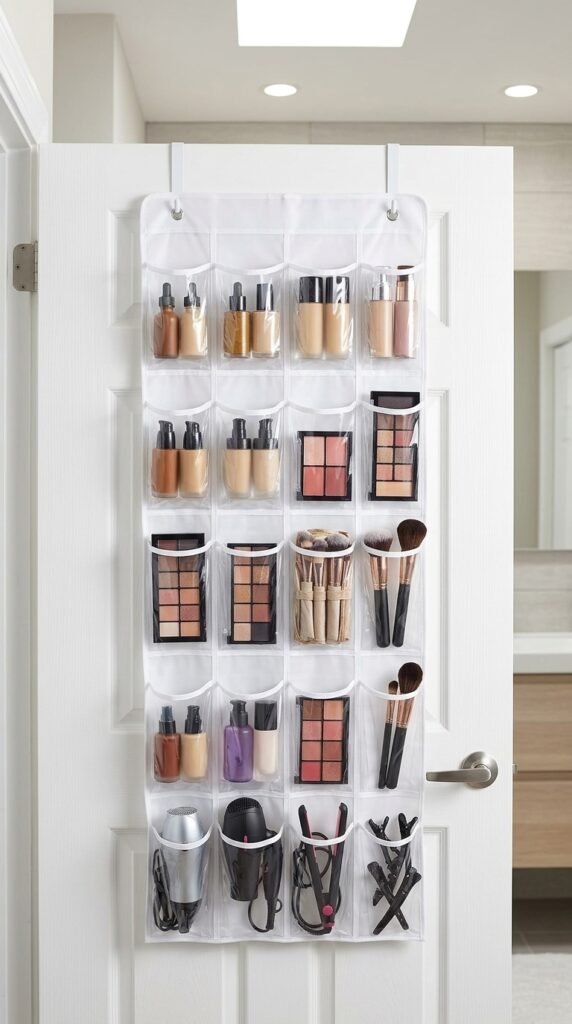
A clear over-the-door shoe organizer holds an enormous amount of makeup. Each pocket fits palettes, brush rolls, foundation bottles, or tool pouches. The pockets are see-through, so you can find things without digging. These organizers cost $8–$15 at discount stores. Hang it on the back of a bathroom or bedroom door where it stays hidden when the door is open. Sort pockets by category and suddenly your entire collection is organized, visible, and accessible in one place.
21. Decorative Tray for a Curated Daily Essentials Display
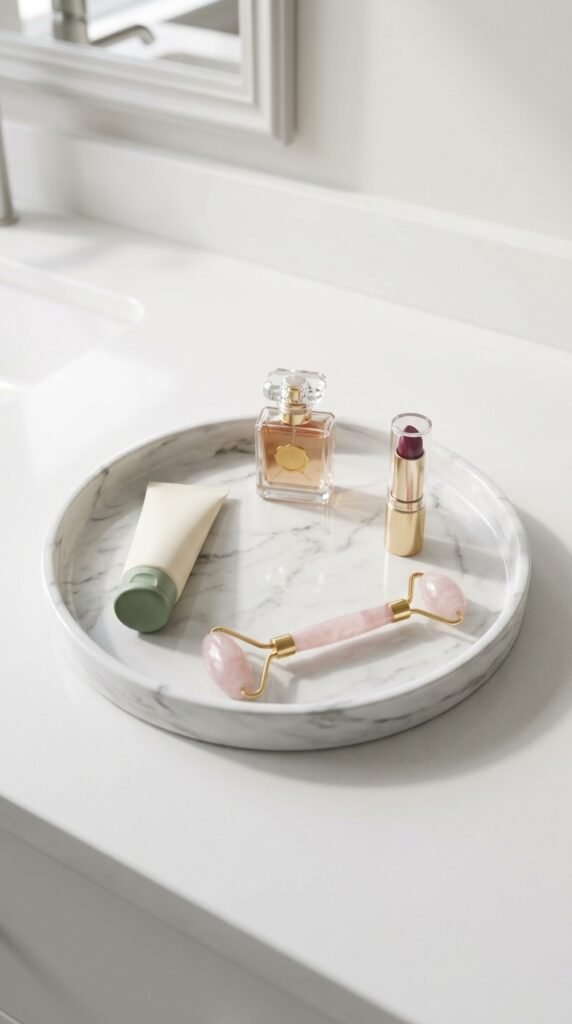
A simple tray on your counter creates a designated spot for daily-use products only. When everything you touch every morning lives on one tray, your routine gets faster and your counter looks intentional. Use a ceramic dish, a wooden bread board, or a decorative plate. Most thrift stores have trays for $1–$4. Limit the tray to five or six items maximum. Anything that does not get used daily goes into a drawer. This one habit alone makes a huge visual difference in a bathroom or bedroom.
22. DIY Washi Tape Labels on Clear Containers
Label your clear storage containers with strips of decorative washi tape instead of printed stickers. Write the category name on the tape with a fine marker. Washi tape comes in hundreds of patterns and colors, and it peels off cleanly when you want to change things up. A roll costs $1–$2 at a craft or dollar store. Use a coordinating tape across all your containers for a cohesive look. It is a tiny detail that makes a big difference in how organized and polished your whole setup feels.
23. Hanging Macramé Pouch for Everyday Hair Tools
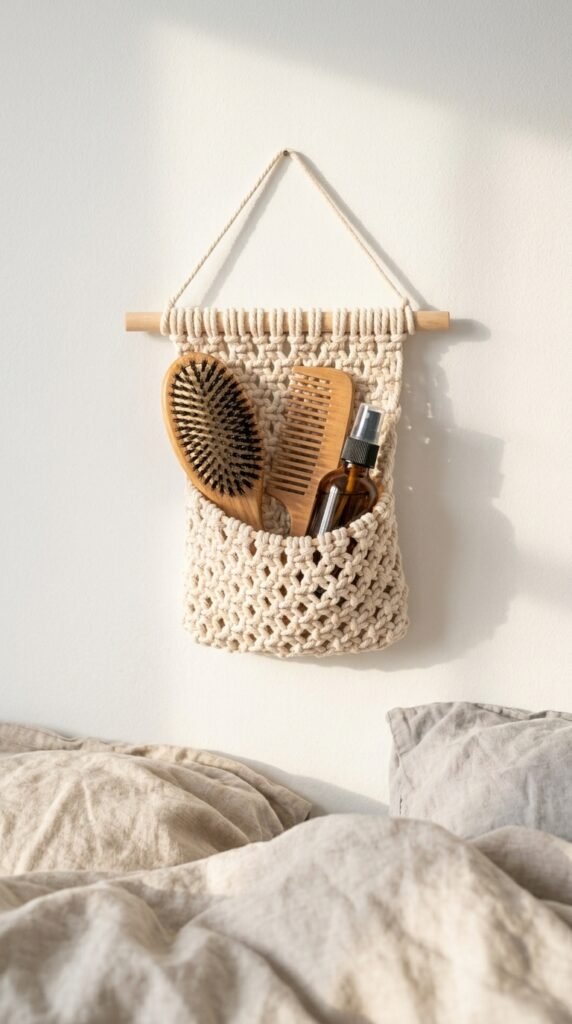
A macramé wall pouch is both functional and a genuine wall decor piece. Use it to store everyday hair tools like a brush, comb, and small spray bottle. You can buy small macramé pouches on craft marketplaces for $10–$20, or make one yourself with basic cotton rope from a craft store for under $5. Hang it near your mirror or above your dresser. It keeps your most-used tools off the counter and adds a handmade, textured element to your space.
24. DIY Chalkboard-Painted Jar Labels
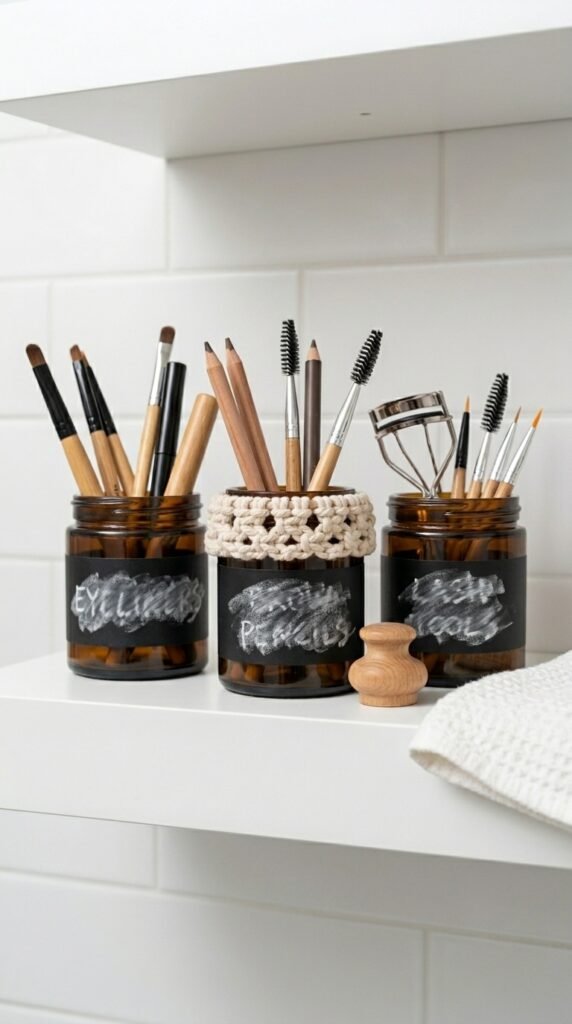
Paint a small band around glass or ceramic jars with chalkboard paint and you have reusable, easy-to-update labels. Write the contents in chalk, and when you reorganize — just wipe it off and rewrite. A small bottle of chalkboard paint costs $4–$6 at a craft store and covers dozens of jars. This is ideal if you frequently rotate your product collection or swap out organizers by season. The look is clean, minimal, and slightly boutique — like a beauty counter you actually designed yourself.
25. Stackable Clear Drawers for a Full Vanity System
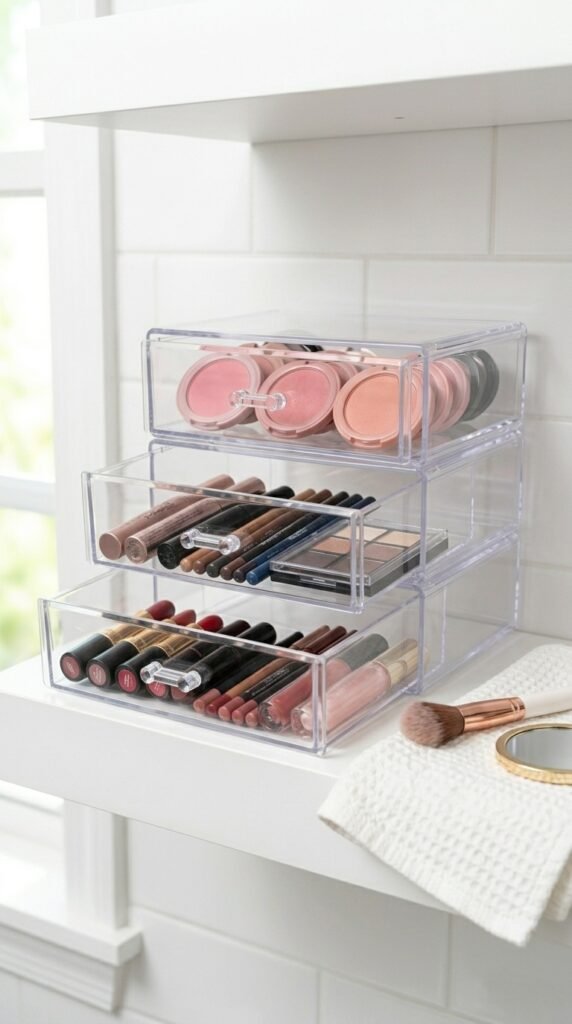
Clear stackable drawers are the backbone of a serious makeup organization system. Each drawer holds one category: eyes, lips, cheeks, base. You can see exactly what is inside without opening anything. A two or three-tier set costs $15–$25 at home goods or dollar stores. Add more tiers as your collection grows. Label the front of each drawer with a small washi tape strip. This modular system works on a vanity, a shelf, or inside a closet. It scales with your collection and keeps everything genuinely easy to find.
Conclusion
Organizing your makeup does not require a full renovation, a big budget, or hours of your weekend. Most of these ideas use items you might already own or can pick up for just a few dollars. The real goal is building a system that makes your daily routine easier, faster, and more enjoyable. Start with one idea — maybe a tray for your daily essentials or a lazy Susan on the counter — and build from there. A little structure goes a long way. When your space works for you, getting ready in the morning feels less like a chore and a lot more like a ritual you actually look forward to.