What if you could make cute, sturdy fabric bins for your home — without touching a sewing machine? No threading needles, no tangled bobbins, no frustration. Just fabric, a little glue, and about 20 minutes of your time. Whether you need something to corral toys, organize your bathroom counter, or add a cozy touch to a shelf, these no-sew fabric bins are the craft project you didn’t know you needed. And the best part? They look like you bought them from a boutique home store.
What You’ll Need Before You Start
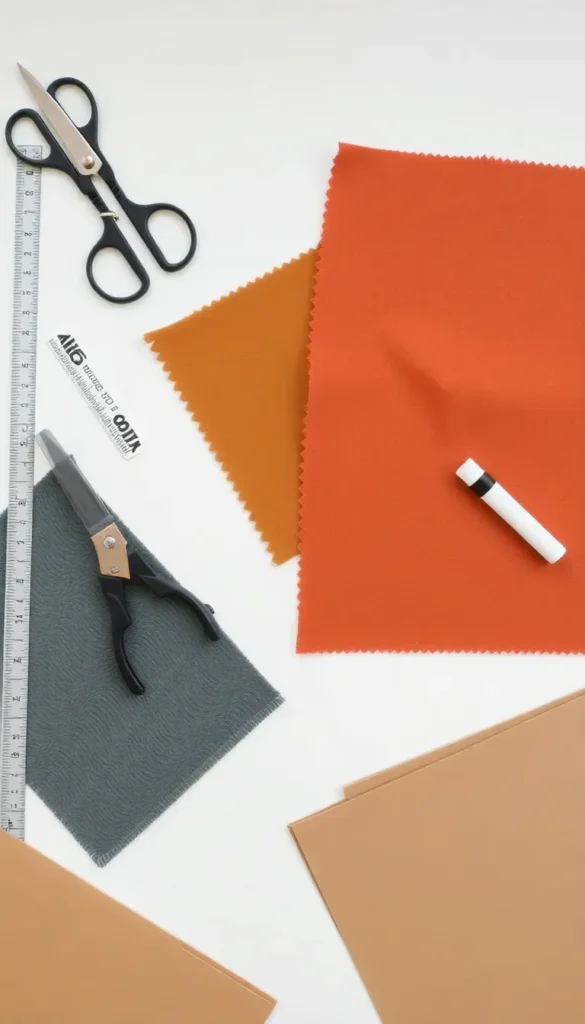
The supply list is short, affordable, and mostly available at any craft or fabric store. Here’s what to gather:
- Fabric — cotton, canvas, burlap, or even felt works great (½ yard makes 1–2 bins)
- Cardboard or plastic canvas — for the base and sides to give structure
- Fabric glue or hot glue gun — the hero of this whole project
- Scissors or a rotary cutter
- A ruler and fabric marker or chalk
- Binder clips — to hold seams while glue dries
- Optional: Iron-on hem tape for extra-clean edges, ribbon or rope for handles
That’s it. No special skills required — if you can cut in a straight line and hold a glue gun, you’ve got this.
Step 1 — Cut Your Fabric and Base
Decide on the size of bin you want. A great starter size is 6 inches wide × 6 inches deep × 5 inches tall — perfect for a bathroom counter or desk organizer.
To figure out your fabric cut:
- Base piece: Cut cardboard to your desired base size (e.g., 6″ × 6″)
- Side fabric: You’ll need one long strip of fabric that wraps all the way around the base, plus a couple of extra inches for overlap. For a 6×6 base, cut a strip about 26 inches long × 7 inches tall
- Base fabric: Cut a fabric square just slightly larger than your cardboard base
Pro tip: Use a quilting ruler and rotary cutter for clean, straight cuts — it makes the whole process faster and more precise.
Step 2 — Prep Your Edges (No Fraying Allowed)
Raw fabric edges can fray over time, which makes your bins look messy. The fix is easy:
- Fold and glue the top edge of your side strip down about ½ inch and press with a hot glue gun to create a clean finished edge
- Alternatively, use iron-on hem tape — just fold, insert the tape, press with a hot iron, and you’ve got a perfectly clean hem in seconds
- Do the same for the base fabric piece, folding the edges under before gluing it to the cardboard
This step adds maybe five minutes but makes your finished bin look genuinely polished.
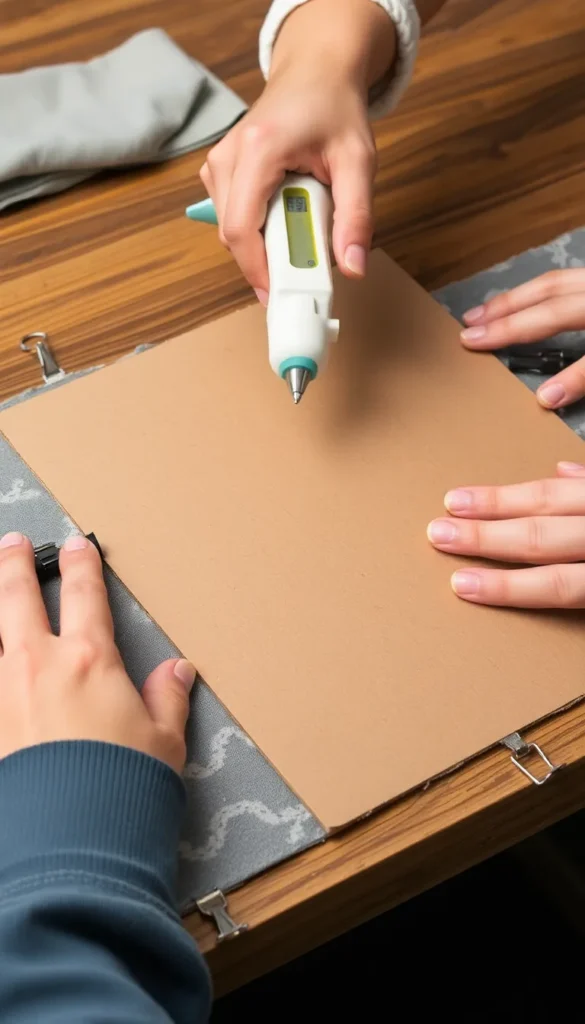
Step 3 — Build the Bin
Now the fun part — assembly!
- Wrap the side strip around your cardboard base, starting at one corner
- Apply a line of hot glue along the bottom edge of the fabric strip and press it firmly against the underside of the cardboard base as you wrap — this anchors everything
- Use binder clips to hold the fabric in place while the glue sets (about 60 seconds with hot glue)
- When you reach the end of the strip, overlap slightly and glue the seam closed at the back corner
- Glue your fabric-covered cardboard base to the bottom, pressing firmly on all edges
Stand your bin upright and admire it for a moment — it already looks great.
Step 4 — Add Handles (Optional but Adorable)
Handles make your bins easier to pull off shelves and add a really charming, intentional touch. Easy options:
- Rope or jute twine: Punch two small holes near the top edge on opposite sides, thread through a loop of rope, and knot on the inside
- Ribbon: Cut two equal lengths, fold into loops, and hot-glue firmly to the inside top edge
- Leather strips: Cut from an old belt or scrap leather, punch holes, and rivet or glue in place for a more modern look
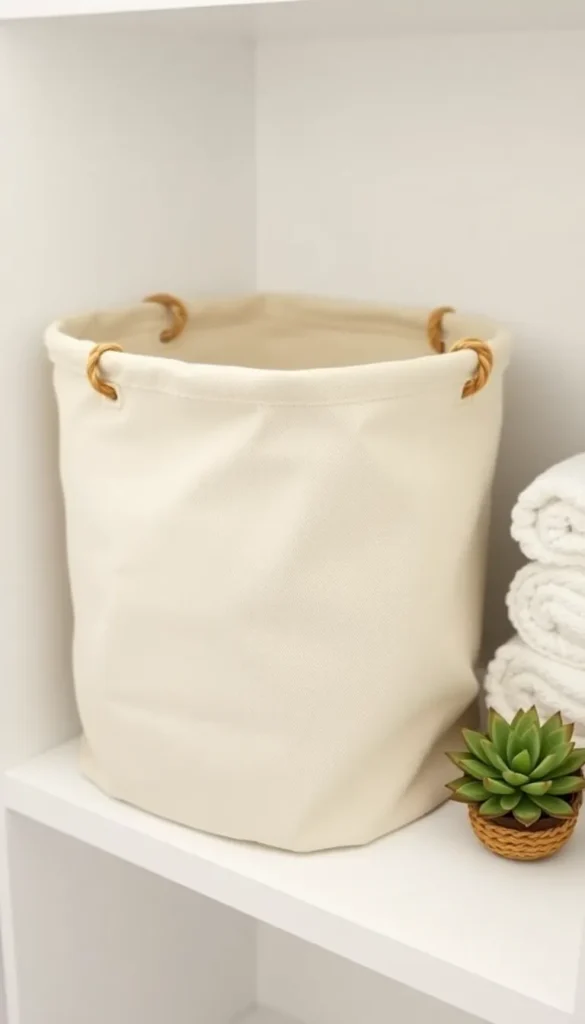
Even without handles, these bins look intentional and beautiful — it’s completely your call.
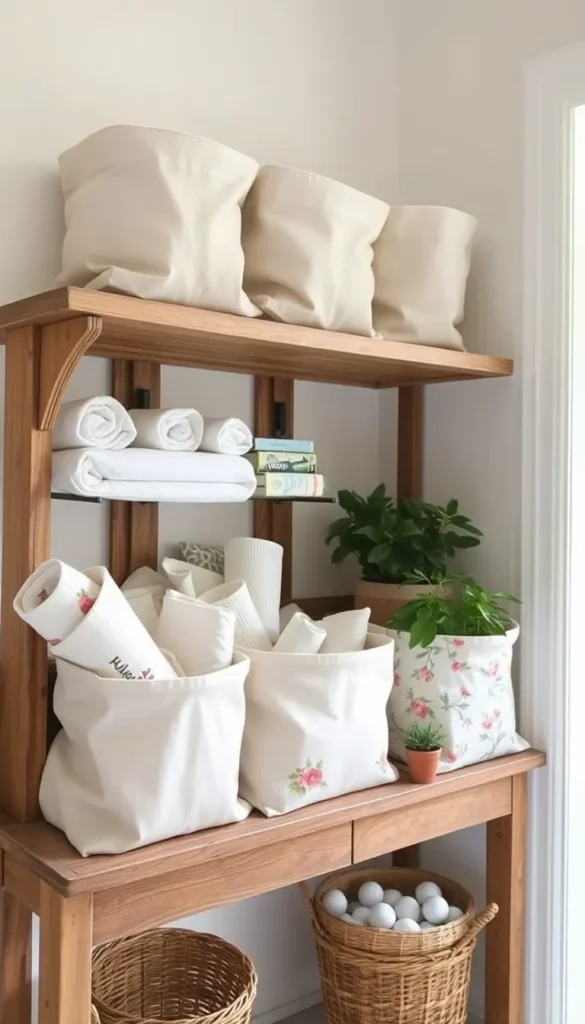
Styling Tips to Make Them Look Store-Bought
A handmade bin can look absolutely boutique-worthy with a few finishing touches:
- Mix textures: Pair a linen bin with a patterned cotton one on the same shelf for visual interest
- Stick to a color palette: Two or three coordinating colors or prints look curated, not chaotic
- Label them: A small chalkboard tag or printed label clipped to the front elevates the whole look
- Line the inside: Glue a contrasting fabric inside the bin for a beautiful peek-a-boo effect when it’s empty
So Much Easier Than You Thought, Right?
No sewing machine. No complicated patterns. Just fabric, glue, and a little creativity — and you’ve got custom storage bins that fit your exact style and space. Make a set in an afternoon and transform a cluttered shelf into something genuinely beautiful.
Save this article to your craft board and share it with a friend who swears they “can’t do DIY” — this project will change their mind! 📌