If your home is starting to feel like a game of Tetris you’re constantly losing — cramped closets, cluttered counters, stuff piling up behind every door — this one’s for you. Door hanging organizers are one of the smartest, most underrated storage hacks out there. They use vertical space you’re already ignoring, cost almost nothing to make, and can be customized for literally any room. Ready to reclaim your space? Let’s do this.
Why Door Organizers Are a Game-Changer
Most people think about storage in terms of shelves and bins — but doors? Pure wasted real estate. The back of a door can hold everything from shoes and cleaning supplies to craft tools and kids’ toys.
Here’s why DIY door organizers beat store-bought every time:
- Custom sizing — fit your exact door height and pocket needs
- Budget-friendly — most projects cost under $15
- No damage — no drilling, no permanent fixtures needed
- Totally personalized — match any decor style or color scheme
Whether it’s a bedroom, bathroom, pantry, or laundry room, there’s a door organizer solution waiting for you.
What You’ll Need
Before you start, gather your supplies. The exact materials depend on which style you choose (fabric pocket organizer, over-the-door rack, or pegboard panel), but here’s a solid starter list:
For a fabric pocket organizer:
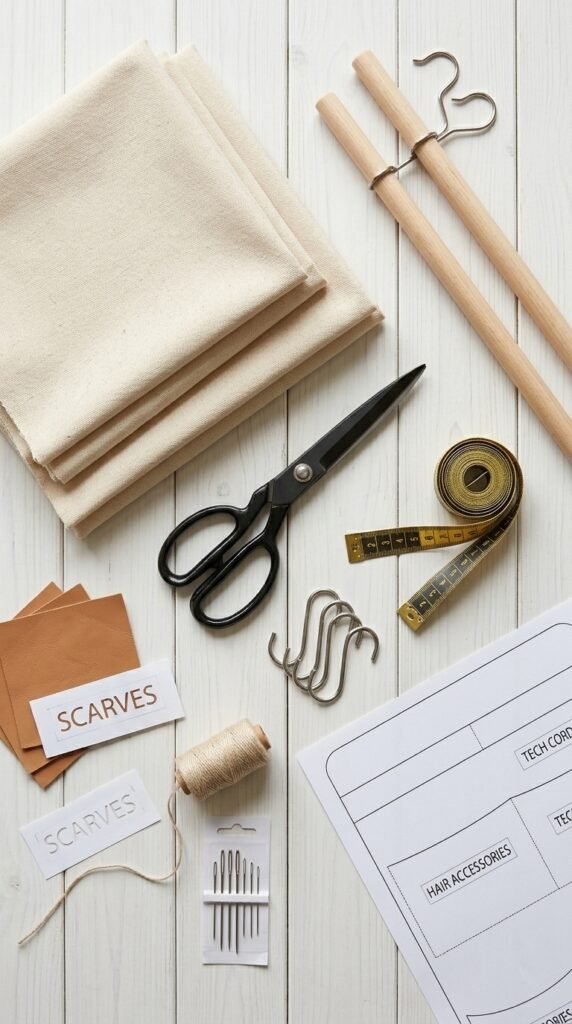
- 1–2 yards of canvas or cotton duck fabric
- Matching thread + sewing machine (or iron-on hem tape for a no-sew version)
- An over-the-door hook or curtain rod
- Measuring tape, scissors, fabric marker
For a simple wire or wood rack:
- Wooden dowels or a tension rod
- S-hooks or small wire baskets
- Twine or leather cord
- Sandpaper and optional wood stain
Step-by-Step: DIY Fabric Pocket Organizer
This is the most versatile style and works beautifully in bedrooms, bathrooms, and offices.
Step 1: Measure your door Measure the height you want the organizer to hang (typically 40–60 inches) and the width (12–18 inches works for most doors). Add 1 inch seam allowance on all sides.
Step 2: Cut your fabric panels Cut your main backing panel, then cut smaller rectangles for each pocket. Pockets typically run 6–8 inches tall and the full width of the organizer.
Step 3: Hem all edges Fold and sew (or iron-on hem) all edges of the backing and each pocket piece. This prevents fraying and gives a clean, professional finish.
Step 4: Attach the pockets Pin each pocket to the backing, evenly spaced. Stitch along the bottom and sides of each pocket, leaving the top open. Add vertical stitching lines to divide larger pockets into smaller slots.
Step 5: Add the hanging hardware Fold over the top of the backing to create a channel for your curtain rod or dowel. Stitch in place. Slide in your rod, attach over-the-door hooks, and hang!

Creative Variations to Try
Once you’ve mastered the basic version, the possibilities really open up. Here are some fun ideas to try:
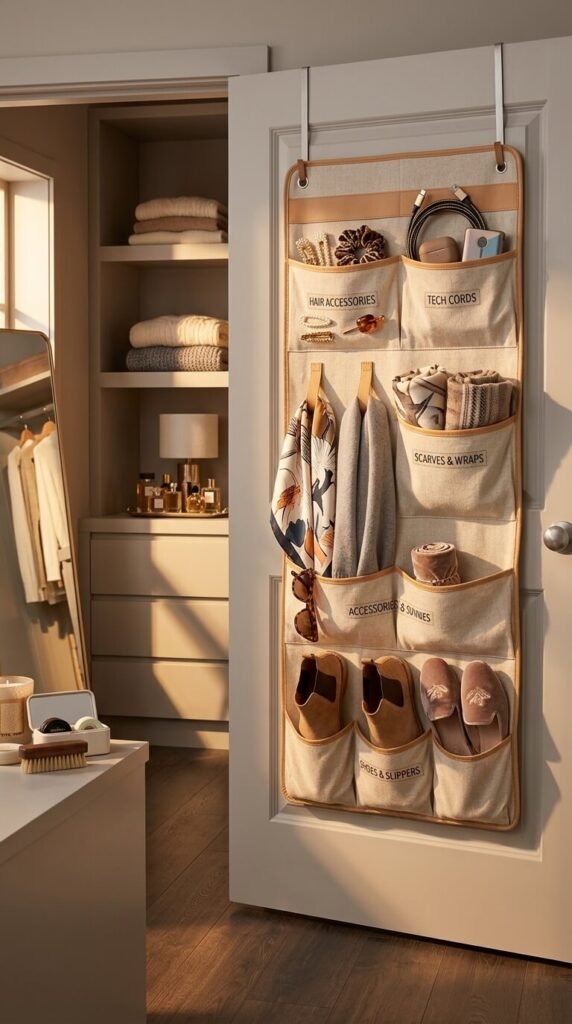
- Shoe organizer — use deep, angled pockets on the back of a closet door
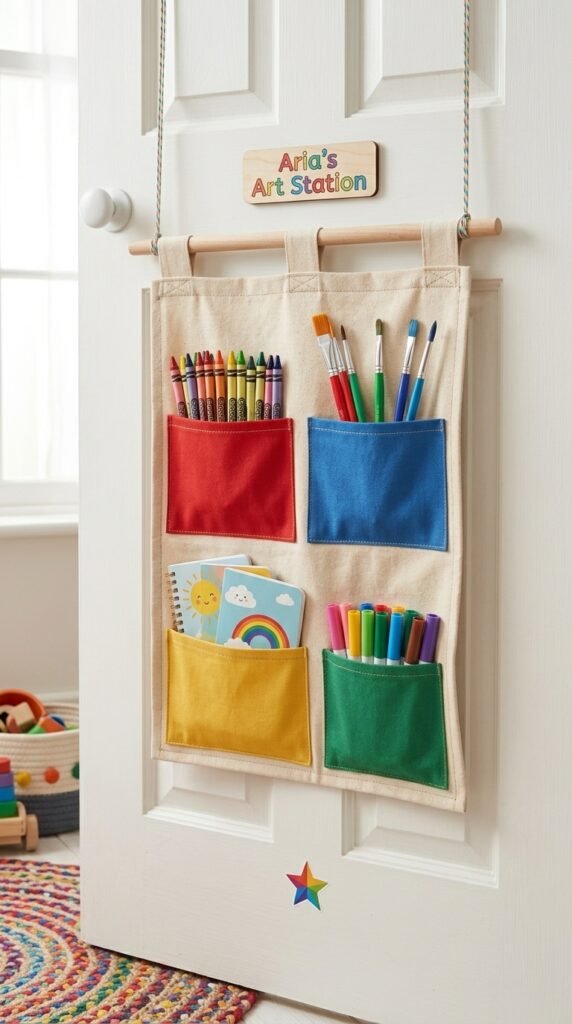
- Kids’ art station — smaller pockets for markers, scissors, and colored pencils
- Pantry helper — use water-resistant fabric and store spice packets, snack bags, or foil rolls
- Bathroom caddy — hang on the back of a bathroom door for toiletries and hair tools
- Gift wrap station — tall, narrow pockets perfect for rolls of wrapping paper and ribbon
Tips for Making It Look Intentional (Not Chaotic)
The difference between a door organizer that looks organized and one that looks like a yard sale? A few simple rules:
- Group like with like — keep one category per pocket or row
- Label pockets — iron-on letters or a simple tag adds clarity
- Don’t overstuff — leave a little breathing room in each pocket
- Use a consistent color palette — your fabric and items together should feel cohesive
- Keep the heaviest items at the bottom — for balance and so nothing tips off the door
Final Thoughts
A door hanging organizer is one of those projects that takes an afternoon and pays off for years. You’re not just making storage — you’re making your daily routine smoother, your space calmer, and your home feel intentionally designed.
Save this article, pin it, and share it with someone who’s drowning in clutter. Your most chaotic door is about to become your most functional one.