Tax season shouldn’t feel like an archaeological dig through crumpled paper and forgotten email folders. Yet for millions of people, that’s exactly what it becomes — a panicked, hours-long hunt for receipts that may or may not still exist. The fix isn’t working harder in April. It’s building a simple system in January. Here’s how to organize your receipts so that tax time (and every return trip to a store) becomes genuinely painless.

Step 1: Decide on Your System — Paper, Digital, or Both
Before touching a single receipt, make one important decision: how do you want to store them? There’s no universally right answer, but there is a right answer for you.
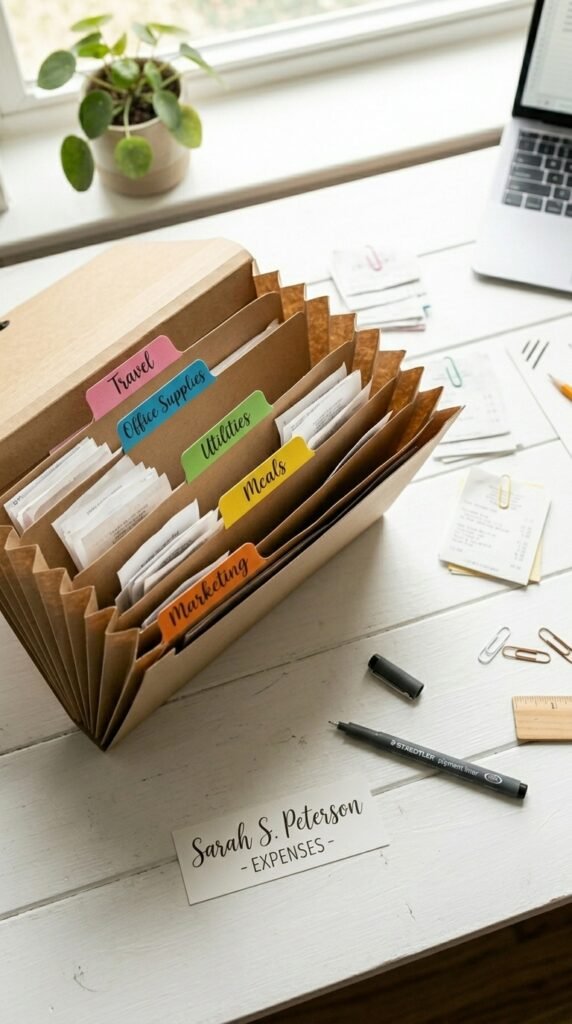
Paper-based system:
- Simple accordion folders or binders with labeled tabs
- Great for people who like physical records
- Requires physical space and consistent filing habits
Digital-only system:
- Scan or photograph every receipt and save to organized folders
- Apps like Expensify, Dext, or even Google Drive work well
- Ideal for people who lose paper but check their phone constantly
Hybrid system:
- Keep physical copies of major receipts (big purchases, medical, business)
- Digitize everything else immediately
- The most flexible option for most households
Pick the one you’ll actually stick with. A mediocre system you use beats a perfect system you abandon.
Step 2: Create Categories That Match Your Real Life
Generic categories lead to overstuffed folders you’ll never want to open. Instead, build categories around your specific tax situation and spending habits.
Common categories that work for most people:
- Medical & Healthcare (copays, prescriptions, equipment)
- Business / Home Office (supplies, subscriptions, equipment)
- Charitable Donations
- Education & Childcare
- Home Improvement (especially relevant if you own property)
- Vehicle & Mileage
- Returns & Warranties (separate from taxes — for store returns)
If you’re self-employed, add categories for client expenses, travel, and meals. When in doubt, ask your accountant which categories matter most for your filing situation.
Step 3: Set Up a “Landing Zone” for New Receipts
The biggest reason receipt systems fail isn’t the organizing — it’s the gap between getting a receipt and filing it. Create a single landing zone where every receipt goes the moment you receive it.
This could be:
- A small tray or basket on your desk or kitchen counter
- A dedicated envelope in your wallet or bag
- A specific folder in your email inbox for digital receipts
The rule is simple: every receipt goes to the landing zone first, no exceptions. Once a week (or once a month if you’re disciplined), you move them from the landing zone into their proper categories.
Step 4: Go Digital with Your Phone
Physical receipts fade, crumple, and disappear. Thermal paper receipts — the shiny kind — can become completely blank within a year. That’s a problem when you need proof of a $400 purchase two years later.
The simplest solution: photograph every important receipt immediately.
Here’s a quick workflow:
- Snap a photo right at the register or when you open a delivery
- Save it to a dedicated album or folder called “Receipts 2025”
- For business or tax receipts, add a quick note with the purpose
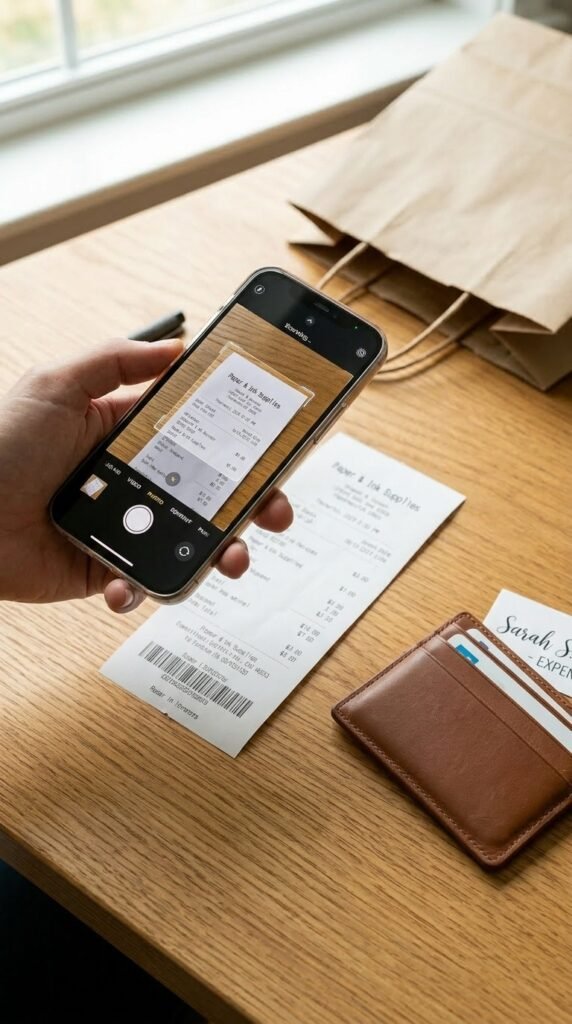
Free apps like Google PhotoScan, Microsoft Lens, or your phone’s native camera work perfectly. Paid apps like Expensify or Wave go further by automatically extracting amounts and categorizing expenses.
Step 5: Do a Monthly 10-Minute Review
Consistency is everything. Schedule a standing monthly appointment — even just 10 minutes — to clear your landing zone and confirm your categories are up to date.
During your review:
- File receipts from the landing zone into categories
- Flag anything that looks like a potential deduction
- Note large purchases that might affect warranties or returns
- Discard receipts for cash purchases of non-deductible items you no longer need
This tiny habit prevents the year-end avalanche entirely.
Step 6: Know How Long to Keep What
Not all receipts deserve permanent storage. A general rule of thumb:
- Tax-related documents: 7 years minimum
- Major purchases (appliances, electronics): Life of the item
- Everyday purchases: 30–90 days, or until the return window closes
- Home improvements: As long as you own the property
Start Now, Thank Yourself Later
You don’t need a fancy system or expensive software. You need one consistent habit and a few labeled folders. Set aside an hour this week to build your foundation — and then let the 10-minute monthly check-ins do the rest.
Save this guide now and come back to it before tax season hits. Your future self — calm, organized, and fully prepared — will be very glad you did.