There’s something irresistible about a handmade rope basket sitting on a shelf — sturdy, stylish, and completely one-of-a-kind. Whether you’re looking to corral clutter in your living room, add a boho touch to your bathroom, or organize your home office, rope baskets are the answer. The best part? You don’t need to be a craft expert to make one. With a little patience and a few simple supplies, you can create gorgeous baskets that look like they came straight from a boutique — for a fraction of the price.
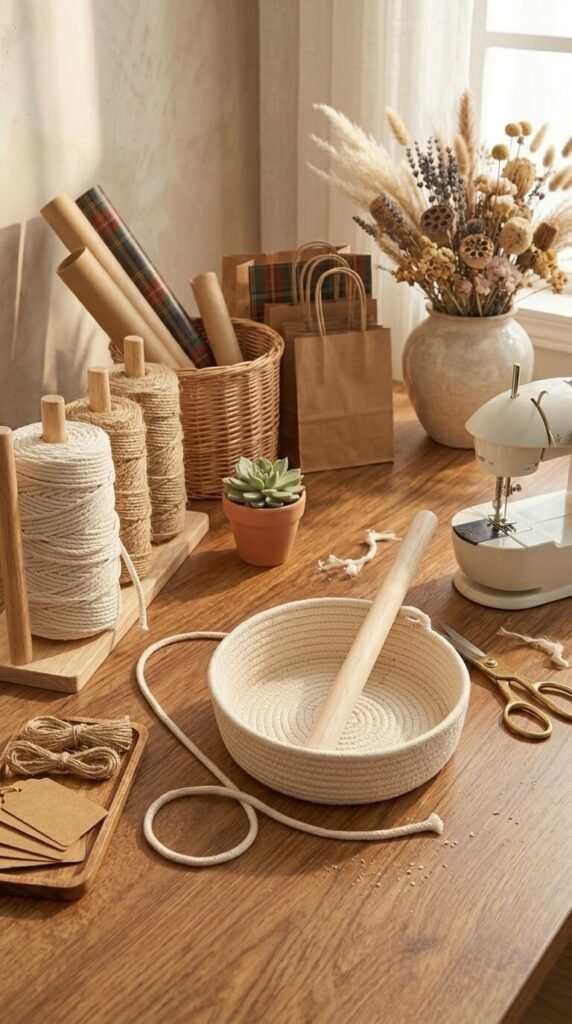
What You’ll Need
Before you start coiling and stitching, gather your supplies. The good news: the materials list is short and beginner-friendly.
- Cotton rope (5mm–8mm thickness works best for beginners)
- Large-eye blunt needle or a sturdy tapestry needle
- Scissors
- Optional: colorful embroidery thread or thin twine for decorative stitching
Look for 100% cotton rope at craft stores or online — it’s soft, flexible, and holds its shape beautifully. Avoid synthetic rope if you can; it’s stiffer and harder to stitch through.
Step 1: Start the Base
The base is the foundation of your basket, so take your time here.
- Cut a length of rope about 12–16 inches long.
- Fold the end over to form a small loop — this is your center.
- Thread your needle with a separate piece of twine or thin rope.
- Begin wrapping the tail of the rope tightly around the loop, stitching through each previous coil to secure it.
Keep your coils snug and even. The tighter you stitch, the sturdier your basket will be. Work in a flat spiral until your base reaches your desired diameter — usually 6–10 inches for a standard storage basket.

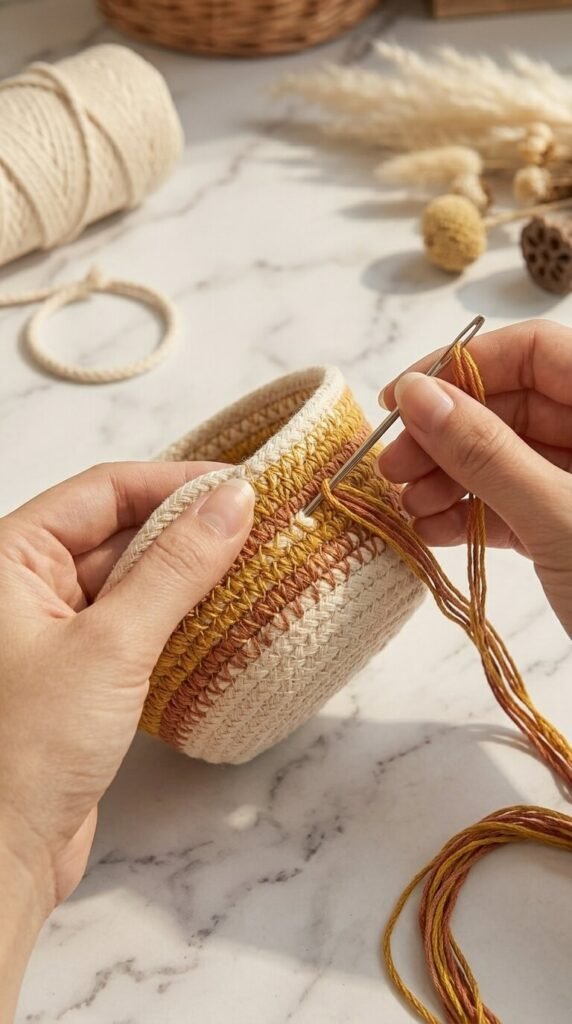
Step 2: Build Up the Sides
Once your base is the right size, it’s time to go vertical.
- Angle your coils upward instead of outward to begin building the walls.
- Stitch each new coil to the one below it, pulling the thread firmly so there are no gaps.
- Keep checking that your basket is sitting flat — if it starts to tilt or wobble, adjust the angle of your coils before continuing.
This is where you can get creative! Try:
- Varying stitch spacing for a more open, airy look
- Adding a pop of color by switching to a bright embroidery thread for a few rows
- Shaping the sides — wider angles create a shallow bowl; steeper angles create a tall, deep basket
Step 3: Create the Handles (Optional but Adorable)
Handles make your basket easier to carry and add a polished, finished look.
- When your basket walls reach the height you want, stop coiling at one side.
- Loop a length of rope up and over (about 4–5 inches tall), then attach it back down to the basket wall.
- Wrap the handle loop tightly with twine or a contrasting rope color for a clean, sturdy grip.
- Repeat on the opposite side for symmetry.
Even if you skip handles, you can finish the top edge by doing a final whipstitch all the way around for a neat, professional border.
Step 4: Finish and Style Your Basket
You’re almost done — just a few finishing touches before your basket is shelf-ready.
- Trim any loose ends close to the stitching.
- Add a knot to secure the very last stitch, then tuck the tail inside a coil so it’s hidden.
- Give the basket a gentle reshape with your hands while it’s still flexible — you can even place a round bowl inside temporarily to help it hold its form as it settles.
Tips for a Beautiful Finished Basket
- Tension is everything. Pull your stitches firm and consistent throughout — loose stitching leads to a floppy basket.
- Go slow on the base. Rushing the flat coil often causes uneven sides later.
- Size up your rope for a chunkier, more rustic look; use thinner rope (3mm–4mm) for a refined, delicate basket.
- Don’t worry about perfection. Slight variations in coiling actually give handmade baskets their charm.
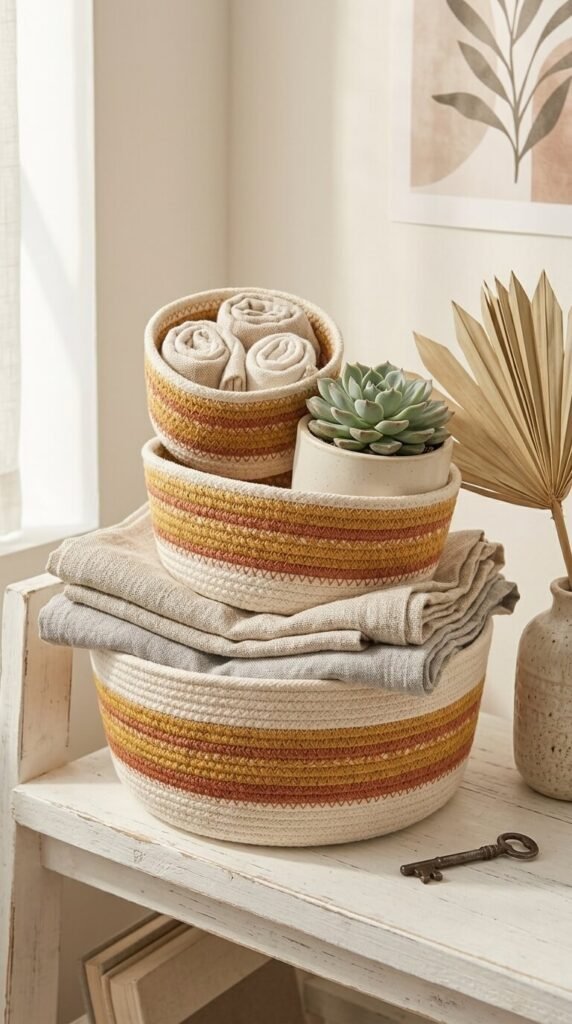
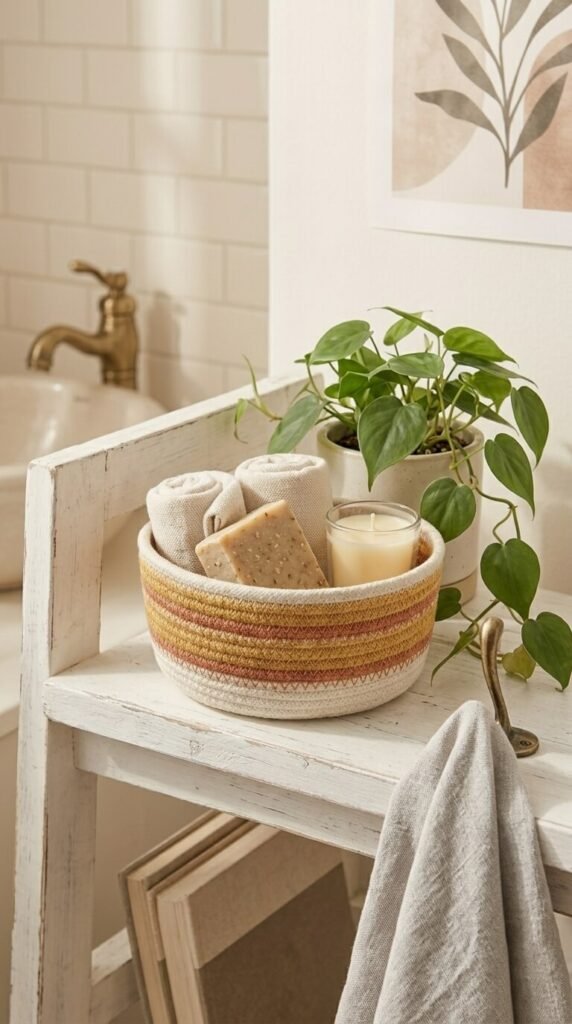
Creative Ways to Use Your Rope Baskets
Once you’ve made one, you won’t stop. Here are some favourite ways to use rope baskets around the home:
- Bathroom: rolled towels, extra toilet paper, or hair accessories
- Living room: throw blankets, magazines, or remote controls
- Nursery: stuffed animals and small toys
- Kitchen: onions, garlic, or fresh fruit
- Entryway: keys, scarves, and odds and ends
You’ve Got This — Now Get Coiling!
Making rope baskets is one of those crafts that looks impressive but is genuinely approachable for beginners. All it takes is a roll of cotton rope, a needle, and an afternoon to create something you’ll use and love every single day. Once you’ve mastered the basic coiled basket, you can experiment with colors, shapes, and sizes to match every corner of your home.
Save this tutorial for your next craft day — and don’t forget to share your finished baskets! Tag your creations and inspire someone else to pick up a needle and rope. Happy coiling! 🧶